Skip to content

Category: Small-Space Gardening

  • Vertical Gardening Ideas for Beginners: Use Walls, Rails, and Height

    Vertical Gardening Ideas for Beginners: Use Walls, Rails, and Height

    ← All garden guides5 min read
    In this guide
    1. 1. Check the support with wet pots
    2. 2. Match the plant to the container depth
    3. 3. Plan how you will water every level
    4. 4. Pick one simple layout
    5. 5. Check the garden from top to bottom each week
    6. Choose your next guide
    7. Check the support, runoff, wind, and reach
    8. Sources and verification

    Before you act

    Plan vertical weight and maintenance

    1. Record: Identify the fixing surface, mature plant weight, wind exposure, drainage path, and safe reach height.
    2. Decide: Use one supported vertical zone and keep routine care within comfortable reach.
    3. Review: Recheck the result after one ordinary week before expanding the project.

    Plan the frame or stand before choosing plants. A safe setup carries the weight of wet growing mix and mature plants, gives roots enough room, drains without damaging the surface below, and stays within easy reach. Then choose plants that suit the container depth, light, and wind.

    Choose a setup

    Choose a structure you can safely use

    Before you count pots, check that the roots will have room and that you can reach every plant.

    Trellis with a deep potA good choice for container varieties of beans, peas, cucumbers, and flowering vines. The pot at the bottom must be deep enough for the roots.
    Wall troughsSuitable for compact herbs and flowers when the troughs are firmly attached, drain safely, and are easy to water.
    Freestanding tiersA movable choice for salad leaves, strawberries, and flowers. It works well for renters because the wall stays untouched.

    1. Check the support with wet pots

    Wall-mounted vertical planter being checked with a level and secure brackets while holding watered pots
    See it in practiceCheck the frame before adding plantsCheck the frame and fixings with the pots full of wet growing mix.

    Wet growing mix is much heavier than dry mix. Check the wall or railing material, use the fixings named by the manufacturer, and add up the full wet weight before hanging anything. Keep every planter away from places where it could fall on a person, nearby property, or a public path. If you rent, choose a freestanding shelf or tower unless you have written permission to drill.

    Follow the product instructions for any space needed behind the planter. Keep every drainage hole open, and protect the wall and floor if runoff could leave marks or cause damage.

    2. Match the plant to the container depth

    Cutaway comparison of a compact herb in a shallow pocket and a tomato in a deep container
    See it in practiceGive roots enough roomShallow pockets work for compact herbs. Larger plants need deeper, stronger containers.

    Small wall pockets dry quickly and leave little room for roots, so keep them for compact plants. Troughs hold more growing mix and keep moisture steadier for many herbs and salad crops. Put climbing crops in a deep pot at floor level and give them a firm support above.

    • Shallow pockets: baby lettuce, other baby leaves, and compact seasonal flowers.
    • Medium-depth troughs: parsley, chives, thyme, compact basil, and strawberries when the light and local climate suit them.
    • Deep pots at floor level: container varieties of climbing beans, peas, cucumbers, and other vigorous vines.

    Read the plant label before buying. Check its full height and spread, whether it is safe around children and pets, the right season, and local growing advice. Some climbers will outgrow even a deep container.

    3. Plan how you will water every level

    Watering wand reaching the top of a vertical garden with a catch tray below
    See it in practiceMake every pot easy to reachYou should be able to water the top pot and catch runoff without climbing or stretching.

    Wind and heat often dry the top pots first. Runoff can leave the lower pots too wet. Feel the growing mix at each level before watering instead of treating the whole wall as one large pot. A narrow-spout watering can or simple drip line can help, but check often for dry pots, leaks, and blocked drainage.

    Leave enough space under the lowest pot to clean the floor. Keep the highest pot within comfortable reach from the ground. If you need a stool every time you water, lower the setup.

    4. Pick one simple layout

    Herbs near the kitchen

    Place two or three roomy troughs near the kitchen. Group herbs that need similar light and watering, and keep the ones you pick most at the easiest height. Grow mint in its own pot so its roots do not take over the others.

    Salad leaves on a freestanding tier

    Fill a freestanding tier with baby leaves and compact herbs. Place the tallest level where it will not shade the lower ones. Sow a little at a time so the leaves do not all become ready at once.

    One climber with flowers below

    Place one deep pot at floor level and secure a trellis above it. Add one low container of flowers beside the pot. You get height without covering the whole wall with small pockets.
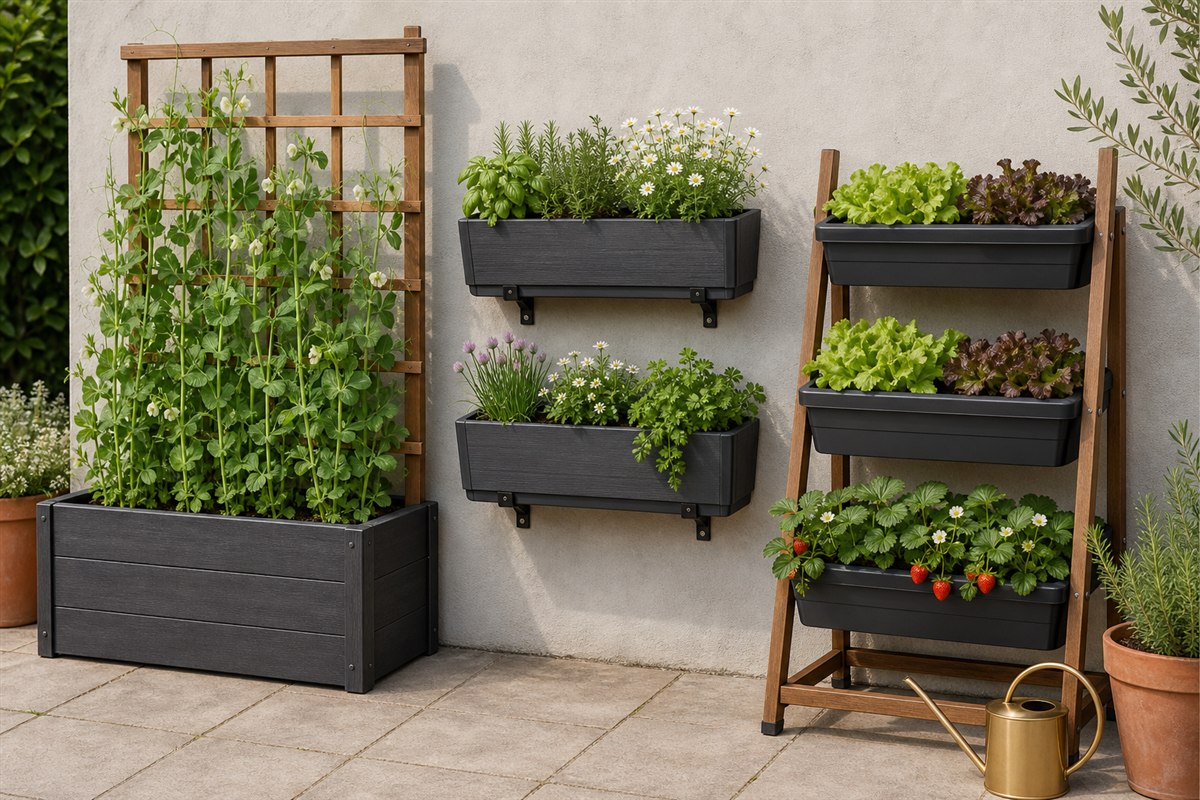
    Trellis planter, wall herb troughs, and freestanding tiered salad planter shown side by side
    Three practical choices: a deep pot with a trellis, roomy wall troughs, and a stable freestanding tier.

    5. Check the garden from top to bottom each week

    Weekly check of plant ties, pot moisture, yellow leaves and drainage in a vertical garden
    See it in practiceCheck from top to bottomOnce a week, check the fixings, soil, leaves, ties, and drainage.
    • Feel the growing mix in every pot before you water.
    • Check hooks, screws, ties, shelves, and the base for any movement.
    • Guide long stems back toward the support before they block the path.
    • Lift out trapped leaves and make sure water can still drain.
    • Look for water marks, damp patches, or overflow on the wall and floor.

    Before you build

    Check the support, runoff, wind, and reach

    A trellis rising from a pot puts its weight on the ground. Wall planters put the full load on the wall or railing. Before fixing anything in place, check the product instructions, the surface, the wet weight, and any rules for your home or rental. Never guess which fixings or load limit are safe.

    What to checkWhy it mattersChange the plan when
    Support and fixingsCheck how it attaches and whether the wall or railing can carry the full wet load.The fixing is improvised, or you are unsure about the surface.
    Where water goesWatch where runoff lands and which pots dry first.Water could stain a surface, damage property, or fall on people below.
    WindSee whether the frame moves or the leaves and pots catch strong gusts.The frame shifts, rattles, or cannot be secured as instructed.
    Can you reach it?Make sure you can water, prune, inspect, and harvest from the ground.Routine care needs climbing or unsafe stretching.

    Start with the easiest safe option. A freestanding trellis works when you cannot fix supports to a wall. A stable shelf or plant stand is enough when the pots only need more height. Choose fixed wall pockets only after checking the support and drainage. Set up one section, water it fully, and watch it for a week before adding more.
  • Small Garden Layout Ideas for Beginners: Plan One Useful Zone

    Small Garden Layout Ideas for Beginners: Plan One Useful Zone

    ← All garden guides5 min read
    In this guide
    1. 1. Mark what cannot move
    2. 2. Choose one main garden job
    3. 3. Build depth with three plant layers
    4. 4. Adapt one of these starter layouts
    5. 5. Test the plan before spending
    6. Continue with the matching guide
    7. Turn measurements into one testable plan
    8. Sources and verification

    Before you act

    Test the layout at full size

    1. Mark the layout on the ground: Use tape, cardboard, or empty pots to show paths, doors, chairs, and containers.
    2. Test it before buying: Walk the route, open every door, sit down, and pretend to water the farthest pot.
    3. Leave the outline in place for a week: Notice where daily use feels tight or awkward.

    A small garden feels larger when every area has one job. Before buying plants or furniture, decide where you will walk, where you will pause, and where the main planting will live. That simple order prevents the most common tiny-space problem: useful things competing for the same square meter.

    Layout map

    Give the floor three jobs

    The proportions can change, but the access route should never disappear.

    1. Mark what cannot move

    Small patio seen from above with a door swing, drain, water tap and fixed walls marked before movable pots are added
    See it in practiceMap the parts that stayStart with the door, drain, tap and walls. The open floor is the part you can plan.

    Stand at the entrance and note doors, drains, taps, steps, bins, air vents, utility boxes, and the route used to carry groceries or a watering can. Watch the space at morning, midday, and late afternoon. A bright wall is not proof that the floor receives enough direct sun for sun-loving vegetables.

    Measure the narrowest part of the walking route as well as the garden’s total width. Keep drains and doors easy to reach. In a rental or shared building, confirm what may be fixed to walls and where runoff must go.

    2. Choose one main garden job

    Small garden corner with one chair, three planters and a clear walking route
    See it in practiceGive the space one main jobOne chair and a few planters can work better than several competing uses.

    Pick the result that matters most for the next season: herbs near the kitchen, a calm sitting corner, flowers visible from indoors, or a small edible bed. A compact space can support several pleasures, but one priority should decide where the best light and easiest access go.

    • Food first: reserve the brightest reachable area for crops and keep water nearby.
    • Rest first: place the seat where it has shade or comfortable evening light, then frame it with plants.
    • View first: compose the strongest group where it can be seen from the main window.

    3. Build depth with three plant layers

    Narrow garden bed arranged with low, medium and tall plants in three visible layers
    See it in practiceBuild the view in layersKeep low plants at the path, medium forms behind them and the tallest shapes at the back.

    Use the back or boundary for height, the middle for the main plant mass, and the front edge for low plants that do not spill into the route. Height can come from a trellis, shrub, or tall container, but confirm mature spread so it does not swallow the small garden later.

    Repeat one container color or material two or three times. Repetition makes mixed plants feel intentional and is usually more effective than adding many decorative objects.

    4. Adapt one of these starter layouts

    Narrow patio

    Keep one long edge planted and the opposite edge mostly open. Put the tallest element at the far end so the eye travels through the space. Use a folding chair instead of permanent deep seating when the route is tight.

    Square tiny yard

    Use an L-shaped planting edge with a small open center. One corner can hold a compact bench or focal pot. Avoid placing unrelated pots around all four sides; the broken outline makes the garden feel busier.

    Doorstep or compact terrace

    Group two or three containers beside the door while keeping the door swing and landing completely clear. Choose plants with similar watering needs and use a tray or saucer only where it will not leave roots standing in water.

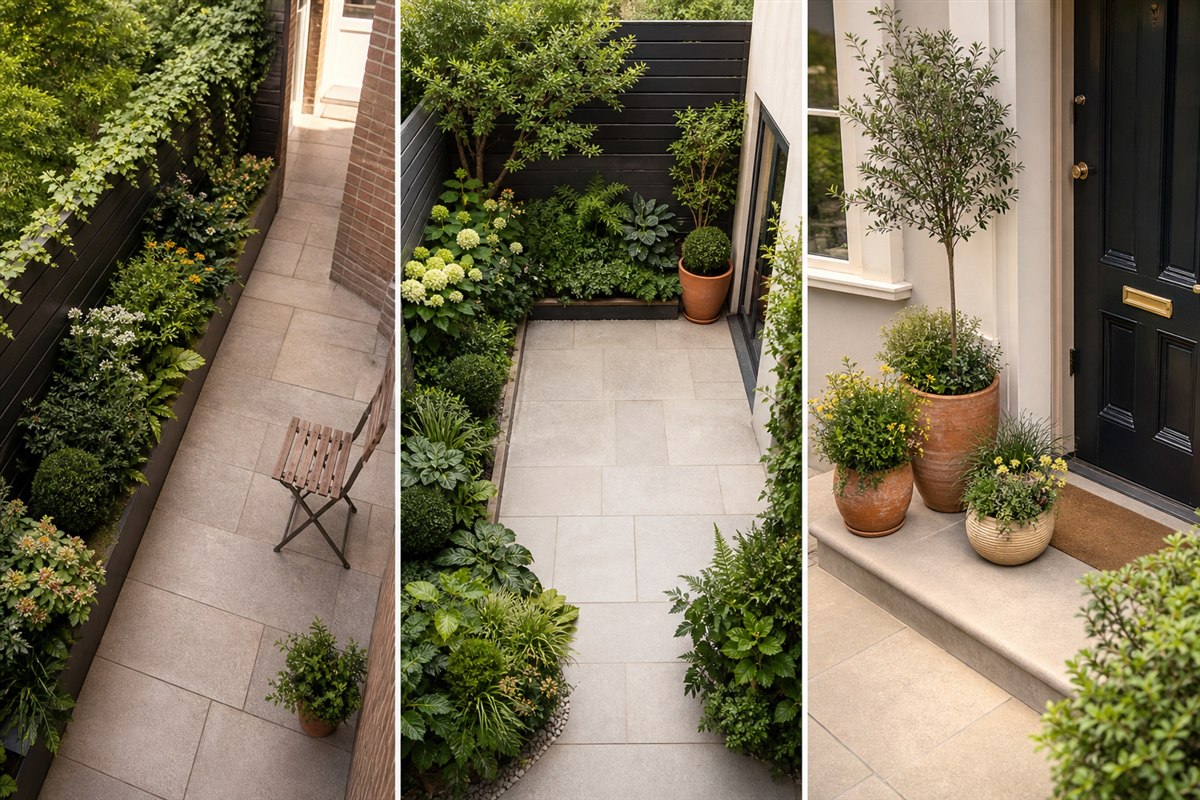
    Three small-garden layouts showing a narrow edge garden, an L-shaped square yard, and clear doorstep containers
    Reference: the planted edge changes with the shape of the space, but the walking and door route always stays clear.

    5. Test the plan before spending

    Cardboard outlines and empty pots testing furniture and container footprints on a patio
    See it in practiceTry the layout at full sizeMark the real footprints and walk the watering route before you buy.
    • Carry a full watering can through the planned route.
    • Open every door and gate without moving a pot or chair.
    • Reach the back planting area without stepping into soil.
    • Confirm filled container weight, drainage, and surface protection.
    • Leave enough room for each plant at mature size, not shop size.

    Layout workbook

    Turn measurements into one testable plan

    A useful layout records more than the outside dimensions. Sketch the door swing, the route from the water source, the area where sunlight actually reaches leaves, and the mature spread of the largest plant. Then mark furniture and containers at their real footprint. This exposes conflicts before anything becomes heavy or expensive.

    Layer to markQuestion to answerWhat changes if it fails?
    AccessCan you enter, turn, sit, and reach every plant?Remove or relocate the least useful object.
    Path for wateringCan water reach the farthest container without crossing seating?Regroup thirsty plants or simplify the route.
    Light patternWhich areas receive direct light, and for how long?Move the plant group rather than forcing an unsuitable plant list.
    Mature sizeWill leaves, stems, or supports block the path later?Use fewer plants or choose one that stays smaller.

    Test before buying: outline the largest pieces with tape, cardboard, or empty pots. Walk the route with a full watering can, open every door, and sit in the planned chair. Photograph the mock layout from the main viewing point. If the space still feels clear and every care task is reachable, the plan is ready for a small first purchase.

  • Balcony Garden Setup Guide: A Beginner Plan for Small Outdoor Spaces

    Balcony Garden Setup Guide: A Beginner Plan for Small Outdoor Spaces

    ← All garden guides5 min read
    In this guide
    1. Check the building rules first
    2. Watch the sun and wind
    3. Choose what the balcony should do
    4. Choose safe pots for the plants and balcony
    5. Add comfort after the plants have a place
    6. Related Beginner Garden Guides
    7. Next Step
    8. FAQ
    9. Sources and verification

    Before you act

    Balcony safety and access

    1. Check the space: Measure the usable floor, note the wind, and confirm the railing and weight rules.
    2. Plan one pot group: Keep it movable and leave a clear path to the door and water source.
    3. Watch it for a week: Check for tipping, difficult watering, and blocked walking space before adding more.
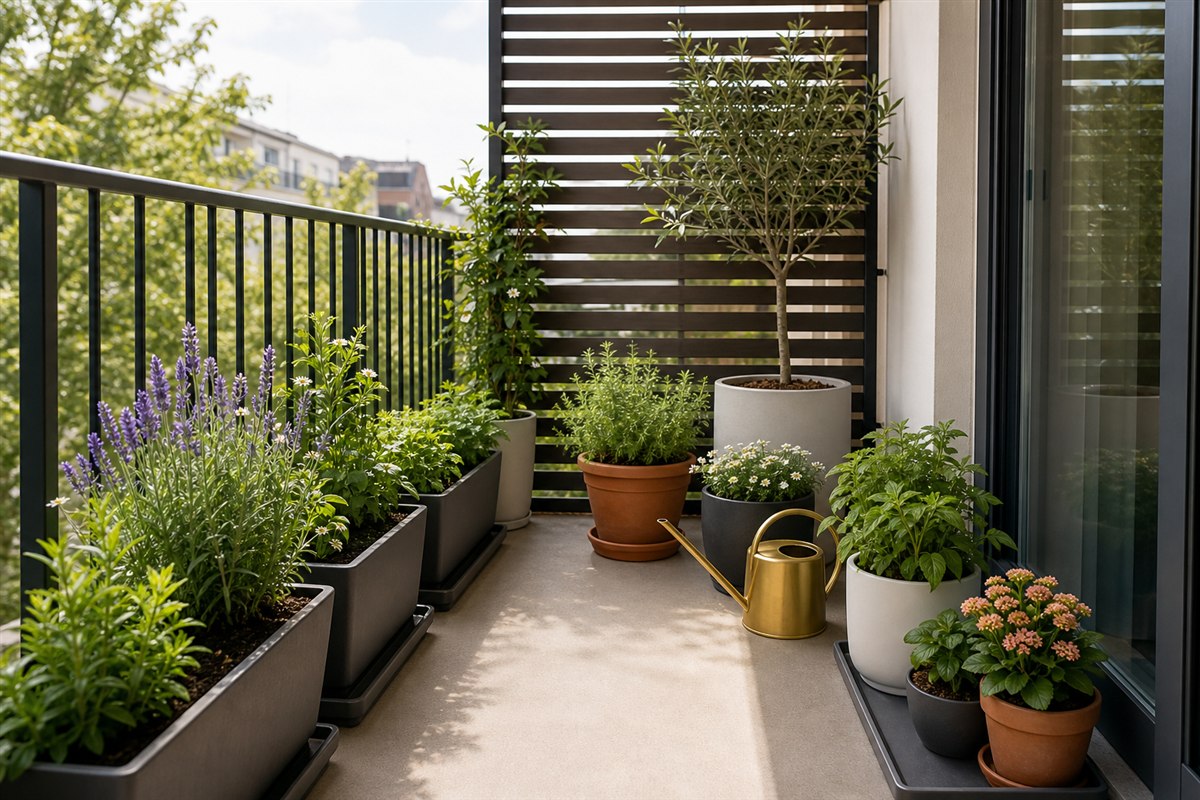
    Balcony garden with planters inside the railing, a wind screen, runoff trays, and a clear walking route
    Reference: place containers safely inside the railing, control runoff, and preserve a route for watering and everyday use.

    A balcony can become a lovely outdoor room, even when it is small. Begin with safety: check the building rules, the weight the balcony can hold, and where extra water will go.

    Next, notice the sunlight and wind and decide how you will carry water outside. These checks make it much easier to choose pots, plants, and a comfortable place to sit.

    Check the building rules first

    A clipboard with blank checklist lines beside a small empty lightweight planter on a balcony floor, railing visible behind.

    If you rent or share a building, ask what you may place or attach outside. Check before adding railing boxes, trellises, hanging pots, or large containers.

    Ask about weight limits and drainage too. Soil and pots become much heavier when wet, and water must not fall onto neighbours or damage the building.

    Put it into practice

    • Check weight restrictions.
    • Ask about railing planters.
    • Confirm drainage rules.
    • Avoid blocking exits or walkways.

    Watch the sun and wind

    A small balcony corner in daylight, a ribbon tied inside the railing indicating wind, and one small pot positioned away from the exposed edge.

    Watch the balcony in the morning, around midday, and later in the day. Notice where direct sun reaches, which corners become hot, and where the wind is strongest.

    Think about watering before adding plants. If you must carry water through the home, begin with only a few pots that are easy to reach.

    Put it into practice

    • Track direct sun hours.
    • Notice windy corners.
    • Plan where extra water goes.
    • Group plants with similar watering needs.

    Choose what the balcony should do

    A compact balcony devoted just to flowering containers: three modest matching pots of simple flowers on the floor, no furniture or vegetables.

    Choose one main purpose before shopping. You might grow cooking herbs, add flowers, harvest a few vegetables, or make a quiet place to sit.

    Starting with one purpose keeps the balcony clear and the cost under control. You can add more after you learn how the space behaves.

    Put it into practice

    • Herb garden for cooking.
    • Flower garden for color.
    • Vegetable containers for food.
    • Cozy patio-style balcony.
    • Vertical garden for limited floor space.

    Choose safe pots for the plants and balcony

    An empty lightweight planter tilted toward the viewer so its drainage openings are visible, beside a small bag of potting mix on a balcony floor.

    Choose steady pots with drainage holes and enough room for the plants at full size. Check how much each pot will weigh when filled, and make sure the wind cannot tip it over.

    A self-watering pot may help during hot weather, but you still need to check the soil and learn how much water each plant uses.

    Put it into practice

    • Start with fewer containers.
    • Avoid oversized heavy planters.
    • Use saucers only where allowed.
    • Choose stable containers for windy areas.

    Add comfort after the plants have a place

    A simple balcony with two established small planters and a folded chair, generous clear floor area; one restrained outdoor lantern well away from plants.

    Once the pots are safely placed, add one or two comforts, such as a small chair, an outdoor rug, or a weather-safe light.

    Repeat a few colors or materials instead of filling the balcony with unrelated objects. Keep the exit, walking space, and access to every plant clear.

    Put it into practice

    • Use one or two planter colors.
    • Keep floor space open.
    • Add lights only where safe.
    • Choose decor that can handle weather.

    Balcony Condition Check

    Check the balcony before choosing plants

    Balconies fail when the plant plan ignores real conditions. Open each check and match your setup to what the space actually gives you.

    Balcony readiness path
    1Watch one day
    2Group by exposure
    3Buy matching plants
    Sun check Balconies with strong afternoon light
    • Track when direct sun hits the floor.
    • Use heat-tolerant herbs or flowers for hot walls.
    • Keep shade-loving plants away from reflective glass.
    Wind check High floors, open railings, or exposed corners
    • Choose heavier pots before tall decor.
    • Keep delicate stems away from the railing edge.
    • Use grouped containers to reduce drying.
    Water check Balconies without an outdoor tap
    • Keep the watering route short.
    • Use saucers where runoff would bother neighbors.
    • Start with fewer pots if water must be carried.

    Quick rule: A balcony garden is easier when the plants match the harshest condition, not the prettiest corner.

    Related garden guides

    What to do next

    Choose another beginner guide, or use the free Garden Starter Planner to turn what you learned into a first-week plan.

    FAQ

    Can I start a balcony garden in an apartment?

    Yes. Check the building or rental rules first, especially for weight, drainage, railing planters, and anything attached to the building.

    What should I grow first on a balcony?

    Try herbs, compact flowers, or one or two vegetables that grow well in pots. Choose them only after checking the sunlight.

    How many containers should a beginner start with?

    Start with three to five pots that you can reach and water easily. Add more only when caring for them still feels manageable.

  • Small Garden Ideas for Beginners: A Simple Plan for Beautiful Tiny Spaces

    Small Garden Ideas for Beginners: A Simple Plan for Beautiful Tiny Spaces

    ← All garden guides5 min read
    In this guide
    1. Choose one job for the space
    2. Draw a simple layout
    3. Five easy ways to begin
    4. Buy the useful basics first
    5. Avoid these common mistakes
    6. Related Beginner Garden Guides
    7. Next Step
    8. FAQ
    9. Sources and verification

    Before you act

    Give the space one job

    1. Choose the garden’s first job: Measure the usable space, then pick food, flowers, seating, privacy, or a quiet place.
    2. Finish one small area first: Make that first purpose work before adding another.
    3. Use the space for a week: Keep what works and change anything that blocks movement or care.
    Compact patio arranged with an L-shaped planting area, clear path, chair, and coordinated containers
    Reference: keep one route open and let the planted edge, pause point, and container group perform separate jobs.

    A small garden can be one of the easiest places to begin. You can see the whole space, reach every plant, and notice quickly what works.

    Start by choosing one job for one small area. You might grow herbs, add flowers, make a quiet seat, or plant a few vegetables. Once that part works, you can add more without wasting money or crowding the space.

    Choose one job for the space

    A small garden corner containing only a compact herb shelf beside a kitchen wall, with three separate pots and open floor.

    Decide what you want most before choosing plants. Herbs need to be easy to reach. Vegetables often need more sun and water. A place to sit needs enough open floor space.

    Pick one goal now. The rest can wait until the first area is growing well and still feels easy to care for.

    Choose what fits

    • Grow herbs near the kitchen.
    • Create a cozy seating corner.
    • Add flowers around a patio edge.
    • Build one beginner raised bed.
    • Create a container vegetable setup.

    Draw a simple layout

    A top-down garden layout with one simple continuous path, tall planters at the back and lower pots toward the front, no obstructions.

    Measure the area and mark the path you need for walking and watering. Then choose one clear arrangement: a group of pots, a row beside a path, or one raised bed you can reach from every side.

    Leave room to sit, turn, carry a watering can, and reach every plant. A crowded garden becomes tiring very quickly.

    Put it into practice

    • Use tall planters at the back and lower plants in front.
    • Repeat one planter color for a calmer look.
    • Keep walking paths clear.
    • Place frequently used herbs closest to the door.

    Five easy ways to begin

    A single small container herb corner with just three modest pots and a watering can on a patio; no raised bed or seating.

    Choose the idea that best matches your space and what you want from it:

    Put it into practice

    • Container herb corner.
    • Single raised bed garden.
    • Patio planter cluster.
    • Vertical wall planter.
    • Flower and greenery border.

    Buy the useful basics first

    A close flat lay of an empty practical planter, potting mix scoop and watering can; no flowers or decorative objects.

    Start with the pots or bed, the right soil mix, and an easy way to water. Add decorations after you know where the plants will live.

    Buy only a few plants on the first trip. Choose plants that match the sunlight and have enough room at their full-grown size.

    Put it into practice

    • Containers that fit the actual space.
    • A watering can or hose attachment.
    • Potting mix or bed mix suited to the setup.
    • Gloves and a hand trowel.
    • Plant labels or a small notebook.

    Avoid these common mistakes

    A wide young shrub in a pot with clear empty space around its leaves and an open walkway next to it.

    Overcrowding causes many small-garden problems. Plants grow wider, pots become heavy when filled, and you still need room to move and water.

    Also check the sunlight before shopping. An easy-care plant can still struggle when the space is too dark, too hot, or too dry for it.

    Watch out for

    • Buying plants before measuring.
    • Choosing containers with poor drainage.
    • Ignoring mature plant size.
    • Mixing too many styles at once.
    • Forgetting how watering will work.

    Small Garden Goal Picker

    Pick one garden job before you buy plants

    Open the option that sounds closest to your space. The mini layouts show what to buy first, what to skip, and where the first money should go.

    Tiny-space decision path
    1Choose one use
    2Build the smallest version
    3Add beauty after it works
    Useful herb corner A sunny edge near the kitchen
    • Start with 3 herbs you already cook with.
    • Buy potting mix before decor.
    • Keep the planter close enough to harvest often.
    Calm seating corner A patio or balcony that should feel finished
    • Anchor the space with one seat first.
    • Use 2 repeated planters instead of many small ones.
    • Add lighting after the walking path is clear.
    Flower focal point The fastest visible upgrade
    • Choose one color family before shopping.
    • Place taller plants behind lower flowers.
    • Leave blank space so the display looks intentional.

    Quick rule: If one option feels useful immediately, build that first version and save the other ideas for later.

    Related garden guides

    What to do next

    Choose another beginner guide, or use the free Garden Starter Planner to turn what you learned into a first-week plan.

    FAQ

    What is the easiest small garden for a beginner?

    A few herb pots or one small raised bed are good first projects. Both are easy to see, reach, and water.

    How do I make a small garden look elegant?

    Repeat one or two pot colors, keep plants in clear groups, and leave open space around seats and paths.

    Should I buy plants or containers first?

    Plan the layout and choose the pots first. Then buy plants that fit the sunlight, pot size, and time you have for care.