Skip to content

Author: GardenEleganceHub

  • Budget Garden Makeover Ideas That Look Elegant Without Overspending

    Budget Garden Makeover Ideas That Look Elegant Without Overspending

    ← All garden guides4 min read
    In this guide
    1. Clear the space before shopping
    2. Choose one result
    3. Repeat colours and materials
    4. Spend first on changes you will use
    5. Avoid cheap purchases that create clutter
    6. Related Beginner Garden Guides
    7. Next Step
    8. FAQ
    9. Sources and verification

    Before you act

    A makeover with a stopping point

    1. Choose one problem: Set your full budget, then name the one view or practical issue you most want to improve.
    2. Spend in a useful order: Clear clutter, fix access or soil problems, then make one visible improvement.
    3. Live with the change for a week: Add something else only if the space still needs it.
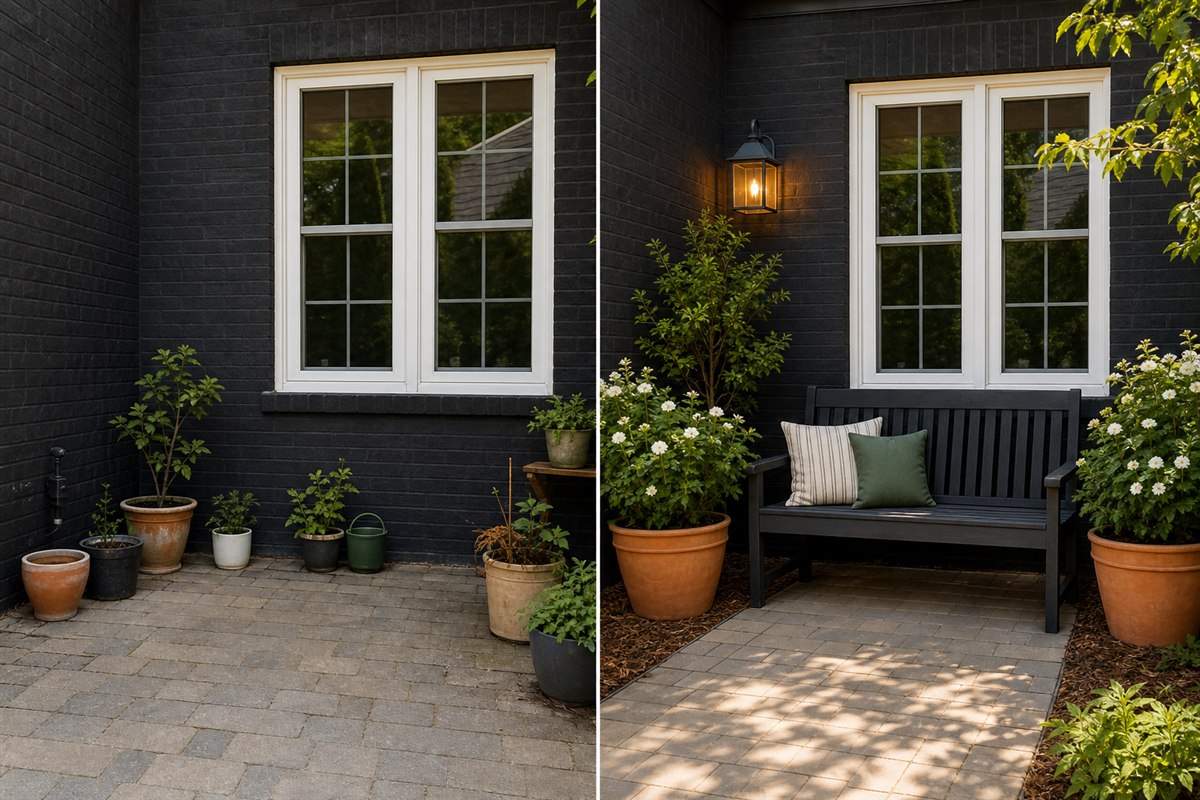
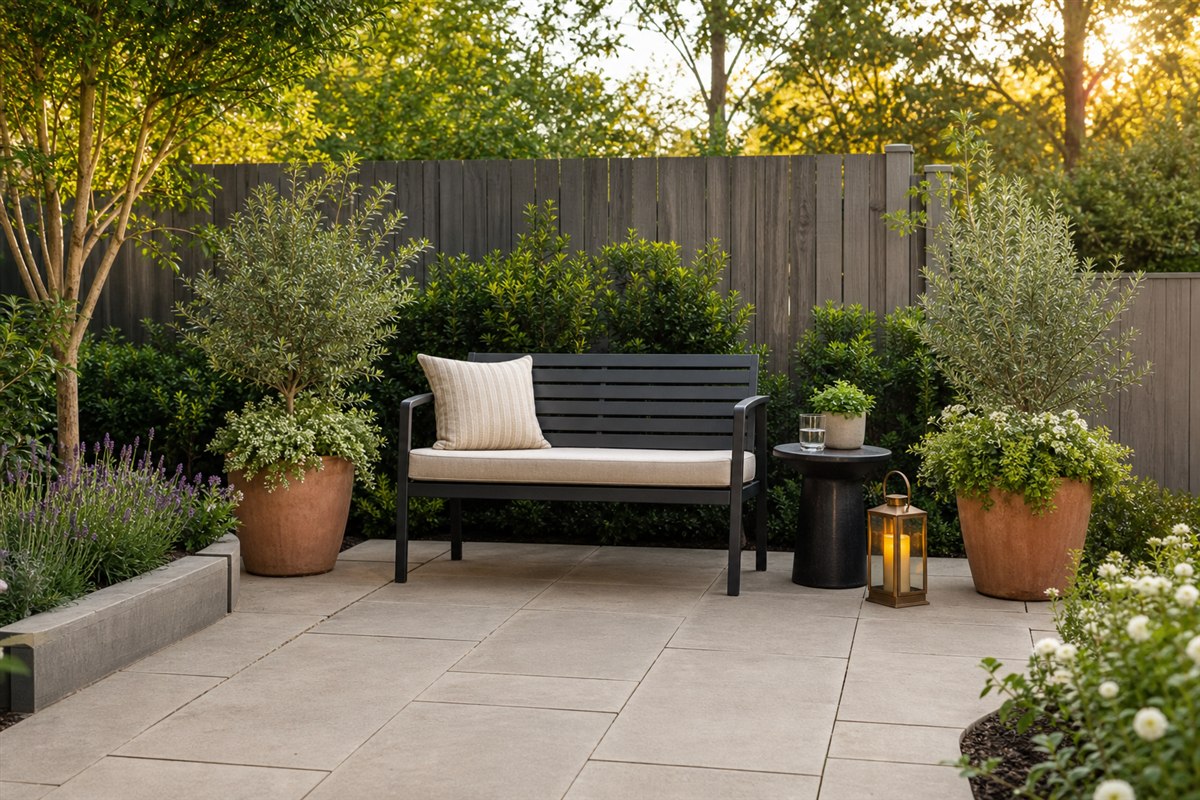
    Before and after small patio showing repeated planters, a repainted bench, mulch, and simple lighting
    Reference: cleaning, repetition, one useful seat, and one warm light can change the space without major construction.

    You can improve a garden without replacing everything. Clear the space, choose one area to change, reuse what still works, and spend only on items that solve a real problem.

    Follow this order so small purchases create one finished result instead of more clutter.

    Clear the space before shopping

    A gloved hand placing unused garden tools and an empty small pot into one storage basket beside a swept patio.

    Remove dead plants, broken pots, and anything you no longer use. Put tools together and clear the paths. Once the area is calm, you can see what is missing and what can be reused.

    Put it into practice

    • Remove broken or unused items.
    • Group tools in one place.
    • Clear pathways.
    • Keep useful containers that fit the plan.

    Choose one result

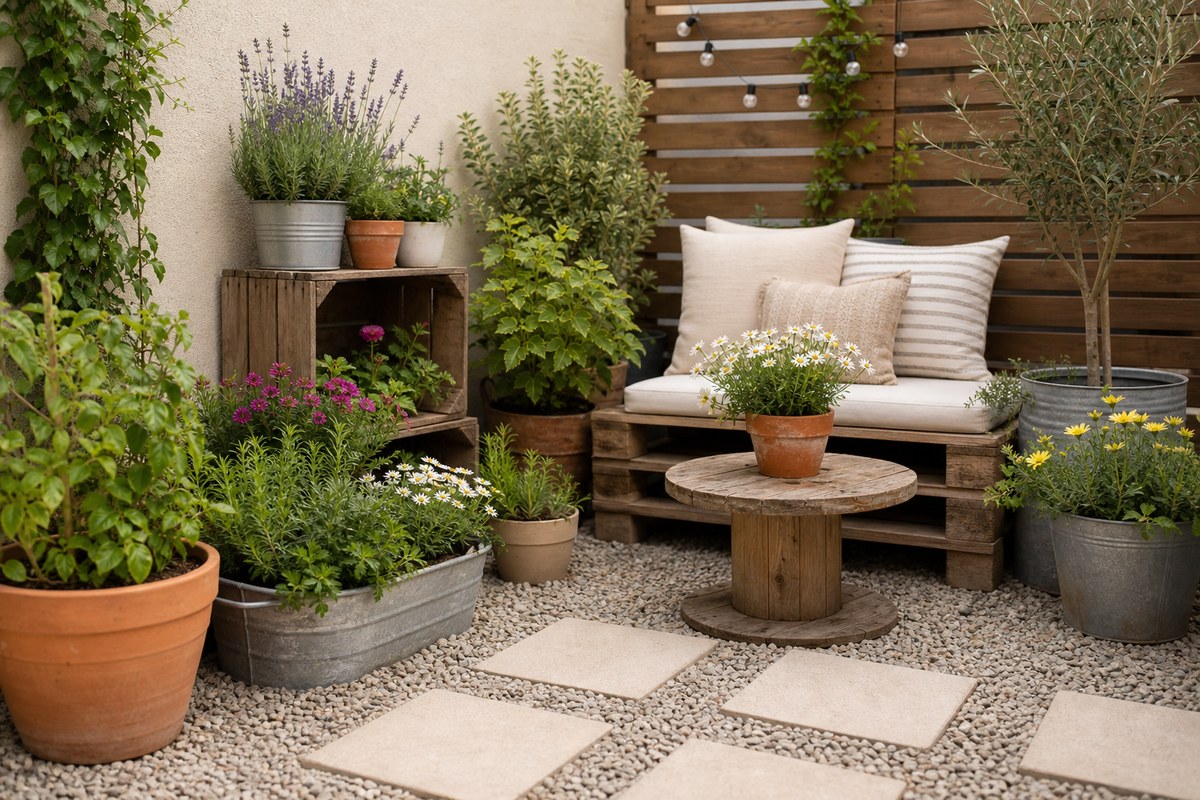
    One simple comfortable chair and one flowering pot forming a modest corner of an otherwise open patio.

    Pick one clear result: a comfortable chair beside flowers, a welcoming front step, a small herb corner, or a tidier balcony. Every purchase should help create that result.

    Choose what fits

    • Cozy seating corner.
    • Container garden cluster.
    • Budget herb garden.
    • Simple raised bed setup.
    • Front step planter refresh.

    Repeat colours and materials

    A hand painting an old planter muted sage green, beside two already painted pots in the same colour.

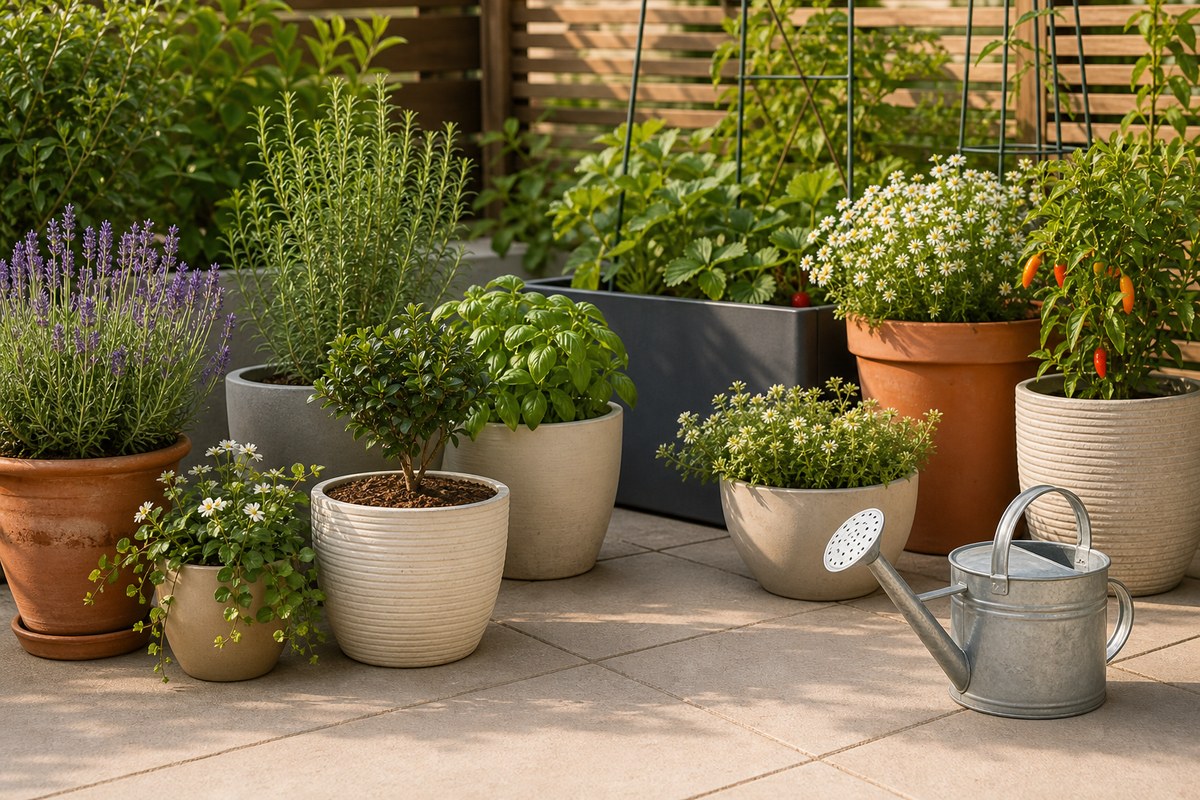
    Paint or group mismatched pots in one colour family. Repeat two or three plant types and one material, such as terracotta or natural wood. Repetition makes separate budget finds look like one plan.

    Put it into practice

    • Repeat one planter color.
    • Use two or three flower colors.
    • Choose similar materials.
    • Keep decor styles consistent.

    Spend first on changes you will use

    A practical long-spouted watering can beside a healthy new flowering plant and an existing garden chair.

    Spend on the problem you actually need to solve. A healthy plant can fill an empty corner, while a chair can make the garden usable. A better watering tool may save more time than decoration. Fresh mulch can tidy a bed and help suitable plants hold moisture.

    Put it into practice

    • Planters.
    • Starter plants.
    • Outdoor lights.
    • Add mulch or gravel only where it suits the plants and drainage.
    • Watering supplies.

    Avoid cheap purchases that create clutter

    A tape measure stretched across the floor beside a chair footprint marked in removable tape; a small pot stands outside the walking route.

    Measure before buying furniture or pots. Check the light before buying plants. Skip an item if it has no clear place, blocks a job, or needs more care than you can give it. Fewer useful pieces usually create a stronger makeover.

    Watch out for

    • Buying plants before planning light and space.
    • Buying tiny decor instead of useful structure.
    • Choosing furniture too large for the patio.
    • Ignoring care requirements.

    Budget Priority Selector

    Put the budget where it changes the view

    Use this selector before shopping. It keeps the makeover focused on visible, useful changes instead of small impulse buys.

    Budget filter
    1Remove clutter
    2Pick one focal zone
    3Repeat one upgrade
    Clean and edit A messy space that already has usable pieces
    • Remove broken decor before buying anything.
    • Trim edges and clear the main sightline.
    • Keep the strongest existing planter or chair.
    Repeat planters A space that feels random or mismatched
    • Buy fewer pieces in a repeated finish.
    • Use repetition near the entrance or seating.
    • Let plants add variety, not every container.
    One focal upgrade A patio that needs one visible improvement
    • Choose the upgrade seen from indoors.
    • Spend on one bigger improvement instead of many tiny ones.
    • Stop after the focal zone looks finished.

    Quick rule: A budget garden looks more expensive when the first dollars create order.

    Related garden guides

    What to do next

    Choose another beginner guide, or use the free Garden Starter Planner to turn what you learned into a first-week plan.

    FAQ

    What is the cheapest way to improve a garden?

    Clean, edit, group containers, repeat colors, and focus on one high-impact area before buying new decor.

    What should I buy first for a budget garden makeover?

    Buy practical structure first, such as planters, healthy plants, lighting, or watering supplies that support your plan.

    How can I make cheap garden decor look better?

    Use repetition, a limited color palette, and fewer pieces placed intentionally.
  • Container Gardening Mistakes Beginners Make and How to Avoid Them

    Container Gardening Mistakes Beginners Make and How to Avoid Them

    ← All garden guides5 min read
    In this guide
    1. Mistake 1: Choosing a pot only for its looks
    2. Mistake 2: Giving water nowhere to escape
    3. Mistake 3: Filling pots with garden soil
    4. Mistake 4: Mixing plants that need different care
    5. Mistake 5: Starting with too many pots
    6. Related Beginner Garden Guides
    7. Next Step
    8. FAQ
    9. Sources and verification

    Before you act

    Diagnose the container before the plant

    1. Check the whole pot: Look at the drainage holes, root space, growing mix, daily light, and how quickly it dries.
    2. Change one thing at a time: You will be able to see what actually helped.
    3. Give the plant time: Watch its moisture and new growth for a week before making another change.
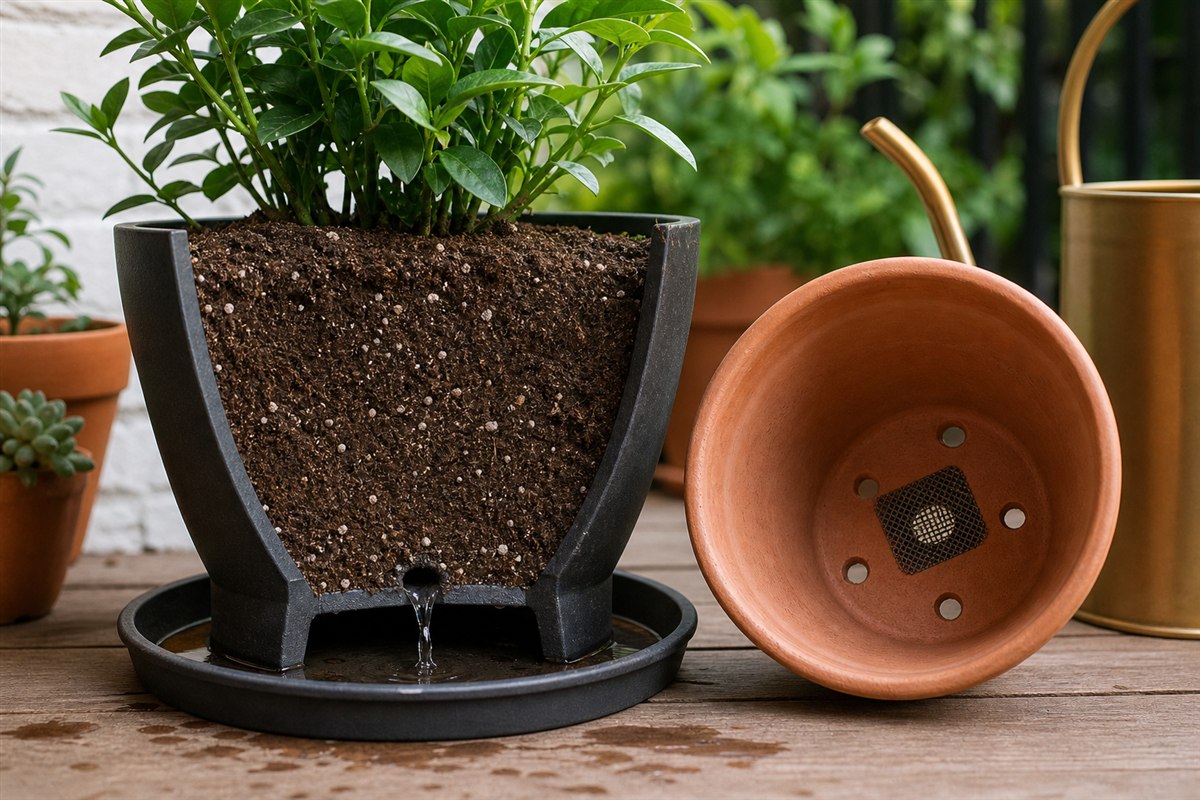
    Container cutaway with potting mix and drainage hole beside an empty pot showing several drainage holes
    Reference: use real drainage holes and raise the pot when needed; do not depend on a decorative gravel layer inside the container.

    Most container problems start with one of five choices. The pot is too small, water cannot drain, the soil is too heavy, the plants need different care, or there are simply too many pots to manage.

    Check these five points before you plant. Fixing them now is easier than rescuing a stressed plant later.

    Mistake 1: Choosing a pot only for its looks

    Two empty plant pots, one broad stable pot and one narrow tall pot, beside the intact root ball of a small seedling.

    A good pot needs room for the roots, holes for excess water, and a stable base. Small pots dry quickly. Tall, light pots may tip in wind. Large filled pots can be too heavy to move and may need a balcony load check.

    Choose the plant first. Then choose a pot that fits its mature size and your space.

    Put it into practice

    • Check drainage holes.
    • Match pot size to plant size.
    • Consider weight when filled.
    • Avoid unstable tall containers in windy spaces.

    Mistake 2: Giving water nowhere to escape

    A terracotta pot tipped gently on its side to reveal a clean round drainage hole in its bottom; an upright planted pot beside it rests on small pot feet with an open gap beneath.

    Use a pot with drainage holes and a potting mix made for containers. After watering, empty a full saucer instead of leaving the roots in standing water. Check the soil before watering again; a wet surface does not always mean the whole root ball is wet.

    Put it into practice

    • Look for drainage holes.
    • Use a potting mix made for containers.
    • Avoid letting containers sit in standing water.
    • Check moisture before watering again.

    Mistake 3: Filling pots with garden soil

    A scoop of loose textured potting mix with visible fine bark and perlite beside an empty planter; a compact clod of dense garden soil sits separately.

    Soil taken from the garden can become dense in a pot. Roots need a mix that holds some moisture but still lets air and excess water move through it. Use a bag labelled for containers and check whether your plant needs a special mix.

    Put it into practice

    • Use container-friendly potting mix.
    • Avoid heavy yard soil in small pots.
    • Refresh mix when needed.
    • Read labels before buying.

    Mistake 4: Mixing plants that need different care

    A rosemary plant and thyme plant each in separate terracotta pots on one side, a separately potted basil on the other with a clear gap.

    Plants in one pot share the same sun, soil, and water. Group plants only when those needs match. A simple combination—one main plant with one or two smaller companions—is easier to keep healthy than a crowded mix.

    Put it into practice

    • Group sun-loving plants together.
    • Group moisture-loving plants together.
    • Avoid overcrowding mixed containers.
    • Check mature plant size.

    Mistake 5: Starting with too many pots

    Exactly three manageable containers spaced beside an accessible outdoor water source, with plenty of open patio around them.

    Every pot needs checking. Five pots can become a daily job during hot weather, especially when they are scattered around the garden. Start with three to five pots in one place. Add more only after the first group fits your routine.

    Put it into practice

    • Start with three to five containers.
    • Keep water access convenient.
    • Use a simple tracking routine.
    • Add more only after the first group works.

    Container Drainage Check

    Run the drainage check before planting

    This quick check turns a common container mistake into a simple yes-or-no decision before soil and plants go in.

    Drainage decision path
    1Check holes
    2Lift the base
    3Use the right mix
    Holes are open Any pot holding herbs, flowers, or vegetables
    • Confirm every hole is open before filling.
    • Avoid decorative cachepots as the main planter.
    • Do not rely on gravel to fix a sealed pot.
    Water can leave Patios where runoff needs control
    • Use feet if the pot sits flat on stone.
    • Empty saucers after heavy rain.
    • Keep drainage away from walls and thresholds.
    Mix stays airy Containers that dry fast or stay soggy
    • Use potting mix instead of yard soil.
    • Leave room at the top for watering.
    • Refresh tired mix when plants stall.

    Quick rule: A pretty container is only useful when water can move through it cleanly.

    Related garden guides

    What to do next

    Choose another beginner guide, or use the free Garden Starter Planner to turn what you learned into a first-week plan.

    FAQ

    Why do my container plants keep dying?

    Check the drainage, pot size, soil moisture, and light first. Also check whether plants sharing a pot need the same care.

    Do containers need drainage holes?

    Most do. Drainage holes give excess water a way out and make watering easier to manage.

    How many containers should a beginner start with?

    Three to five pots in one area is a practical start. You can add more after you know how often they need water.

  • Raised Bed Gardening for Beginners: Start With One Simple Bed

    Raised Bed Gardening for Beginners: Start With One Simple Bed

    ← All garden guides5 min read
    In this guide
    1. Choose the best place for the bed
    2. Make the first bed easy to reach
    3. Choose a simple first crop
    4. Buy only what the bed needs
    5. Keep a few notes during the first season
    6. Related Beginner Garden Guides
    7. Next Step
    8. FAQ
    9. Sources and verification

    Before you act

    One reachable raised bed

    1. Mark the bed on the ground: Make sure you can reach the middle without stepping on the soil.
    2. Check the basics before buying: Confirm the sunlight, water access, path width, and amount of soil you will need.
    3. Walk around the outline for a week: Move it now if it blocks a path or is awkward to water.
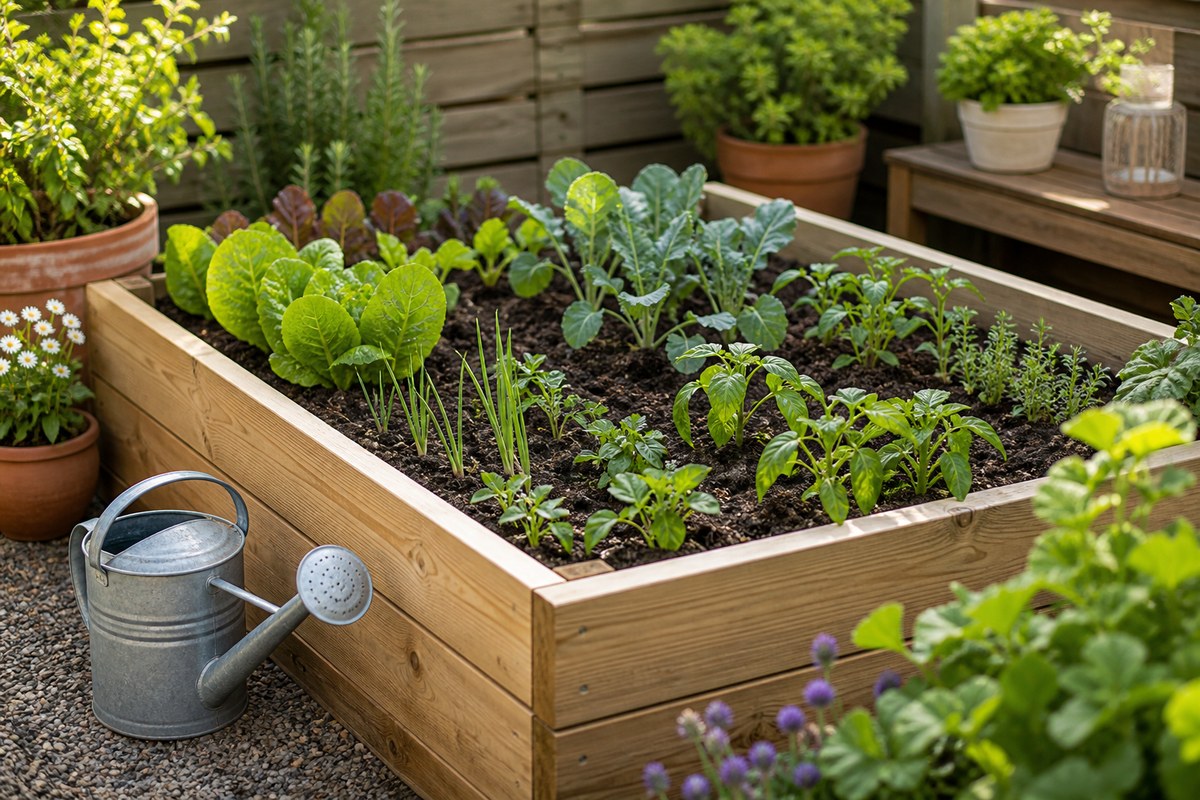
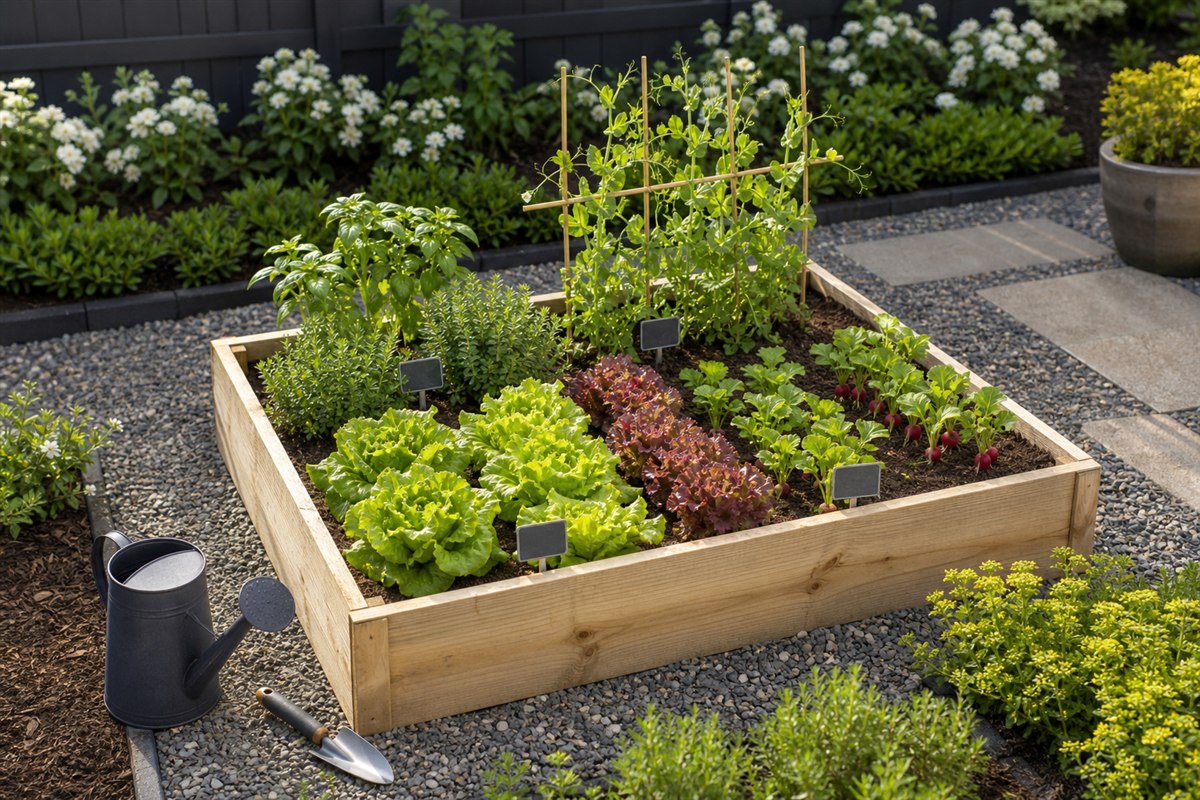
    Reachable raised bed with clear paths, spaced vegetables, herbs, peas, and basic hand tools
    Reference: a first bed should be narrow enough to reach without stepping into the soil and surrounded by usable paths.

    A raised bed gives your first garden a clear shape. It can hold herbs, flowers, salad leaves, or a few vegetables in one easy-to-see place.

    Begin with one bed. Put it near water, make sure the plants will get enough sun, and keep the middle within reach. You can add another bed next year if you enjoy caring for the first one.

    Choose the best place for the bed

    A single empty low raised bed positioned near an outdoor tap with an unobstructed path along both long sides.

    Choose a place you can reach comfortably and see often. Keep it close enough to a hose or watering can so watering does not become a difficult job.

    Watch the sunlight before deciding. Many vegetables and herbs need plenty of direct sun, while some leafy vegetables and flowers can grow with less.

    Put it into practice

    • Check sun exposure.
    • Keep water access close.
    • Leave room to walk around the bed.
    • Avoid areas with poor drainage or heavy tree roots.

    Make the first bed easy to reach

    A gardener kneeling outside a narrow raised bed and comfortably reaching to its centre, never stepping on the soil.

    You should be able to reach the middle without stepping on the soil. Check this from every side you will use before building or buying the bed.

    Also work out how much soil the bed needs. A large or deep bed can cost much more to fill than expected.

    Put it into practice

    • Avoid starting with several beds at once.
    • Choose a width you can reach across.
    • Plan paths before placing the bed.
    • Estimate soil needs before buying materials.

    Choose a simple first crop

    An overhead flat lay of blank seed packets beside loose lettuce seeds, a sprig of parsley and a small flowering seedling; a simple sketch of one bed has three blank planting zones..

    Decide whether the bed is mainly for herbs, salad leaves, flowers, or vegetables. This choice tells you how much spacing, sunlight, and water the plants need.

    Pick only a few kinds of plants in the first season. Choose things you will enjoy eating or seeing, because you are more likely to notice and care for them.

    Put it into practice

    • Herbs for cooking.
    • Lettuce and greens for quick harvests.
    • Flowers for beauty and motivation.
    • A few beginner vegetables.

    Buy only what the bed needs

    A neat practical supply group: four timber boards for one small raised bed, a bag of growing mix and a hose watering wand.

    Start with the bed or building materials, soil made for raised beds, a way to water, labels, and a few seeds or plants.

    A ready-made kit can save time. Building your own may cost less if you already have the right tools and know how to make it stable and safe.

    Put it into practice

    • Raised bed frame or materials.
    • Growing mix suited to raised beds.
    • Watering can, hose, or wand.
    • Gloves and hand trowel.
    • Seeds or starter plants.

    Keep a few notes during the first season

    A gardener writing in an open notebook with blank ruled pages beside a young raised bed; pencil and plant label nearby.

    Write down what you planted, when you watered, what grew well, and which jobs took too much time. A few simple notes will make next season easier and cheaper.

    One struggling plant does not mean the whole bed failed. Look for the cause, change one thing, and keep what worked.

    Put it into practice

    • Track planting dates.
    • Write down watering patterns.
    • Note pest or disease issues without panic.
    • Record what you would repeat.

    Raised Bed Size Checker

    Choose a raised bed size you can actually reach

    A raised bed should make care easier. Use these size checks before buying lumber, soil, or a kit.

    Bed-size decision path
    1Measure reach
    2Choose crop depth
    3Keep sides accessible
    2 x 4 starter bed Tiny yards or first-season testing
    • Good for herbs, greens, and a first test crop.
    • Needs less soil, so mistakes cost less.
    • Works well when space is narrow.
    3 x 6 everyday bed A balanced beginner vegetable bed
    • Large enough for variety without feeling huge.
    • Keep access on both long sides.
    • Plan watering before adding more beds.
    4 x 8 only if reachable Open yards with room on every side
    • Avoid placing a wide bed against a wall.
    • Confirm you can reach the center comfortably.
    • Budget for the soil volume before buying.

    Quick rule: The best first bed is the one you can weed, water, and harvest without stepping into it.

    Related garden guides

    What to do next

    Choose another beginner guide, or use the free Garden Starter Planner to turn what you learned into a first-week plan.

    FAQ

    What size raised bed should a beginner start with?

    Choose a bed that lets you reach the middle without stepping on the soil. One reachable bed is enough for a first season.

    Are raised beds expensive?

    They can be. Keep the cost down by starting with one bed, calculating the soil before shopping, and buying only the basic tools.

    What should I plant first in a raised bed?

    Herbs, salad leaves, compact flowers, radishes, and bush beans can be good first choices when they suit your season and sunlight.

  • Small Garden Ideas for Beginners: A Simple Plan for Beautiful Tiny Spaces

    Small Garden Ideas for Beginners: A Simple Plan for Beautiful Tiny Spaces

    ← All garden guides5 min read
    In this guide
    1. Choose one job for the space
    2. Draw a simple layout
    3. Five easy ways to begin
    4. Buy the useful basics first
    5. Avoid these common mistakes
    6. Related Beginner Garden Guides
    7. Next Step
    8. FAQ
    9. Sources and verification

    Before you act

    Give the space one job

    1. Choose the garden’s first job: Measure the usable space, then pick food, flowers, seating, privacy, or a quiet place.
    2. Finish one small area first: Make that first purpose work before adding another.
    3. Use the space for a week: Keep what works and change anything that blocks movement or care.
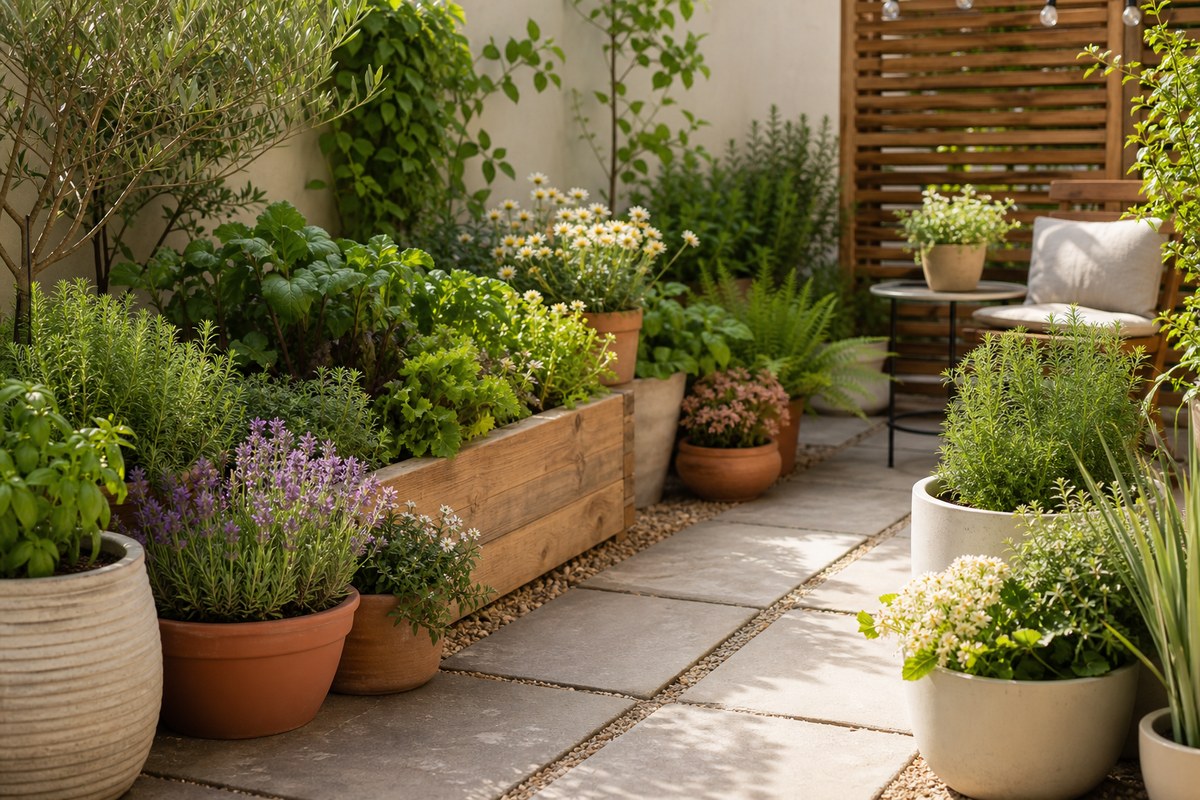
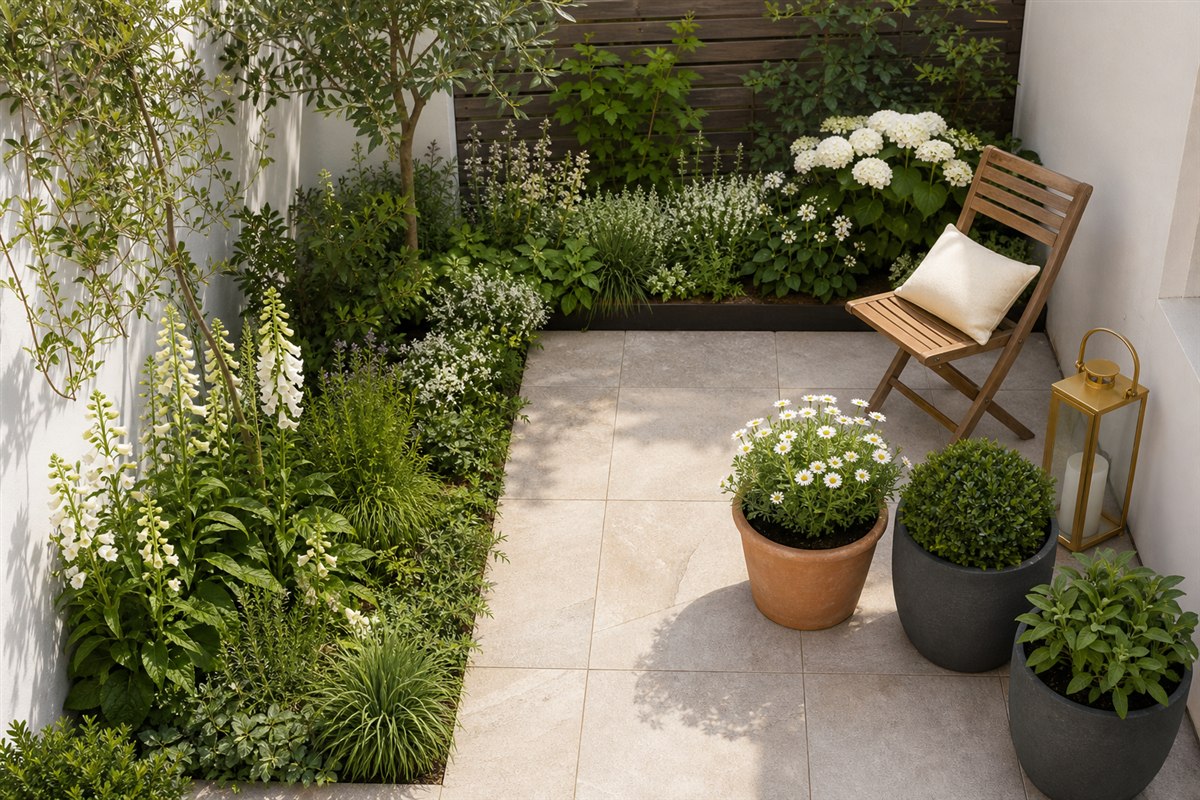
    Compact patio arranged with an L-shaped planting area, clear path, chair, and coordinated containers
    Reference: keep one route open and let the planted edge, pause point, and container group perform separate jobs.

    A small garden can be one of the easiest places to begin. You can see the whole space, reach every plant, and notice quickly what works.

    Start by choosing one job for one small area. You might grow herbs, add flowers, make a quiet seat, or plant a few vegetables. Once that part works, you can add more without wasting money or crowding the space.

    Choose one job for the space

    A small garden corner containing only a compact herb shelf beside a kitchen wall, with three separate pots and open floor.

    Decide what you want most before choosing plants. Herbs need to be easy to reach. Vegetables often need more sun and water. A place to sit needs enough open floor space.

    Pick one goal now. The rest can wait until the first area is growing well and still feels easy to care for.

    Choose what fits

    • Grow herbs near the kitchen.
    • Create a cozy seating corner.
    • Add flowers around a patio edge.
    • Build one beginner raised bed.
    • Create a container vegetable setup.

    Draw a simple layout

    A top-down garden layout with one simple continuous path, tall planters at the back and lower pots toward the front, no obstructions.

    Measure the area and mark the path you need for walking and watering. Then choose one clear arrangement: a group of pots, a row beside a path, or one raised bed you can reach from every side.

    Leave room to sit, turn, carry a watering can, and reach every plant. A crowded garden becomes tiring very quickly.

    Put it into practice

    • Use tall planters at the back and lower plants in front.
    • Repeat one planter color for a calmer look.
    • Keep walking paths clear.
    • Place frequently used herbs closest to the door.

    Five easy ways to begin

    A single small container herb corner with just three modest pots and a watering can on a patio; no raised bed or seating.

    Choose the idea that best matches your space and what you want from it:

    Put it into practice

    • Container herb corner.
    • Single raised bed garden.
    • Patio planter cluster.
    • Vertical wall planter.
    • Flower and greenery border.

    Buy the useful basics first

    A close flat lay of an empty practical planter, potting mix scoop and watering can; no flowers or decorative objects.

    Start with the pots or bed, the right soil mix, and an easy way to water. Add decorations after you know where the plants will live.

    Buy only a few plants on the first trip. Choose plants that match the sunlight and have enough room at their full-grown size.

    Put it into practice

    • Containers that fit the actual space.
    • A watering can or hose attachment.
    • Potting mix or bed mix suited to the setup.
    • Gloves and a hand trowel.
    • Plant labels or a small notebook.

    Avoid these common mistakes

    A wide young shrub in a pot with clear empty space around its leaves and an open walkway next to it.

    Overcrowding causes many small-garden problems. Plants grow wider, pots become heavy when filled, and you still need room to move and water.

    Also check the sunlight before shopping. An easy-care plant can still struggle when the space is too dark, too hot, or too dry for it.

    Watch out for

    • Buying plants before measuring.
    • Choosing containers with poor drainage.
    • Ignoring mature plant size.
    • Mixing too many styles at once.
    • Forgetting how watering will work.

    Small Garden Goal Picker

    Pick one garden job before you buy plants

    Open the option that sounds closest to your space. The mini layouts show what to buy first, what to skip, and where the first money should go.

    Tiny-space decision path
    1Choose one use
    2Build the smallest version
    3Add beauty after it works
    Useful herb corner A sunny edge near the kitchen
    • Start with 3 herbs you already cook with.
    • Buy potting mix before decor.
    • Keep the planter close enough to harvest often.
    Calm seating corner A patio or balcony that should feel finished
    • Anchor the space with one seat first.
    • Use 2 repeated planters instead of many small ones.
    • Add lighting after the walking path is clear.
    Flower focal point The fastest visible upgrade
    • Choose one color family before shopping.
    • Place taller plants behind lower flowers.
    • Leave blank space so the display looks intentional.

    Quick rule: If one option feels useful immediately, build that first version and save the other ideas for later.

    Related garden guides

    What to do next

    Choose another beginner guide, or use the free Garden Starter Planner to turn what you learned into a first-week plan.

    FAQ

    What is the easiest small garden for a beginner?

    A few herb pots or one small raised bed are good first projects. Both are easy to see, reach, and water.

    How do I make a small garden look elegant?

    Repeat one or two pot colors, keep plants in clear groups, and leave open space around seats and paths.

    Should I buy plants or containers first?

    Plan the layout and choose the pots first. Then buy plants that fit the sunlight, pot size, and time you have for care.

  • Best Garden Decor Ideas for a Cozy Backyard That Still Feels Practical

    Best Garden Decor Ideas for a Cozy Backyard That Still Feels Practical

    ← All garden guides4 min read
    In this guide
    1. Make one comfortable place to sit
    2. Use planters to shape the space
    3. Add a small amount of warm light
    4. Repeat two colours and one accent
    5. Keep everyday care easy
    6. Related Beginner Garden Guides
    7. Next Step
    8. FAQ
    9. Sources and verification

    Before you act

    Decor that earns its space

    1. Start with one view: Take a photo and mark where people walk, sit, and carry water.
    2. Add one useful feature: Try seating, a group of planters, or safe outdoor lighting before buying smaller decorations.
    3. Look again after a week: Keep what makes the space easier or nicer to use, and leave out the rest.
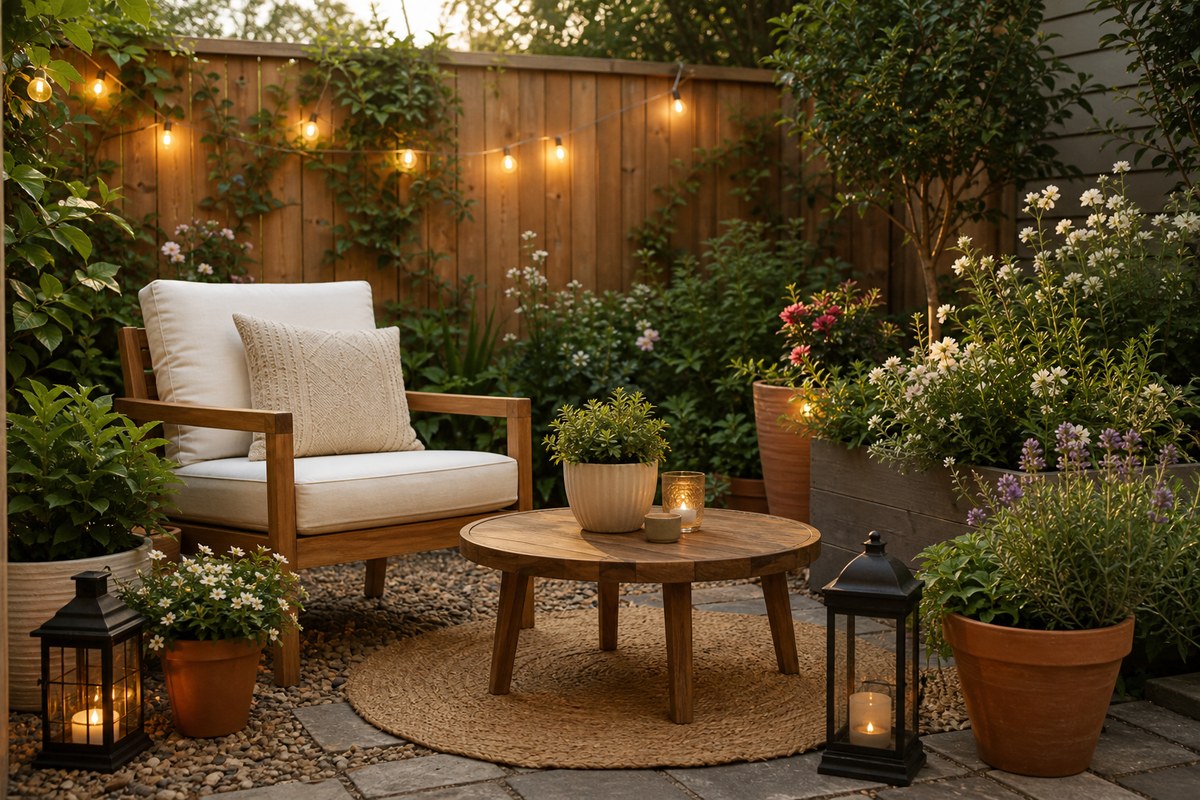
    Practical patio seating area framed by coordinated planters with a side table and warm lantern
    Reference: one comfortable pause point, two plant anchors, and an open care route feel calmer than scattered decoration.

    The best garden decor gives you a comfortable place to sit, keeps paths clear, and makes plants feel connected. You do not need to fill every corner.

    Begin with one seat, a few well-placed planters, and warm light. Add something only when it makes the space more useful or more inviting.

    Make one comfortable place to sit

    One small bistro chair and round table beside a single flowering planter, set clear of a garden walkway.

    A bench, bistro set, or simple chair can turn an unused corner into a place you want to visit. Face the seat toward the plants or the best view. Leave enough room to walk, water, and prune without moving furniture.

    Put it into practice

    • Use a small bistro set for patios.
    • Place a bench near flowers or herbs.
    • Keep walking paths open.
    • Add a side table only if it will be used.

    Use planters to shape the space

    Two substantial matching planters framing the edge of a patio entrance, leaving the middle completely open.

    A few repeated planters can frame a doorway, soften a fence, or mark the edge of a patio. Choose sizes that fit the mature plants and colours that work with the house. This gives you more value than many small ornaments.

    Put it into practice

    • Repeat one planter color.
    • Use taller planters for corners.
    • Group containers in odd numbers.
    • Match planter size to plant size.

    Add a small amount of warm light

    A short strand of warm outdoor lights above a simple seating corner at dusk, securely supported away from plant stems; restrained gentle glow, no dense foliage..

    Light the seating area or one path instead of the whole garden. Use outdoor-rated products, secure loose cords, and follow the maker’s installation instructions. Soft, warm light usually feels calmer than bright, cool light.

    Put it into practice

    • Frame a seating area with warm lights.
    • Use path lights sparingly.
    • Avoid harsh cool-toned lighting.
    • Follow product safety instructions.

    Repeat two colours and one accent

    A flat lay of a sage cushion, cream terracotta pot and one muted coral flower; only these three coordinated colour objects on a white background.

    Choose two main colours for planters, cushions, and larger pieces. Let flowers add one changing accent. Repeating the same colours makes inexpensive pieces feel connected.

    Put it into practice

    • Pick two main colors and one accent.
    • Repeat colors across planters and textiles.
    • Let flowers provide seasonal color.
    • Avoid buying decor in every trend color.

    Keep everyday care easy

    A garden stool and watering can stored at the edge of a patio, with clear access around two planters and no objects across the walking path.

    Before placing anything, carry a watering can through the space. Make sure you can reach every pot, sweep the floor, and open gates or doors. A storage bench or tool hook may improve the garden more than another ornament.

    Put it into practice

    • Keep tools easy to reach.
    • Choose weather-friendly materials.
    • Leave room around containers.
    • Avoid fragile items in high-traffic areas.

    Decor Purpose Board

    Choose decor by the job it does

    Garden decor works best when every piece has a purpose. Use this board before adding more objects to the backyard.

    Decor purpose path
    1Anchor
    2Frame
    3Light
    Anchor the seating Backyards without a clear place to pause
    • Start with one comfortable seat or bench.
    • Keep the front open so the area invites use.
    • Add a small table only if it will be used.
    Frame with planters Spaces that need softness or structure
    • Use planters to mark the edge of a zone.
    • Repeat two containers for a calmer look.
    • Let plants soften hard corners.
    Add evening warmth Gardens used after sunset
    • Light the path before adding decorative extras.
    • Use warm light near seating.
    • Keep cords and solar panels easy to manage.

    Quick rule: The space feels more modern when decor creates a clear experience instead of filling gaps.

    Related garden guides

    What to do next

    Choose another beginner guide, or use the free Garden Starter Planner to turn what you learned into a first-week plan.

    FAQ

    What garden decor should I buy first?

    Start with useful pieces like planters, seating, and lighting before buying purely decorative items.

    How do I make a backyard feel cozy on a budget?

    Create one seating area, repeat planter colors, add warm lighting, and keep the layout clean.

    Can garden decor make maintenance harder?

    Yes. Avoid decor that blocks watering, pathways, drainage, or access to plants.

  • DIY Garden Fountain Ideas for Small Backyards and Patios

    DIY Garden Fountain Ideas for Small Backyards and Patios

    ← All garden guides4 min read
    In this guide
    1. Decide what the fountain should do
    2. Choose a simple fountain type
    3. Test the position before buying
    4. Make cleaning and refilling easy
    5. Soften the edges with plants
    6. Related Beginner Garden Guides
    7. Next Step
    8. FAQ
    9. Sources and verification

    Before you act

    Water feature reality check

    1. Check the location: Measure the space and plan a safe way to power, refill, empty, and clean the fountain.
    2. Keep it manageable: Choose a fountain you can empty, clean, and protect in winter without special equipment.
    3. Run it for a week: Check the water level, splashing, noise, and cleaning needs before adding anything else.
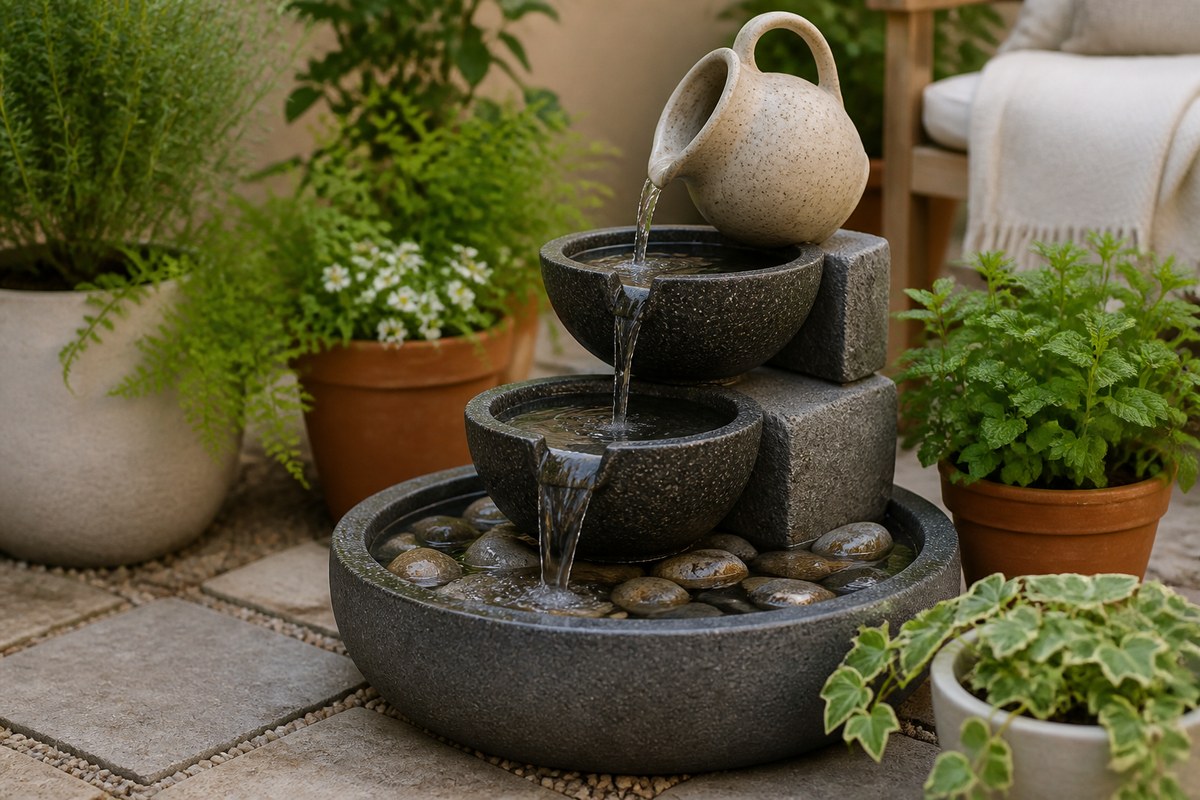
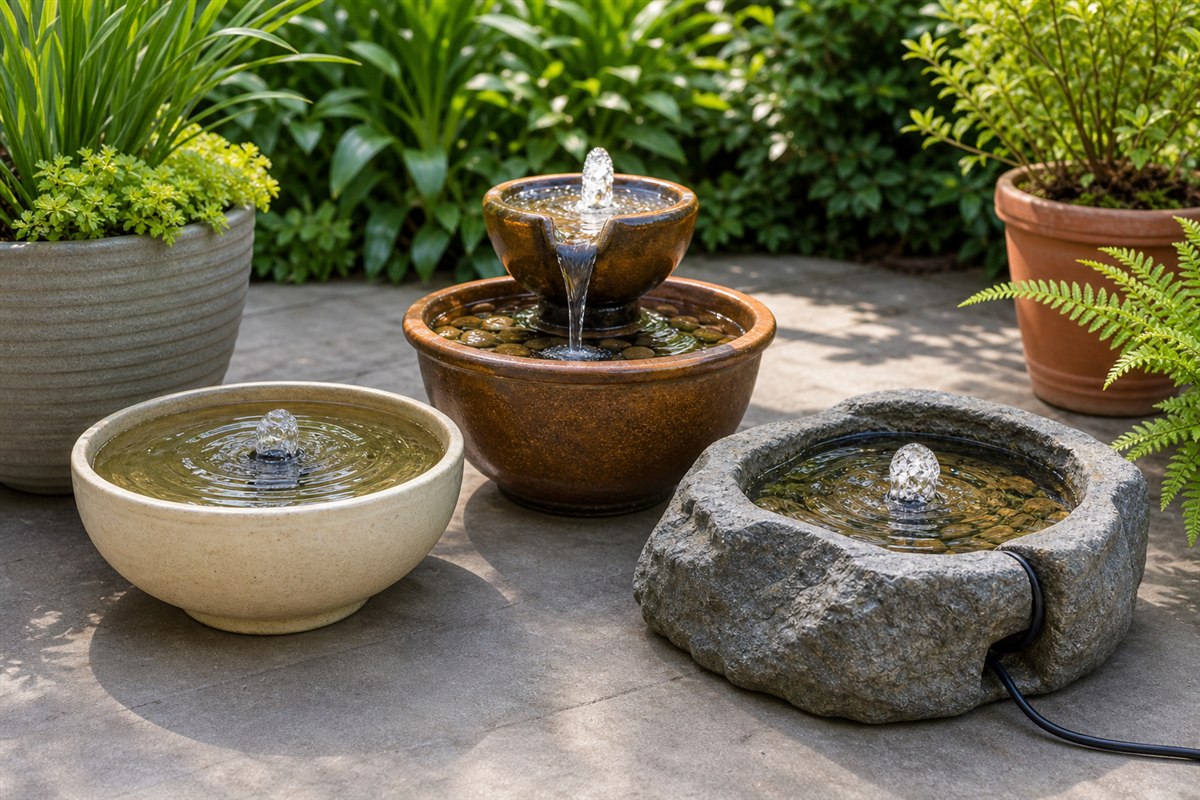
    Three small recirculating fountain types on stable patio surfaces with accessible maintenance space
    Reference: compare a bowl bubbler, a compact tier, and a stone-look basin by splash area, stability, pump access, and cleaning effort.

    A small fountain can bring gentle sound and movement to a patio or garden corner. It also needs a level base, a safe power source or enough sun, and easy access for cleaning and refilling.

    Choose the simplest fountain that suits your space and routine. A small bowl or self-contained unit is often easier for a first project than a permanent installation.

    Decide what the fountain should do

    A small tabletop water fountain with a gentle trickle near one outdoor chair.

    Do you want to hear water beside a chair, add movement to a patio, or soften an empty corner? Your answer decides the size and the best position. A tabletop fountain may be enough for a balcony; a wider container can suit a garden corner.

    Put it into practice

    • Create relaxing sound near seating.
    • Add a focal point to a patio.
    • Soften a plain wall or corner.
    • Bring movement into a container garden.

    Choose a simple fountain type

    A simple self-contained bowl fountain viewed close-up, water returning into its own basin, no external plumbing or elaborate decoration.

    Look for a self-contained fountain, a bowl with the right pump, or a small tabletop model. A DIY project can be as simple as assembling safe, compatible parts. Leave pump construction and electrical work to a qualified professional.

    Put it into practice

    • Self-contained patio fountain.
    • Container bowl fountain.
    • Tabletop fountain.
    • Solar fountain bowl.
    • Small wall-style fountain where safely installed.

    Test the position before buying

    A patio plan sketched on paper without text, showing a fountain circle away from the walking route and a chair beside it, with a pencil and tape measure.

    Mark the fountain’s width on the ground. Check that the base is level, the path stays open, and splashes will not make the surface slippery. Solar pumps need direct sun. Mains-powered fountains need an outdoor-rated setup installed and used according to local electrical rules and the maker’s instructions.

    Put it into practice

    • Place near seating but not in the walkway.
    • Check splash radius.
    • Keep access for cleaning.
    • Follow electrical and product safety instructions.

    Make cleaning and refilling easy

    A switched-off small fountain basin being wiped with a soft cloth, removable pump resting dry beside it and a disconnected plug fully away from water.

    Leave enough room to reach the pump and lift out debris. Decide how you will refill the water before placing a heavy container. Follow the product directions for cleaning, cold weather, and storage.

    Put it into practice

    • Plan how you will refill water.
    • Clean according to product directions.
    • Avoid setups that are hard to access.
    • Consider seasonal storage needs.

    Soften the edges with plants

    A low bowl fountain softly framed by two modest separate planters, one trailing over its own pot edge but not into the water; fountain basin fully accessible.

    Place one or two pots beside the fountain to connect it to the garden. Choose plants that suit the light and can tolerate any splash. Keep leaves clear of the pump and leave access for cleaning.

    Put it into practice

    • Frame with two matching planters.
    • Use trailing plants nearby.
    • Add stones or gravel for a clean base.
    • Keep the color palette calm.

    Fountain Placement Map

    Map the fountain before buying it

    A small fountain affects sound, splash, power, and cleaning access. Use this map to avoid choosing a beautiful piece that is annoying to maintain.

    Fountain placement path
    1Choose view
    2Check access
    3Plan splash
    View and sound A seating area or window-facing focal point
    • Place the fountain where you will actually see it.
    • Keep sound close enough to enjoy.
    • Frame it with plants after the position is set.
    Power and water Plug-in or refillable fountains
    • Check the cord route before buying.
    • Keep refill access open.
    • Use a level base so the water flows correctly.
    Splash and cleaning Tiny patios, decks, or narrow corners
    • Leave room to wipe and remove debris.
    • Avoid splash near cushions or wood edges.
    • Choose a size you can clean without moving furniture.

    Quick rule: The easiest fountain is the one with a beautiful view and boringly simple access.

    Related garden guides

    What to do next

    Choose another beginner guide, or use the free Garden Starter Planner to turn what you learned into a first-week plan.

    FAQ

    Are DIY garden fountains hard to maintain?

    They can be simple if the setup is small and accessible, but all fountains need some cleaning and refilling.

    Can I use a fountain on a balcony?

    Possibly, but check building rules, weight, drainage, splash, and safe power access first.

    What is the easiest water feature for beginners?

    A small self-contained fountain or tabletop fountain is usually easier than a permanent installation.