Skip to content

Author: GardenEleganceHub

  • Fall Garden Checklist for Beginners: 7 Decisions Before Cold Weather

    Fall Garden Checklist for Beginners: 7 Decisions Before Cold Weather

    ← All garden guides9 min read
    In this guide
    1. Make these seven fall decisions
    2. 1. Check your local frost window
    3. 2. Sort plants into act, watch, or leave
    4. 3. Remove disease, not every stem and leaf
    5. 4. Leave healthy habitat where it is safe
    6. 5. Keep checking moisture around the roots
    7. 6. Test the soil before adding products
    8. 7. Plant only when your local timing works
    9. A simple two-hour fall garden reset
    10. Seven beginner mistakes to avoid
    11. Frequently asked questions
    12. Next step
    13. Sources

    Start with your local forecast instead of a universal calendar. Note the expected first frost, tender plants, and unfinished crops. Remove clearly diseased material and leave healthy wildlife shelter where it is safe. Keep checking moisture, test the soil before adding products, and plant only when the timing suits your area and the plant.

    Not every fall garden job is urgent. You do not need to clear every bed, buy fertilizer, or squeeze in one more planting. Focus on three things: protect vulnerable plants, remove material that can spread a known problem, and leave the garden easier to use next spring.
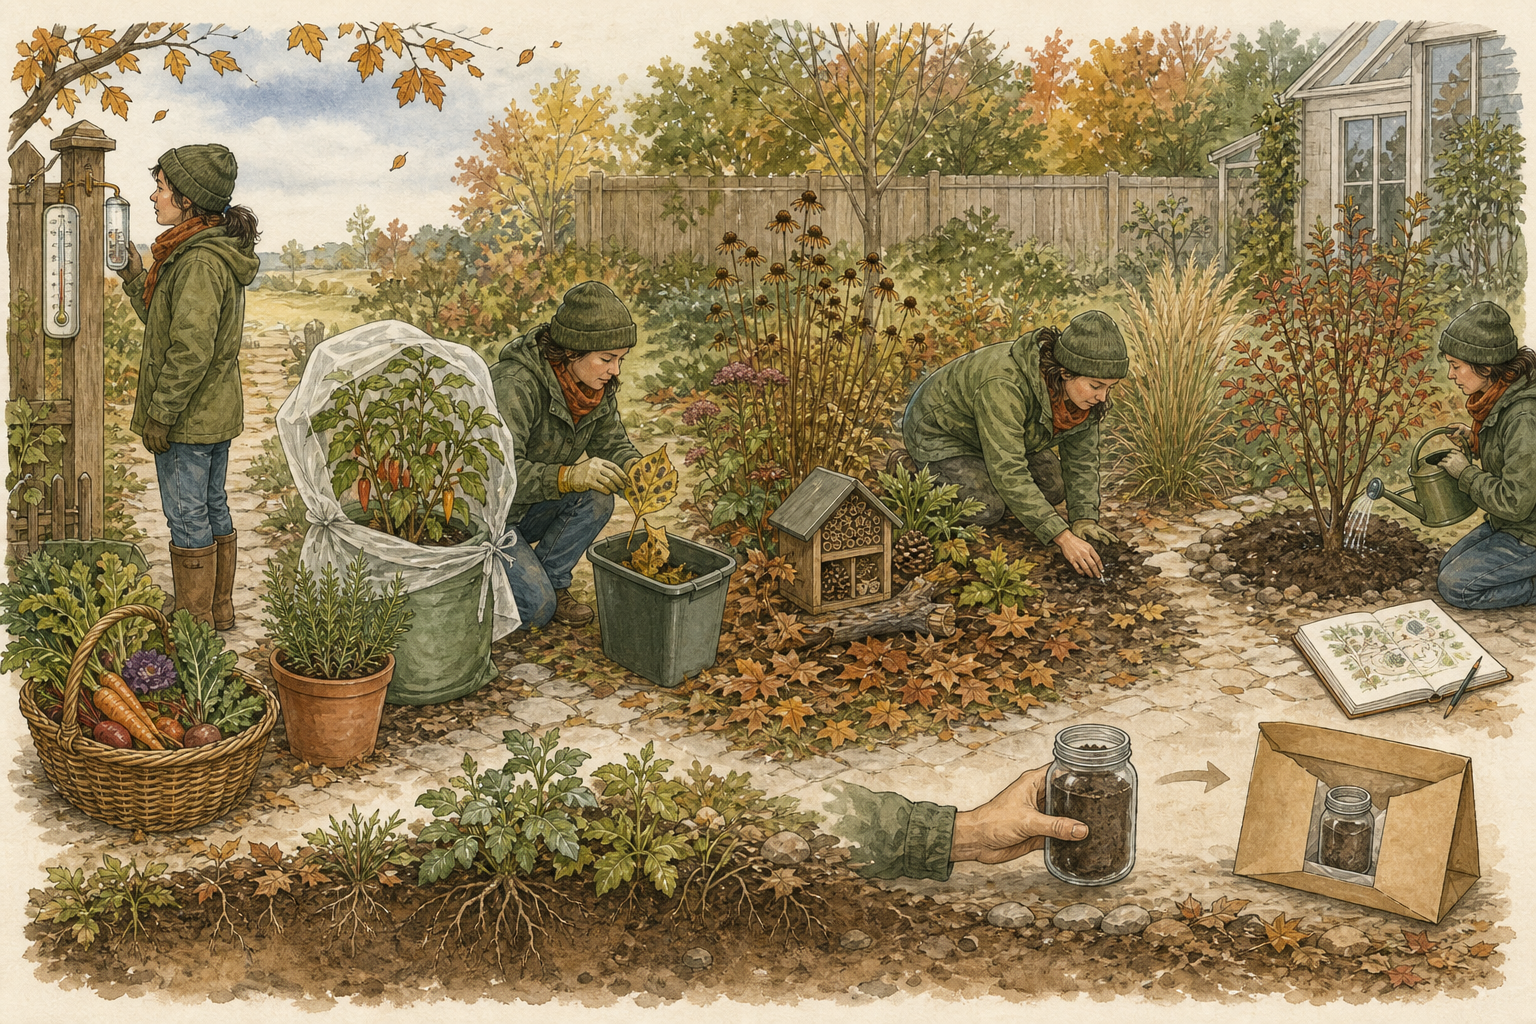
    Hand-drawn fall garden decision map showing a frost check, harvest basket, selective cleanup, healthy habitat, root-zone moisture check, soil sample, and new-plant watering
    Use the picture as a decision path: forecast first, then act only where the garden shows a real need.

    Make these seven fall decisions

    Use the decisions in order. A task that does not solve a real problem can wait.

    Decision Look for Useful action Do not assume
    1. Forecast Local frost window and current weather Record the likely window and recheck it One national date fits everyone
    2. Sort Tender plants, mature crops, unfinished crops Harvest, protect, move, or let go deliberately Every plant needs rescue
    3. Clean selectively Confirmed disease or damaged material Remove the problem material using local guidance Every stem and leaf is waste
    4. Keep habitat Healthy stems, leaves, bare soil, shelter Retain useful habitat where safe and suitable A bare garden is always healthier
    5. Check water Root-zone moisture, rainfall, new planting Water from observed need Cooler air means watering stops
    6. Test soil A real question about pH or nutrients Use a reliable lab before adding soil products More fertilizer is automatically better
    7. Plant locally A plant that suits the area, workable soil, enough water, and time for roots to settle Plant only when local guidance supports it “Fall planting” is one universal window

    1. Check your local frost window

    Gardener comparing a local weather forecast with frost on leaves while row cover waits nearby
    See it in practiceWatch the forecast and the gardenUse your local forecast with what you see outside. Keep frost cover ready for tender plants.

    Penn State Extension recommends checking frost and freeze dates before planning fall work. Crop timing also depends on the number of days to harvest and whether you start with seed or a young plant.[1] A calendar from social media cannot give the right planting or harvest date for every garden.

    Write down three things: the current ten-day forecast, the usual first-frost window for your area, and the most cold-sensitive plant still outside. Treat the long-range date as a planning range, not a guarantee. Recheck the short forecast before moving heavy pots, covering plants, or harvesting early.

    Look at the actual garden too. A sheltered wall, exposed balcony, low frost pocket, or windy roof terrace can behave differently from a regional weather station. The forecast starts the decision; the site observation finishes it.

    Done when: you can name the first vulnerable plant or crop and the weather event that would require action.

    2. Sort plants into act, watch, or leave

    Fall garden divided into diseased plants to remove, tender plants to watch and healthy seed heads to leave
    See it in practiceSort before you cutRemove diseased material, watch tender plants and leave healthy seed heads standing.

    Make three groups rather than one overwhelming list.

    • Act now: mature produce, visibly declining annuals, tender plants that already have a
    • verified indoor or protected destination, and damaged containers that cannot drain.

    • Watch: crops still maturing, recently planted perennials, and containers that may
    • need protection only if the forecast changes.

    • Leave: hardy established plants that fit the site and do not have a diagnosed problem.

    For vegetables, compare the time left in your season with the variety’s days to harvest. The count may start on the sowing date or the transplanting date, so check the packet or plant record.[1] If the crop will not have time to mature, harvest what you can. Compost healthy material if your local system allows it, and dispose of problem material according to local guidance.

    Do not move every outdoor plant into the house. Indoor light, pests, pets, humidity, and space may make that a worse environment. Bring in only plants you can identify, inspect, and care for safely.

    Done when: every vulnerable item is marked act, watch, or leave.

    3. Remove disease, not every stem and leaf

    One spotted diseased leaf clipped into a disposal bag while healthy foliage remains
    See it in practiceRemove only problem growthBag diseased leaves and keep clean stems and foliage in place.

    Clean up where there is a clear reason. Illinois Extension explains that much fall tidying is only for appearance, but diseased material needs special care.[3] If a plant had a confirmed leaf disease or another diagnosed problem, remove the affected stems and leaves. Use the disposal method advised for that problem and your area.

    Keep unknown or diseased material out of a cool home compost pile. Local collection systems differ, and some reach higher temperatures than home compost. If you do not know what is wrong with the plant, photograph it before removing it. Ask a local Extension service, plant clinic, or trusted garden adviser.

    Healthy annual material can be handled according to the needs of the bed and your compost system. Healthy perennial stems do not all require cutting at ground level. Remove anything that blocks a route, creates a safety problem, or has a clear disease reason; avoid clearing the whole garden only to make it look finished.

    Done when: the disease-risk material is separated from healthy habitat and ordinary garden residue.

    4. Leave healthy habitat where it is safe

    Seed heads, hollow stems and leaf litter sheltering a small bird and insects away from the garden path
    See it in practiceLeave useful habitatSeed heads, hollow stems and leaf litter can shelter wildlife where they do not block paths.

    A tidy photograph is not the only measure of a functioning garden. University of Minnesota Extension recommends retaining features such as leaves, some bare ground, brush, and standing stems because different native bees use different nesting places.[2]

    Apply that principle selectively. Keep healthy stems where they will not fall across a walkway. Let clean leaves rest in beds or designated habitat areas rather than sealing wet piles against doors, drains, or vulnerable structures. Preserve small areas of suitable bare ground instead of covering every surface automatically.

    Habitat does not cancel disease management, fire-safety requirements, tenancy rules, or local invasive-species guidance. The useful design is intentional: a clear path, a clean problem area, and a few protected habitat zones that you understand.

    Done when: you can point to what was removed for a reason and what was retained for a reason.

    5. Keep checking moisture around the roots

    Finger and moisture probe checking soil beneath mulch while water is directed at the root zone
    See it in practiceCheck beneath the mulchFeel the soil near the roots and water there only when it is drying.

    Cool air does not mean the soil around every plant is wet. Oregon State University Extension advises watering new fall plantings until regular rain begins, with extra checks during long dry periods.[5] Pots, raised beds, sheltered areas, and new plants can all dry at different speeds.

    Feel the soil below the surface, near the depth of the roots. Do not judge only by leaf colour or the dry-looking top layer. Think about recent rain, wind, pot size, drainage, and the plant’s growth stage. Water when the soil near the roots needs it, and make sure extra water can drain safely.

    Avoid a fixed “once a week” promise. A schedule can remind you to inspect, but the soil and weather decide whether watering is needed. Empty hoses and watering equipment according to manufacturer and local freeze guidance before cold can damage them.

    Done when: new plants and containers have a repeatable moisture-check routine and a safe watering route.

    6. Test the soil before adding products

    Clean soil sample and simple test kit beside an unused garden amendment scoop
    See it in practiceTest before adding anythingCollect a clean soil sample and wait for the result before adding a soil product.

    Fall can be a useful time to investigate a soil problem before the next growing season. Illinois Extension explains that a soil test can show pH and nutrient levels. The results help you add only what the soil needs and avoid fertilizer that could wash away.[4]

    Start with a question: poor growth in one bed, a planned food-growing area, or uncertainty after repeated fertilizer use. Follow the sampling instructions of a reliable local or accredited laboratory. Keep beds with different histories separate when the lab recommends it, and label every sample clearly.

    Do not buy lime, sulfur, or a general fertilizer before the result tells you what problem exists. A result still needs interpretation for the intended crop, soil type, and local recommendations. “Improve the soil” is not a measurement.

    Done when: you have a clear reason to test the soil, or you have decided that it needs no added products this fall.

    7. Plant only when your local timing works

    Small perennial being planted and watered during mild fall weather before hard frost
    See it in practicePlant at the right local timeSettle the roots, water well, and leave enough mild weather for new root growth.

    Fall can be a good planting time in some climates. Oregon State University Extension explains that warm soil and fall rain can help roots grow, although new plants may still need water and careful mulching.[5] Use this as a general idea, not as a planting date for every region.

    Before planting, check that the plant suits your area. The soil should be workable, not soaked or frozen. Make sure water is available and that mild weather should last long enough for roots to begin growing. Read the instructions for that exact bulb, seed, tree, shrub, or perennial.

    Mulch should solve moisture and temperature problems without being piled against woody stems. Mark small perennials that disappear in winter and record plant positions; a simple map prevents accidental digging next spring.[5]

    If the window is uncertain, prepare the site and wait. A plant purchased because a generic checklist said “plant in fall” is not automatically a good fit.

    Done when: every new planting has a locally suitable reason, position, water plan, and record.

    A simple two-hour fall garden reset

    Compact fall work area with rake, snips, watering can and separate piles for garden material
    See it in practiceKeep the reset manageableChoose one work area and sort material into keep, compost and dispose piles.

    Use this sequence for one small zone, not the whole property.

    1. 15 minutes — observe: photograph the area, note the forecast, and identify the one
    2. most vulnerable item.

    3. 25 minutes — sort: label each plant or pot as act, watch, or leave.
    4. 30 minutes — remove problems: collect confirmed diseased or unsafe material and keep
    5. it separate from ordinary residue.

    6. 20 minutes — protect function: clear the path, check drains, and retain one healthy
    7. habitat zone.

    8. 15 minutes — check water: feel the soil near the roots and water only the areas that need it.
    9. 10 minutes — record: sketch the bed, note what struggled, and save plant labels.
    10. 5 minutes — stop: do not invent extra work because time remains.

    You are finished when the garden is safer, easier to understand, and ready for the next weather change. It does not need to be stripped bare.

    Seven beginner mistakes to avoid

    Comparison of an over-cleared fall bed and a tidy habitat-friendly garden with a clear path
    See it in practiceLeave the garden ready, not bareA restrained tidy-up protects soil and habitat while keeping paths safe to use.
    • Following a national frost date instead of a current local forecast.
    • Harvesting or removing every plant because one tender crop is at risk.
    • Putting confirmed diseased debris into an unsuitable home compost pile.
    • Cutting every healthy perennial stem for visual neatness.
    • Stopping moisture checks as soon as daytime temperatures cool.
    • Buying fertilizer, lime, or sulfur before identifying a soil need.
    • Planting a bargain shrub without enough mild weather for roots to settle or easy access to water.

    Frequently asked questions

    Should I cut every perennial down in fall?

    No. Remove material for a clear disease, access, safety, or species-specific reason. Healthy stems can provide winter structure and habitat, while some plants have their own local care requirements.[2][3]

    Do I stop watering the garden in autumn?

    Not automatically. Check actual rainfall and root-zone moisture, especially for containers and new plantings. Adjust watering rather than following a rigid calendar.[5]

    Is fall always the best time to test soil?

    It can be a practical time when you have a real pH or nutrient question and can use a reliable lab. Follow the laboratory’s sampling and interpretation guidance.[4]

    Can I plant vegetables after summer?

    Possibly. Check your local frost dates and the variety’s number of days to harvest. Read the packet to see whether that count starts when you sow the seed or set out the young plant.[1]

    What is the most important fall garden task?

    Identify the first real risk in your own space. That may be a tender container, diseased material, a dry new planting, a blocked drain, or a crop close to maturity. Solve that one before adding optional chores.

    Next step

    Use the free GardenEleganceHub Starter Planner to define one manageable garden zone, or continue with the low-maintenance and container-gardening guides. This article contains no affiliate links, prices, or paid-product claims.

    Sources

    [1] https://extension.psu.edu/season-extenders-and-growing-fall-vegetables — Season Extenders and Growing Fall Vegetables [2] https://extension.umn.edu/garden-and-home/yard-and-garden/lawns-and-landscapes-in-minnesota/pollinator-nests — Nests for pollinators [3] https://extension.illinois.edu/news-releases/should-you-make-your-garden-tidy-fall-or-spring — Should you make your garden tidy in the fall or spring? [4] https://extension.illinois.edu/blogs/good-growing/2018-09-19-give-your-soil-check-fall — Give Your Soil a Check-up This Fall [5] https://extension.oregonstate.edu/news/fall-planting-offers-long-term-benefits-trees-shrubs-perennials — Fall planting offers long-term benefits
  • How to Clean Garden Rocks and Keep Them in Place

    How to Clean Garden Rocks and Keep Them in Place

    ← All garden guides11 min read
    In this guide
    1. Match what you see to the first job
    2. Find out why the rocks look dirty or keep moving
    3. Check five things before you clean
    4. Start with the gentlest cleaning method
    5. Save pressure washing for the last resort
    6. Do not use homemade chemical mixtures
    7. Choose an edge that can hold the rocks
    8. Install or repair the edge in this order
    9. Keep the job small with regular checks
    10. Edging comparison
    11. Eight common rock-bed mistakes
    12. A 20-minute reset
    13. Frequently asked questions
    14. Continue planning your garden
    15. Sources

    Before you act

    Clean without creating a new problem

    1. Look before cleaning: Identify the stone, nearby plants, direction of runoff, stains, and any edging that has moved.
    2. Start gently: Test a small hidden patch before trying stronger pressure or a cleaning product.
    3. Check the area a week later: Make sure the stone, plants, edge, and drainage still look sound.

    Start by removing leaves and loose debris before they break down. Pull weeds while they are small. Use plain water only when dry cleaning is not enough, and direct every rinse away from storm drains and erosion paths. If stones keep escaping, fix the edge, slope, traffic, or runoff instead of repeatedly replacing them.

    Garden stone lasts a long time, but it still collects dust, clippings, seeds, mud, and leaves. As that material breaks down, pale rocks turn grey and weeds can grow in the thin layer of dirt, even over landscape fabric.

    Pause before cleaning or digging: identify the stone, nearby plants, buried services, drainage path, and local wash-water rules. Test a hidden area first. This article is general guidance, not a site-specific drainage, utility, pesticide, or structural plan.

    Match what you see to the first job

    What you seeFirst actionWhy
    Leaves and loose debrisDry removalLift debris before it breaks down into a fine seedbed.
    New weedsHand removalPull early with the root and remove loose soil from the rock surface.
    Dust or light soil filmLow-volume waterRinse only after dry debris is gone and keep wash water on site.
    Mud mixed through small gravelLift and batch-cleanWork in sections so stone, soil, edging, and fabric can be inspected.
    Repeated rock migrationFix the edge or drainageCleaning will not solve runoff, foot traffic, or an undersized border.

    Find out why the rocks look dirty or keep moving

    Rock bed showing leaf debris, soil washing into gravel and a low spot where stones have moved
    See it in practiceFind the cause firstLeaf litter, moving soil and low spots need different fixes.

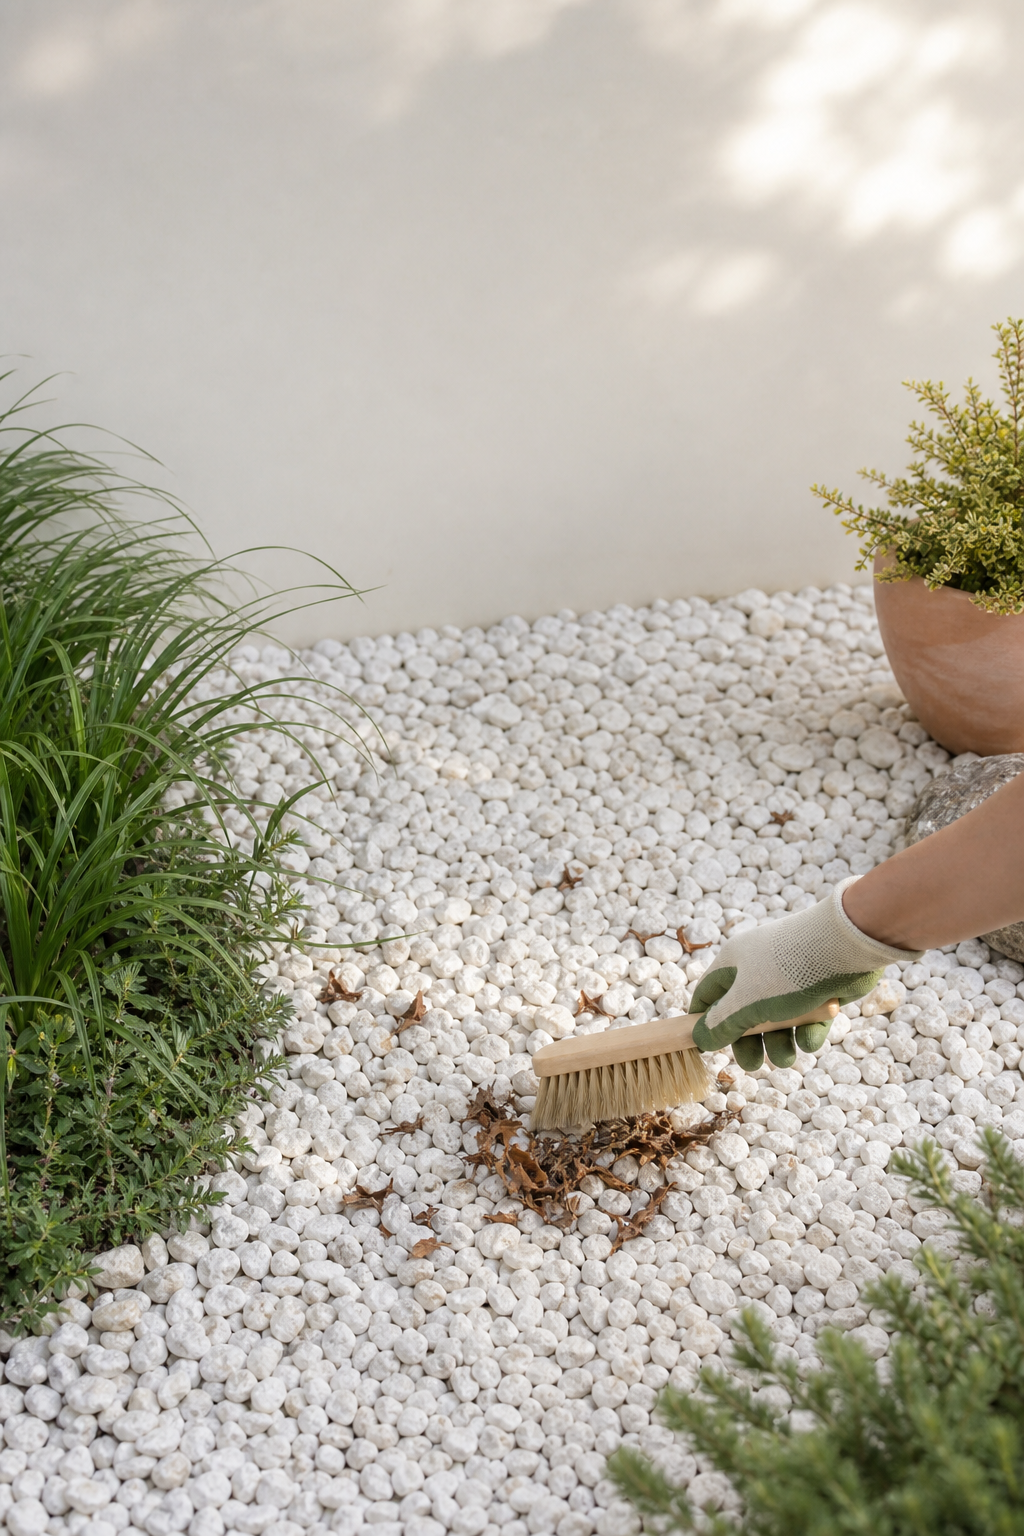
    White stone often looks dirty because small organic particles settle between the pieces. Leaves, grass clippings, pollen, soil, and blown dust collect faster near lawns, deciduous trees, downspouts, bare soil, and frequently used paths. Once that material decomposes, it becomes a shallow seedbed where weeds can germinate even when landscape fabric lies underneath.

    Rock that repeatedly leaves the bed has a different problem. Look for runoff from a roof or slope, wheels crossing the edge, pets or people cutting the corner, and an edge that sits too low or lacks anchoring. Cleaning the same scattered stone every month will not correct the movement.

    Before using water, see where it will flow. Take extra care near a driveway, street, storm drain, foundation, basement opening, or steep slope. A small, flat bed surrounded by soil where water can soak in is easier to manage. Moving water can carry dirt, chemicals, and garden waste away from the cleaning area.

    Check five things before you clean

    Close inspection of plant roots, drainage, edging, landscape fabric and a loose garden stone
    See it in practiceInspect before cleaningCheck roots, drains, edges, fabric and the stone surface before choosing a method.

    First, identify the material. Marble chips, limestone, granite, quartz, river rock, lava rock, and manufactured aggregates do not respond identically to acids, brushes, heat, or pressure. If the supplier’s specification is available, follow it. Test any method on a hidden handful rather than treating the entire bed.

    Second, check the plants. Keep stone away from trunks and stems, note shallow roots, and protect foliage from spray and flying grit. Rock can increase heat around some plants, so a stressed plant is not a good reason to add stronger cleaning chemicals.

    Third, find drains, slopes, and escape routes for wash water. Fourth, inspect the edge and underlying grade. Fifth, decide where collected leaves, weeds, muddy water, and sediment can be handled under local rules. A cleaning job is incomplete if the debris is simply moved into the street or drain.

    Start with the gentlest cleaning method

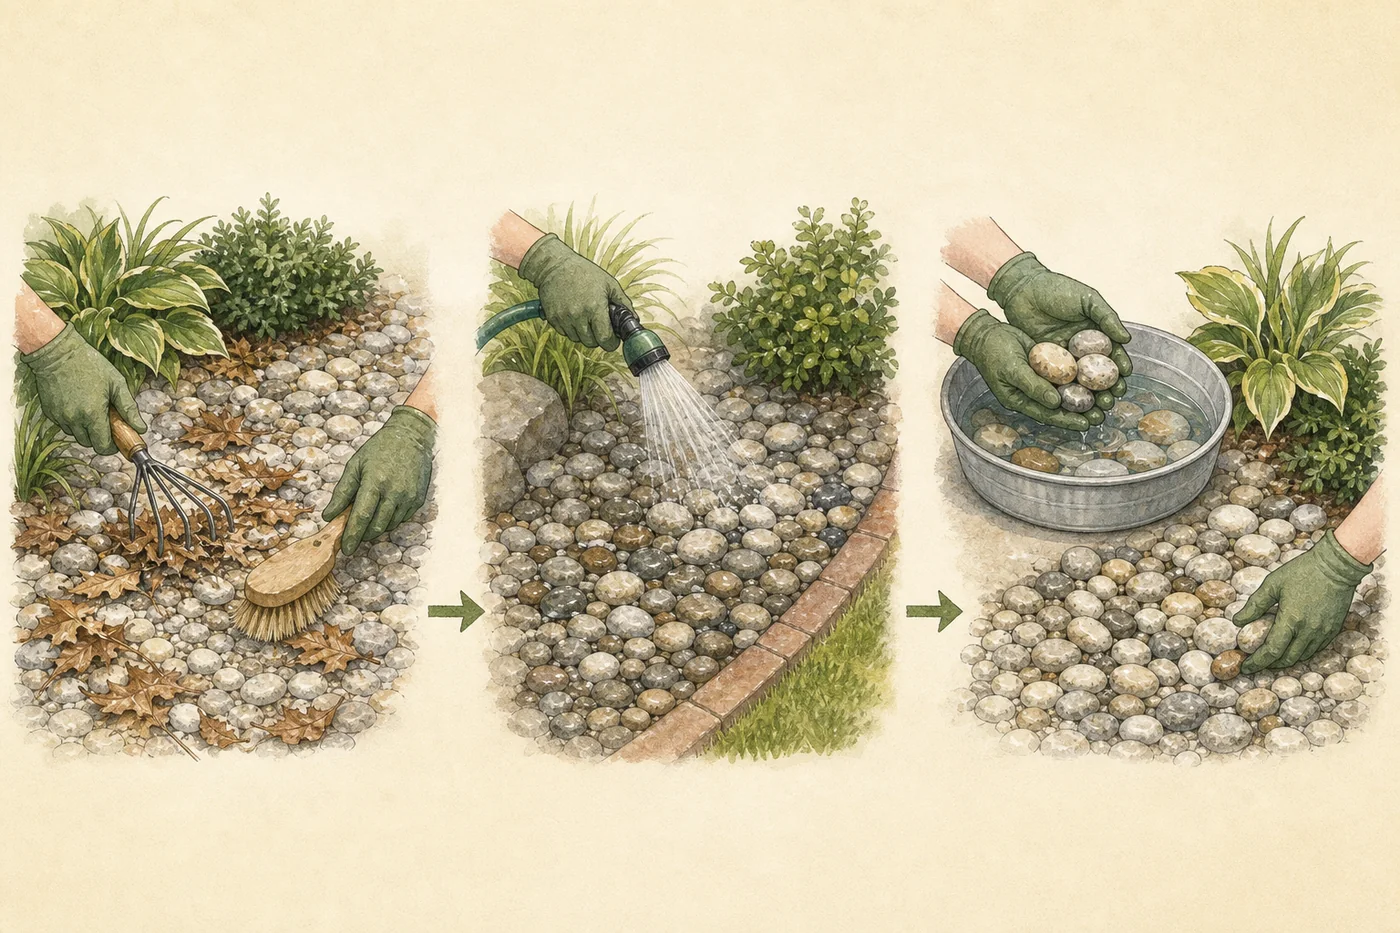
    Three-stage garden-rock cleaning workflow: dry debris removal, controlled plain-water rinse, and contained batch cleaning
    Escalate only as needed: remove dry debris first, use controlled plain water second, and reserve contained batch cleaning for stubborn buildup.

    Begin dry. Pick up larger leaves and twigs by hand, then use a flexible leaf rake, soft outdoor broom, or low blower setting to move light debris without launching stones. Work from the planted side toward a sheet or collection area. Wear eye protection and keep people, pets, windows, and vehicles away from flying grit.

    Next, pull weeds while the soil is slightly moist enough to release roots but not so wet that mud spreads across the stone. Hold nearby rock aside, remove the whole plant where possible, shake or brush soil into the bed, and take the plant away before it sets seed. Repeated early removal is easier than extracting mature roots woven through gravel and aging fabric.

    For light dust, first remove the dry material. Then use a hose nozzle or watering wand that you can control. Work in small sections and use as little water as possible. Send the water toward ground where it can soak in without overflowing, washing soil away, reaching a storm drain, or wetting a building.

    If mud is mixed throughout loose small stone, lift a manageable section into a sturdy perforated basket or sieve set over a contained collection area. Rinse with plain water, capture sediment, let the stone drain, and inspect the base before replacing it. Do not excavate broadly around tree roots or buried utilities.

    Save pressure washing for the last resort

    Low-pressure washer tested on a hidden patch with nearby plants covered and runoff contained
    See it in practiceUse pressure sparinglyProtect plants, test a hidden patch and contain runoff before cleaning a larger area.

    High pressure can scatter gravel, expose or tear landscape fabric, damage plant tissue, erode the base, and throw grit toward people or glass. It also creates dirty wash water quickly. For loose decorative rock, hand cleaning or batch washing is usually more controlled.

    Use a pressure washer only on a fixed hard surface that can safely take it. Sweep first. Use cold water, the lowest useful pressure, and no soap or chemicals. Keep the dirty water contained and protect storm drains. Follow the equipment instructions and local rules. Never point the jet at people, plants, loose stone, windows, electrical equipment, or an unstable edge.

    Stop if water begins carrying sediment off site, pooling by a foundation, or cutting a channel through soil. Appearance is not worth creating a runoff, erosion, or safety problem.

    Do not use homemade chemical mixtures

    Bucket of plain water and soft brush beside closed household bottles kept away from a rock bed
    See it in practiceKeep the mix simpleBegin with plain water and a soft brush. Leave household chemical bottles closed and set aside.

    Do not pour bleach, table salt, dish detergent, or a homemade vinegar-and-salt mixture over a planted rock bed. Salt can stay in the soil and harm nearby plants. Detergent and bleach can harm soil life and water quality. Strong weed-killing vinegar can burn skin and eyes, damage stonework, and injure wanted plants.

    A homemade mixture that browns weed leaves is not proof that it controlled the roots, and a nonselective treatment can injure every plant it touches. Hand removal and keeping organic debris out of the stone are the first controls.

    If pulling or cutting does not control the weeds, identify the weed and ask a local Extension service about other options. If you use a weed-control product, it must be approved for that exact place. Follow every instruction about distance, protective clothing, weather, amount, and disposal. A stronger mix is not safer or better.

    Choose an edge that can hold the rocks

    Anchored garden edging holding gravel at an even depth beside soil and plant roots
    See it in practiceSet a firm edgeThe right depth keeps gravel in place without trapping water around the plants.

    Edging has a practical job as well as a decorative one. It must hold back the stone and cope with the slope, moving water, mower wheels, foot traffic, freezing weather, and the shape of the bed. A shallow flexible strip may work on a flat curve but fail where gravel rolls downhill or wheels cross the boundary.

    For a flat lawn edge with little loose stone, a maintained spade-cut trench may be enough. Metal creates a narrow visual line; composite edging follows curves; pavers create a wider mowing strip; a concrete curb offers stronger permanent restraint. No material fixes bad grading, and every system needs safe installation and periodic inspection.

    The visible height should restrain the stone without creating a trip or mower hazard. Check manufacturer instructions rather than copying a universal depth. On a slope or beside concentrated runoff, obtain site-specific help before assuming a taller edge alone will solve erosion.

    Install or repair the edge in this order

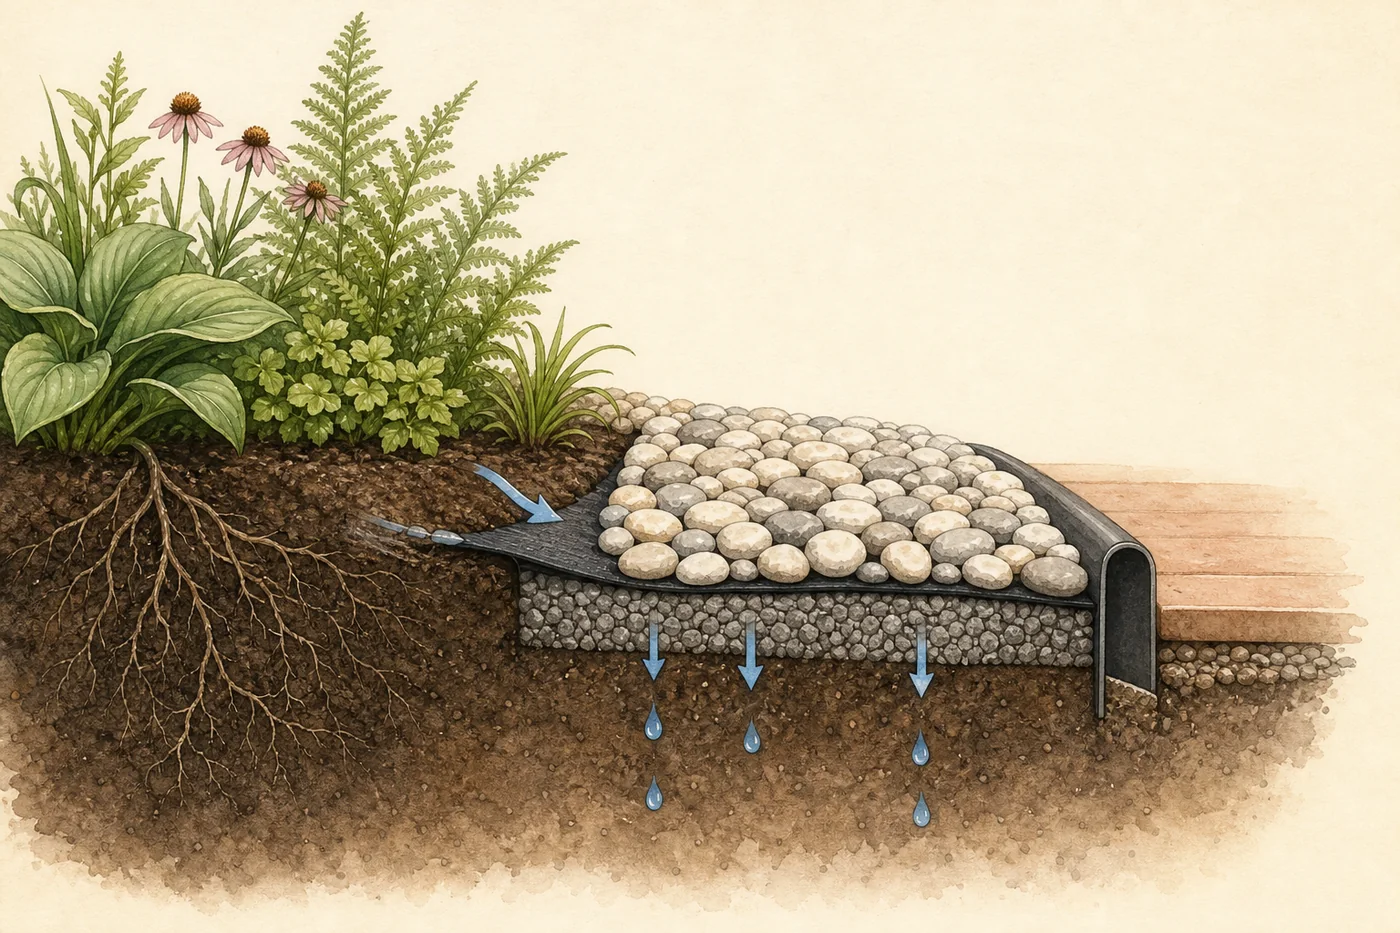
    Cross-section of a drained decorative-rock bed with a stable edge, compacted base, and protected plant roots
    A stable edge, sensible rock depth, and a draining base solve movement more reliably than repeated surface cleaning.

    Mark the desired line with a hose or removable paint and walk the route from both directions. Confirm property limits, irrigation, lighting wires, drains, and other buried services. In the United States, contact 811 before digging; elsewhere, use the local utility-location service and required waiting period.

    Move escaped stone back into the bed and remove accumulated soil at the boundary. Check the grade before digging: the finished edge must not direct water toward the house or trap it around plant crowns. Avoid deep trenching around established trees and shrubs, where important roots may be close to the surface.

    Prepare a stable line or base suitable for the selected material, install and anchor it according to its instructions, and connect sections without sharp projections or large gaps. Backfill both sides, return stone without burying plant stems, and test the edge with gentle hose flow before considering the job finished.

    After the first heavy rain and after freeze-thaw periods, inspect for low spots, heaving, soil washing through gaps, or rock crossing the boundary. Correct the cause early rather than adding another layer of stone.

    Keep the job small with regular checks

    Gloved hand removing leaves, replacing loose stones and clearing a garden drain
    See it in practiceReset little and oftenLift debris, return loose stones and clear the drain while the job is still small.

    During leaf fall or active lawn mowing, remove loose debris frequently before it breaks down. Pull new weeds before flowering or seed set. After storms, return displaced stone and look for the water path that moved it. These short dry-cleaning visits do more than an annual aggressive wash.

    Once or twice a year, check stone depth, bare fabric, buried plant stems, compacted soil, edge anchors, trip hazards, drainage outlets, and the gap around trunks. Do not keep adding rock until the bed sits above paths or directs runoff somewhere new.

    Accept some natural weathering. Outdoor stone will not remain showroom-white in every climate. A clean edge, low debris load, controlled weeds, and safe drainage usually make the bed look intentional without chasing a chemically bright finish.

    Edging comparison

    EdgeUseful forStrengthWatch for
    Spade-cut edgeFlat lawn beside a small bedLow material use and easy to reshapeNeeds regular recutting and does not restrain loose gravel on a slope
    Metal edgeClean curves and narrow transitionsSlim profile with useful restraintMust be anchored, finished safely, and checked for exposed sharp edges
    Composite or plastic edgeGentle curves and lighter-duty bedsFlexible and comparatively easy to adjustCan heave, wave, or become visible when poorly anchored
    Brick, paver, or stone curbStraight runs, mowing strips, and formal bedsBroad, visible border that can separate wheels from gravelNeeds a stable base; movement creates gaps that catch soil and seeds
    Concrete curbPermanent, high-restraint layoutsStrong containment with little seasonal repositioningCostly to change and can redirect water if the grade is wrong

    Eight common rock-bed mistakes

    Small rock-bed examples showing buried plants, exposed fabric, weak edges, weeds, blocked drainage and loose stones
    See it in practiceSpot problems earlyLook for buried crowns, exposed fabric, weak edges, weeds, blocked drains and displaced stone.
    • Adding new white rock over leaves, soil, weeds, or exposed failing fabric.
    • Using a blower so aggressively that gravel becomes a projectile.
    • Pressure washing loose stone without containing sediment and wash water.
    • Pouring bleach, salt, detergent, or a homemade weed mixture across a planted bed.
    • Installing edging before checking the grade and source of runoff.
    • Digging a deep trench through tree roots or before buried utilities are marked.
    • Setting an edge high enough to become a trip, mower, or exposed-sharp-edge hazard.
    • Assuming landscape fabric makes a rock bed weed-free or maintenance-free.

    A 20-minute reset

    One freshly tidied section of a rock bed beside a small rake, bucket, brush and gloves
    See it in practiceWork on one small patchUse a rake, bucket and brush, then stop when that area is tidy.
    1. Photograph the bed and note the slope, drains, plants, and escaped-rock pattern.
    2. Collect leaves, twigs, clippings, and trash without disturbing the stone base.
    3. Pull the newest weeds and remove their loose soil.
    4. Return escaped stone and expose the existing edge.
    5. Test a small plain-water rinse only if dry cleaning is insufficient.
    6. Mark any low, heaved, sharp, or failed edge section for a properly planned repair.

    Frequently asked questions

    How do I make white garden rocks look white again?

    Remove leaves and loose soil first, hand-pull weeds, then test a plain-water rinse on a hidden area. Some mineral staining and natural weathering may not be safely reversible.

    Can I use bleach to clean landscape rocks?

    Do not broadcast bleach through a planted bed. It can affect plants, soil life, surfaces, and runoff. Use dry cleaning and plain water first, and seek material-specific guidance for a stain that remains.

    Why do weeds grow through landscape fabric and rock?

    Wind, runoff, mowing, and decomposing leaves deposit soil and seeds above the fabric. Weeds can then germinate in that new surface layer, while perennial roots may also persist.

    What edging keeps gravel in place best?

    The answer depends on slope, rock depth and size, traffic, runoff, and permanence. A stable paver or concrete curb restrains more than a shallow flexible strip, but grading must be correct before choosing either.

    Should landscape edging be level with the ground?

    Follow the system’s instructions and make the visible height sufficient to restrain the stone without creating a trip or mower hazard. There is no single safe height for every bed.

    Continue planning your garden

    Sources

    This draft was checked against Extension and government guidance on 2026-07-30:

    Editorial note: this article contains no affiliate link, product price, paid-product promotion, or unsupported before-and-after claim.

  • How to Prune Hydrangeas Without Losing Next Year’s Blooms

    How to Prune Hydrangeas Without Losing Next Year’s Blooms

    ← All garden guides10 min read
    In this guide
    1. Find your hydrangea in this quick guide
    2. Identify the plant before choosing a date
    3. How to identify your hydrangea
    4. Prune in this safe order
    5. How to prune old-wood hydrangeas
    6. How to prune new-wood hydrangeas
    7. If it reblooms—or you do not know the type
    8. Deadheading is not the same as resizing
    9. If your hydrangea does not bloom
    10. Eight mistakes that can cost flowers
    11. Make the pruning decision in two minutes
    12. Frequently asked questions
    13. Continue planning your garden
    14. Sources

    Before you act

    Identify before pruning

    1. Photograph it in flower: Note when it blooms, where the buds sit, and which stems are dead or damaged.
    2. Wait if you do not know the type: Remove only wood that is clearly dead, damaged, or weak.
    3. Step back before another cut: Give yourself time to check the shape and confirm the plant type.

    Quick answer: identify the hydrangea before pruning. Panicle and smooth hydrangeas usually bloom on new wood and can be pruned in late winter or early spring. Bigleaf, mountain, oakleaf, and climbing hydrangeas commonly bloom on old wood and should be pruned, if needed, soon after flowering. Some reblooming cultivars flower on both.

    Before you prune, answer one question: does this hydrangea make flower buds on old stems or new growth? Cutting at the wrong time can leave you with a healthy green shrub but few flowers. If you cannot identify the plant, make only essential cuts and wait.

    Pause before pruning: This is general garden guidance, not a diagnosis for a specific plant. Local weather, cultivar behavior, disease, and winter damage can change the right action. Use the exact plant label and local Extension advice when available.

    Find your hydrangea in this quick guide

    Plant viewCommon typeBotanical nameBlooms onUsual pruning window
    Bigleaf (mophead or lacecap)Hydrangea macrophyllaUsually old wood; some varieties bloom on bothAfter flowering, if pruning is needed
    MountainHydrangea serrataUsually old wood; check the exact varietyAfter flowering, if pruning is needed
    OakleafHydrangea quercifoliaOld woodImmediately after flowering
    ClimbingHydrangea anomala subsp. petiolarisOld woodAfter flowering, only when necessary
    PanicleHydrangea paniculataNew woodLate winter or early spring
    SmoothHydrangea arborescensNew woodLate winter or early spring

    Use the table as a starting point, then check the label for your exact variety. Some reblooming bigleaf and mountain varieties can flower on both old stems and new growth.

    Identify the plant before choosing a date

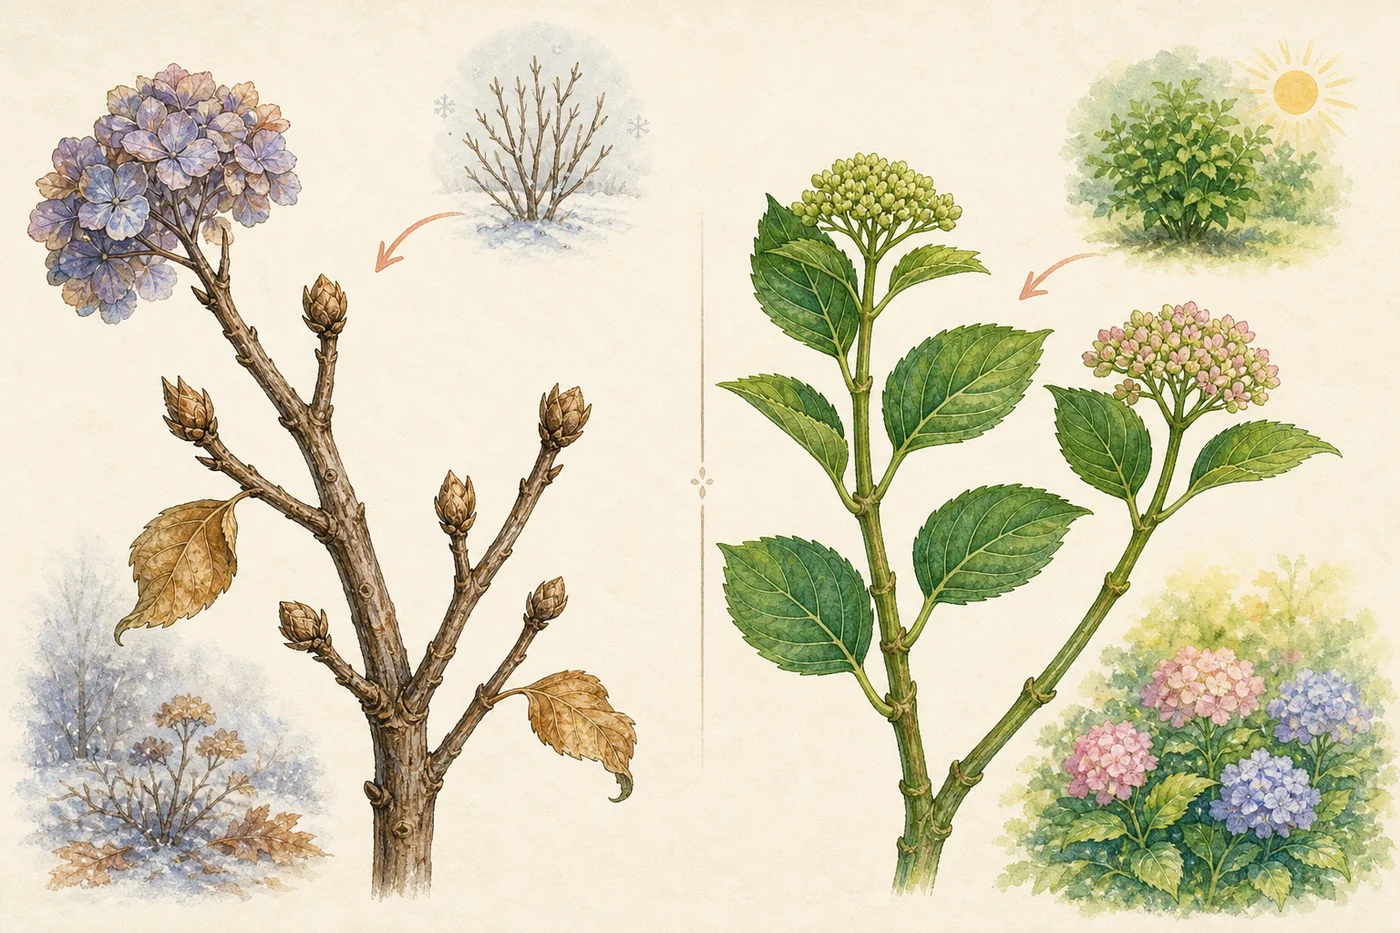
    Old-wood hydrangea stems carry buds from the previous season, while new-wood types form flowering growth in the current season
    Old wood carries last season’s framework and buds; new wood produces the current season’s flowering growth.

    Do not begin with the calendar. Begin with the plant tag. Hydrangeas do not all form flower buds at the same time. An old-wood hydrangea carries much of next season’s flower potential on stems that grew last year. A new-wood hydrangea forms flower buds on stems produced in the coming growing season.

    That difference changes the safe pruning window. Cutting an old-wood type in autumn, winter, or early spring can remove buds before they open. Panicle and smooth hydrangeas, by contrast, can be shaped in late winter or early spring because their flowers form on the new growth that follows.

    Some modern bigleaf and mountain varieties bloom on both old stems and new growth. They are a little more forgiving, but they still do not need hard pruning. The exact variety name is more reliable than flower colour or a broad shop label.

    How to identify your hydrangea

    Identify firstCompare the plant label, bloom shape, leaves and a photo before deciding when to prune.

    Look for the original plant label, order confirmation, or nursery receipt. Search the exact variety name on a university Extension or breeder website. A broad name such as ‘blue hydrangea’ is not enough. Flower colour does not show whether it blooms on old stems or new growth.

    If the label is gone, compare several clues: the leaves, flower shape, full-grown form, and usual flowering time. Oak-shaped leaves strongly suggest an oakleaf hydrangea. Upright cone-shaped flowers often point to a panicle type. Rounded flower heads may point to a bigleaf type, but the exact variety can still change the pruning advice.

    When identification is uncertain, take clear photos of the whole plant, leaves, stems, and flowers and ask a reputable nursery or local Extension service. The safest temporary choice is to remove only confirmed dead, damaged, or diseased wood and postpone size reduction.

    Prune in this safe order

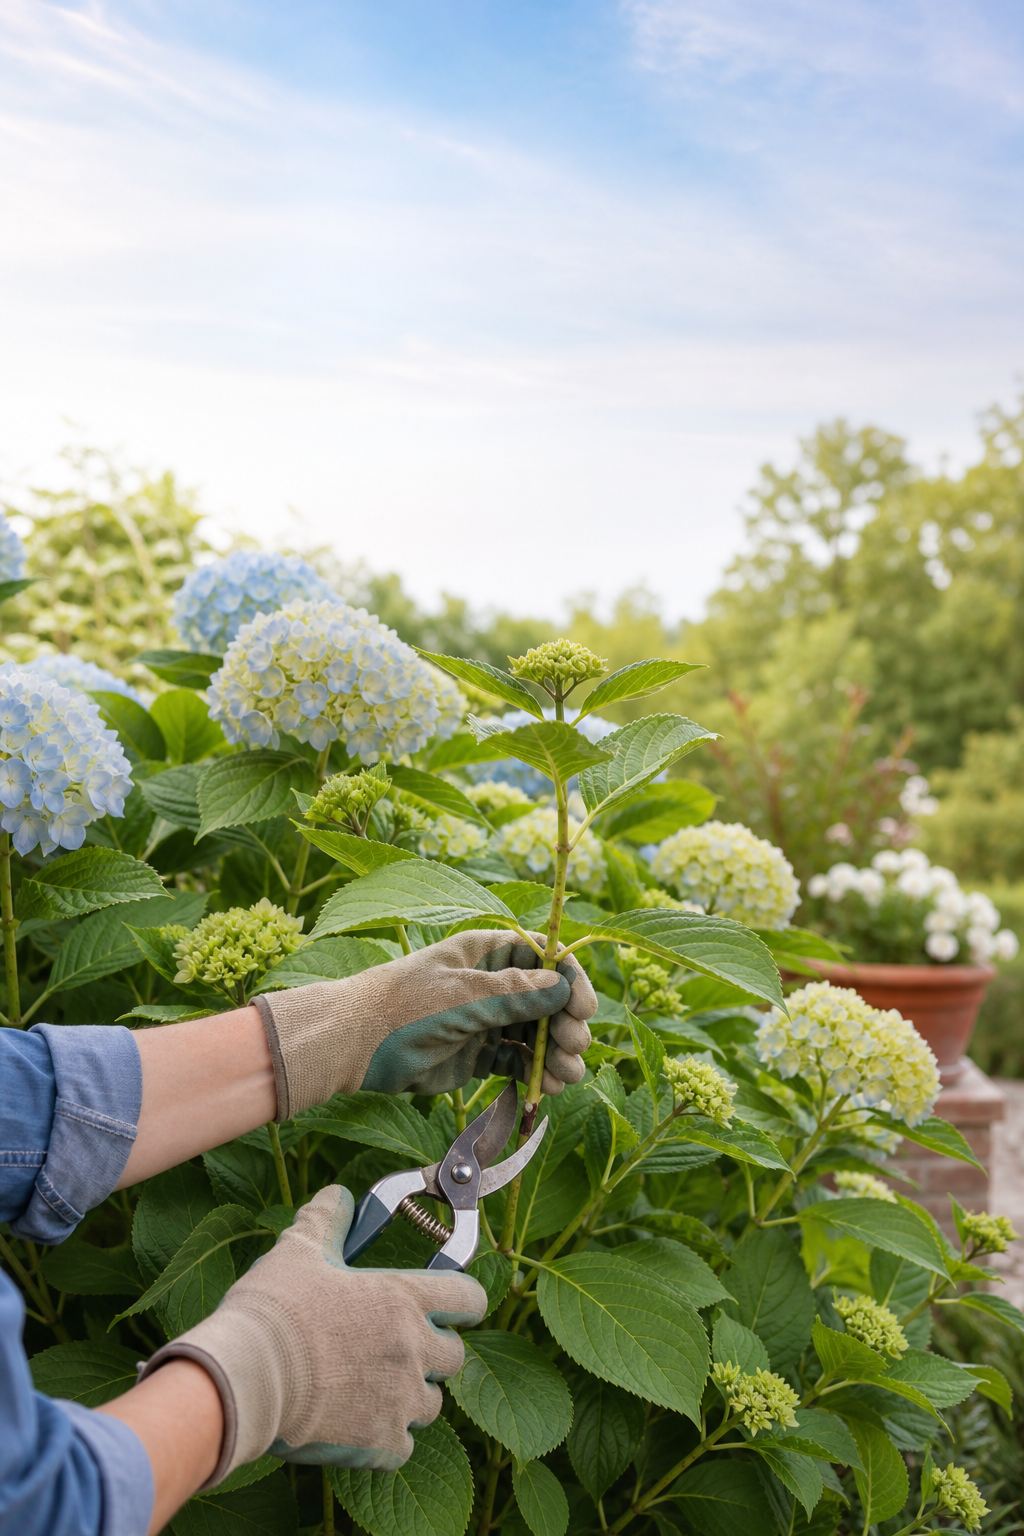
    A gardener positions bypass pruners just above a healthy outward-facing hydrangea bud
    When a heading cut is safe for that hydrangea, place clean bypass pruners just above a healthy bud that faces outward.

    Choose a dry working period and wear gloves and eye protection. Use sharp bypass pruners for small stems and loppers or a pruning saw only when the branch size requires them. Clean away sap and plant debris. Disinfect tools before use and after working on a plant that may be diseased so tools do not carry pathogens to another shrub.

    Step back and name the reason for every cut. Start with dead, broken, rubbing, or obviously diseased stems. Then consider a small number of older stems if the center is crowded. A thinning cut removes a stem at its origin and usually preserves the shrub’s natural outline better than shearing every stem to the same height.

    For a heading cut on a suitable new-wood type, cut just above a healthy outward-facing bud. Do not leave a long stub, and do not cut into the bud. Stop frequently and view the whole plant. A slightly uneven natural framework is usually healthier and more attractive than a tight dome.

    Remove less than you first think. Hydrangeas do not need pruning every year, and pruning cannot fix a shrub that is too large for its position. If you need severe cuts every year to keep it away from a path or window, move it or replace it with a smaller variety.

    How to prune old-wood hydrangeas

    Protect old-wood budsAfter flowering, remove only what needs to go and keep the older budded framework intact.

    Bigleaf, mountain, oakleaf, and climbing hydrangeas commonly flower on old wood. If they need shaping, work soon after flowering rather than waiting for the dormant season. This gives the plant time to produce and mature the stems that can carry the following year’s flower buds.

    Begin by removing dead wood and any stem that is broken or rubbing. For an established multi-stem shrub that has become congested, remove a limited number of the oldest stems at the base. Keep healthy younger stems because they form the future framework. Avoid shortening every stem simply to make the plant look even.

    Do not use one fixed date for every climate. Flowering and bud growth change with the hydrangea type, exact variety, and local weather. Check the variety instructions when flowering ends. If the safe window has passed, waiting until next year is often better than making a large late cut.

    How to prune new-wood hydrangeas

    Shape new wood modestlyIn late winter or early spring, make measured cuts that leave a strong, open framework.

    Panicle and smooth hydrangeas form flowers on the current season’s growth, so late winter or early spring is the usual pruning window. Start by removing dead and damaged stems. Then thin crowded growth and shorten selected stems only enough to create a strong, open framework.

    Some mature smooth and panicle hydrangeas can recover from hard pruning, but they do not all need it. Leaving several strong stems can support heavy flower heads. Give young plants time to settle in before making severe cuts.

    For panicle hydrangeas trained as small trees, preserve the trunk and intended branch structure. Remove shoots that undermine that form rather than treating the plant like a ground-level shrub. Large, high, damaged, or structurally important branches are a reason to use a qualified professional.

    If it reblooms or you do not know the type

    When the type is uncertainLeave the structure in place, record what you see and wait for clearer evidence.

    A reblooming bigleaf variety can flower on both older stems and new growth. You are less likely to lose every flower, but hard pruning may still delay or reduce the first display. Keep as many healthy stems as you can and follow the instructions for the exact variety.

    For an unknown plant, observe it for one full flowering cycle. Record when flowers appear and which stems carry them. Photograph leaves and flower heads and compare them with reliable identification resources. During that observation year, limit work to dead, damaged, rubbing, or diseased material.

    Do not assume a shrub is dead because its outer stems look bare early in spring. Cold-climate hydrangeas can leaf out slowly, and winter injury may be uneven. Wait for growth to show where practical, then prune damaged stems back to live tissue.

    Deadheading is not the same as resizing

    Deadhead above healthy growthFollow the stem down from the faded flower and stop above the first healthy leaves and buds.

    Deadheading removes a spent flower head; structural pruning removes stems. You can leave dried flower heads for winter interest or remove them carefully. On an old-wood type, follow the stem down only to the first healthy pair of buds and avoid turning a cosmetic trim into a major cut.

    A hydrangea does not need deadheading to survive, and removing old flowers does not guarantee more blooms. Treat it as an appearance choice. If you cannot see healthy buds clearly, leave the flower head until the plant begins to wake.

    If your hydrangea does not bloom

    Diagnose before pruningShade, frost damage and overly lush growth can all reduce flowering. A harder cut is not the first answer.

    Pruning is only one possible cause. Winter cold, late freezes, animals, or an exposed position can damage buds on old stems. Too little light can reduce flowers. Too much high-nitrogen fertilizer can produce leaves instead of blooms. A newly planted shrub may also be putting its energy into root growth.

    Do not reach for fertilizer first. Confirm the hydrangea type and exact variety, then check when it was last pruned. Look for stems damaged over winter. Compare the actual light with the plant’s needs, and think back over watering, drainage, and fertilizer use. One year without flowers does not mean the plant needs a hard cut.

    If leaves or stems show unusual spots, cankers, distortion, or widespread dieback, avoid moving from that plant to healthy shrubs with the same uncleaned tools. Photograph the symptoms and seek a local diagnosis before making a major treatment decision.

    Eight mistakes that can cost flowers

    Keep the natural outlineLight thinning preserves a hydrangea’s shape better than shearing every stem to one height.
    • Pruning every hydrangea in late winter without identifying it.
    • Using flower color alone to decide the species or pruning group.
    • Shearing the shrub into a tight ball and leaving a dense twiggy surface.
    • Cutting a young or stressed plant hard because a mature example tolerated it.
    • Assuming a reblooming variety cannot lose flowers after severe pruning.
    • Treating deadheading as permission to shorten whole stems at any time.
    • Using dirty or dull tools, especially after working on a diseased plant.
    • Trying to control a plant that is too large for its site through annual severe cuts.

    Make the pruning decision in two minutes

    Use the two-minute checkFind the label, compare old and fresh stems, and keep the pruners closed until the growth type is clear.
    1. Do you know the hydrangea type and exact variety? If not, remove only stems that are clearly dead, damaged, rubbing, or diseased.
    2. Does it bloom on old wood? Prune only if needed, soon after flowering.
    3. Does it bloom on new wood? Prune in late winter or early spring, preserving a sensible framework.
    4. Does it bloom on old stems and new growth? Follow the variety instructions and keep healthy stems if you want the first flowers.
    5. Is the plant too large for the space? Move it or choose a smaller variety instead of making severe cuts every year.

    Frequently asked questions

    Quick-reference cuesFlower form, buds, tool choice and seasonal timing are the four clues to revisit.

    What month should I prune hydrangeas?

    There is no safe month for every hydrangea. Prune panicle and smooth types in late winter or early spring. Prune old-wood types, if needed, soon after flowering. Adjust the timing for your climate and exact variety.

    Can I cut my hydrangea all the way back?

    Some established smooth and panicle hydrangeas tolerate hard pruning, but it is not required and may remove a useful supporting framework. Do not cut an old-wood type to the ground if you want the buds already carried on its stems.

    How can I tell whether a branch is dead?

    Wait for growth to show when practical. Dead stems are commonly dry and brittle, while living tissue remains flexible and shows healthy buds or green tissue beneath a very light scratch. When uncertain, seek local help before removing a major stem.

    Should I remove brown hydrangea flowers?

    You may leave them for winter interest or deadhead them. On old-wood types, cut only above the first healthy buds below the flower head and avoid shortening the whole stem.

    Will pruning make my hydrangea bloom more?

    Correct pruning can preserve flowering wood and improve an overcrowded shrub, but it cannot guarantee more flowers. Light, winter injury, plant age, water, and fertilizer also affect bloom.

    Continue planning your garden

    Plan around the plantMatch the job to the season and weather, then prepare clean tools and protective gloves.

    Sources

    Check the exact plantThe variety label and reliable references are more useful than a date copied from a different climate.

    This draft was checked against university Extension guidance on 2026-07-30:

    Editorial note: external sources are included for evidence and reader verification. This article contains no affiliate link, product price, or paid-product promotion.

  • Vertical Gardening Ideas for Beginners: Use Walls, Rails, and Height

    Vertical Gardening Ideas for Beginners: Use Walls, Rails, and Height

    ← All garden guides5 min read
    In this guide
    1. 1. Check the support with wet pots
    2. 2. Match the plant to the container depth
    3. 3. Plan how you will water every level
    4. 4. Pick one simple layout
    5. 5. Check the garden from top to bottom each week
    6. Choose your next guide
    7. Check the support, runoff, wind, and reach
    8. Sources and verification

    Before you act

    Plan vertical weight and maintenance

    1. Record: Identify the fixing surface, mature plant weight, wind exposure, drainage path, and safe reach height.
    2. Decide: Use one supported vertical zone and keep routine care within comfortable reach.
    3. Review: Recheck the result after one ordinary week before expanding the project.

    Plan the frame or stand before choosing plants. A safe setup carries the weight of wet growing mix and mature plants, gives roots enough room, drains without damaging the surface below, and stays within easy reach. Then choose plants that suit the container depth, light, and wind.

    Choose a setup

    Choose a structure you can safely use

    Before you count pots, check that the roots will have room and that you can reach every plant.

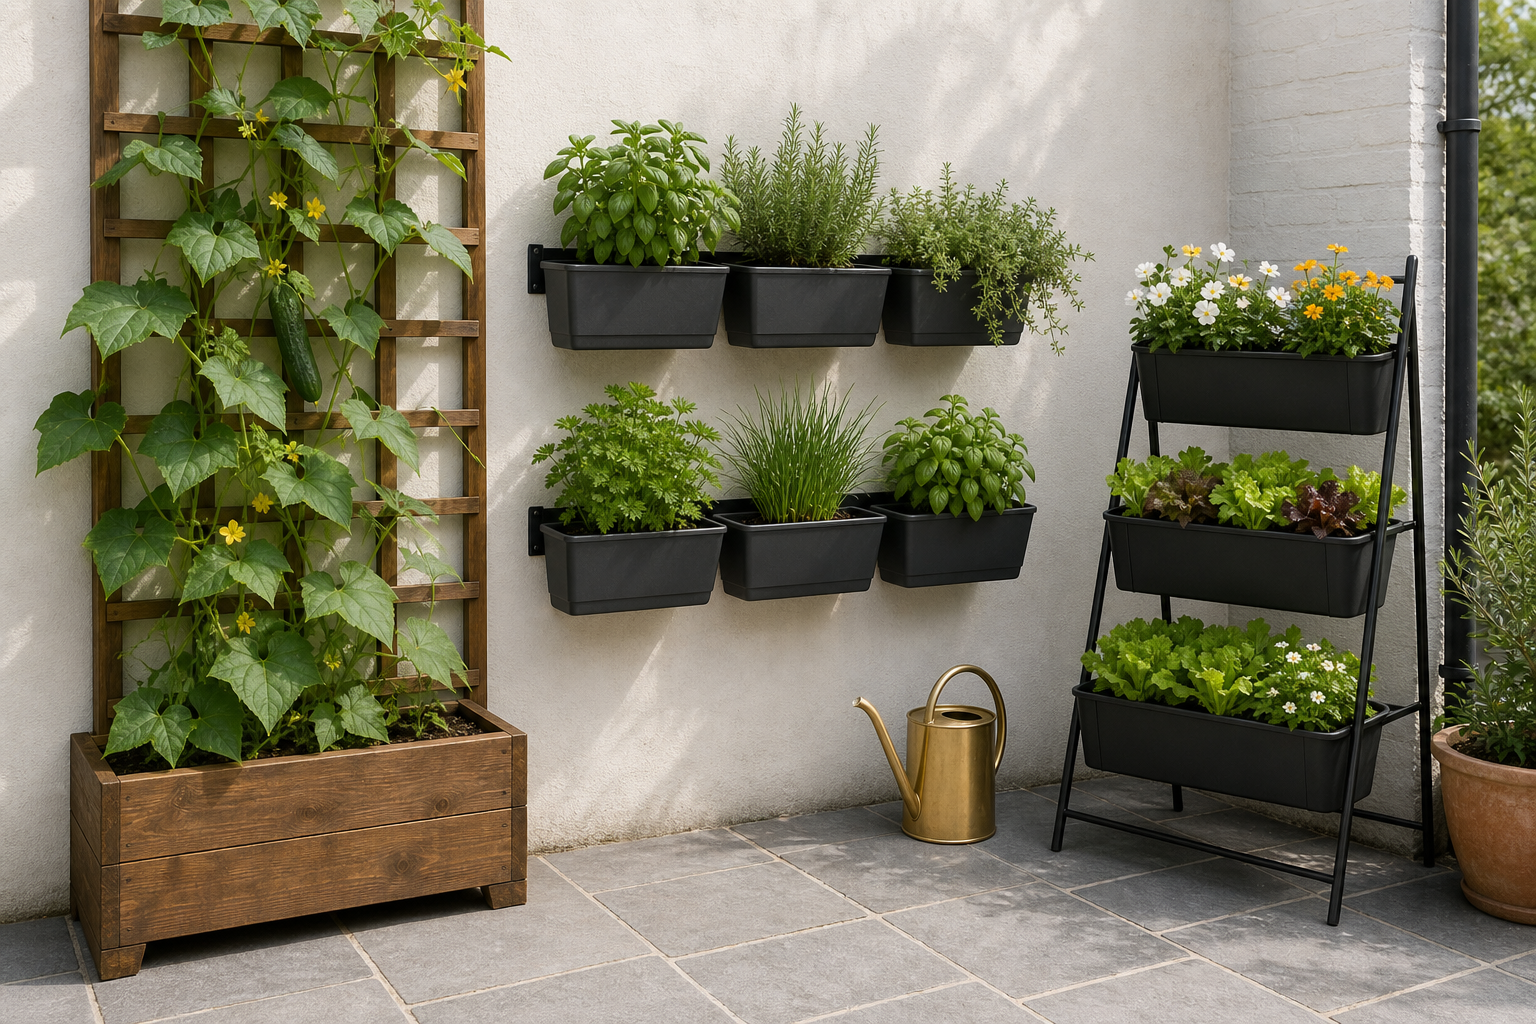
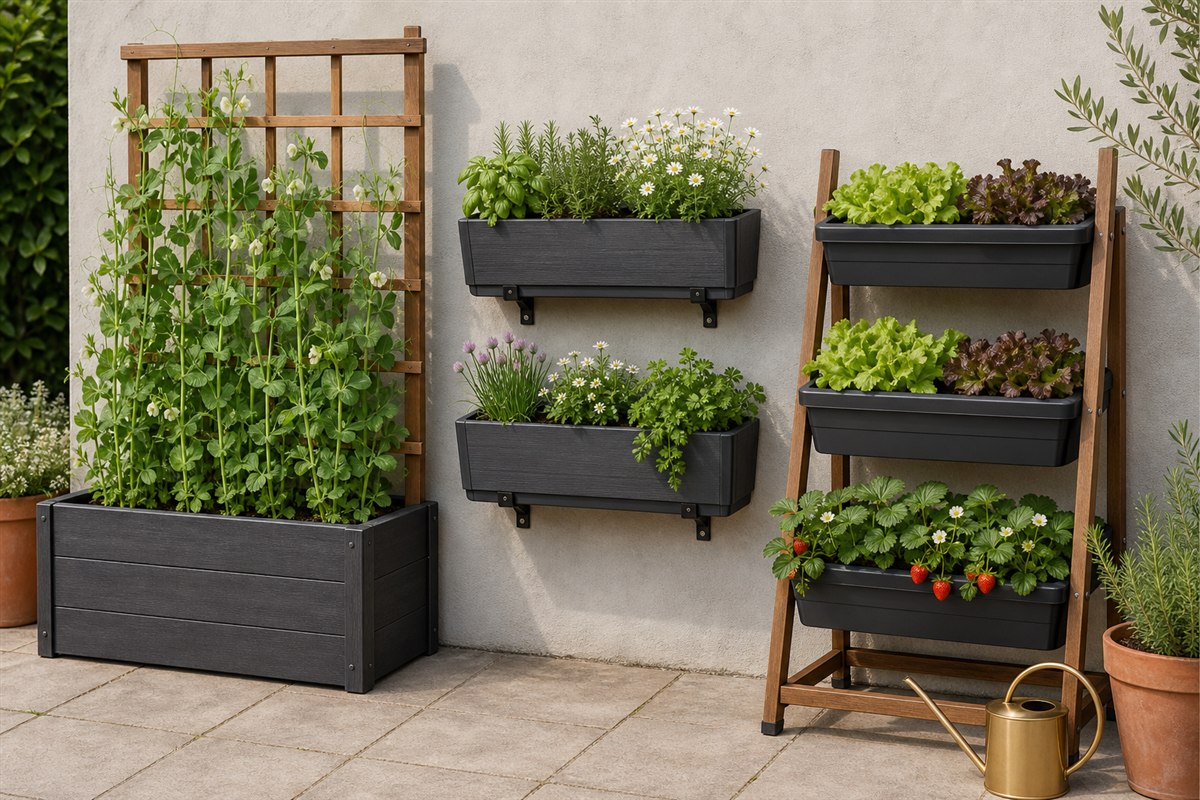
    Trellis with a deep potA good choice for container varieties of beans, peas, cucumbers, and flowering vines. The pot at the bottom must be deep enough for the roots.
    Wall troughsSuitable for compact herbs and flowers when the troughs are firmly attached, drain safely, and are easy to water.
    Freestanding tiersA movable choice for salad leaves, strawberries, and flowers. It works well for renters because the wall stays untouched.

    1. Check the support with wet pots

    Wall-mounted vertical planter being checked with a level and secure brackets while holding watered pots
    See it in practiceCheck the frame before adding plantsCheck the frame and fixings with the pots full of wet growing mix.

    Wet growing mix is much heavier than dry mix. Check the wall or railing material, use the fixings named by the manufacturer, and add up the full wet weight before hanging anything. Keep every planter away from places where it could fall on a person, nearby property, or a public path. If you rent, choose a freestanding shelf or tower unless you have written permission to drill.

    Follow the product instructions for any space needed behind the planter. Keep every drainage hole open, and protect the wall and floor if runoff could leave marks or cause damage.

    2. Match the plant to the container depth

    Cutaway comparison of a compact herb in a shallow pocket and a tomato in a deep container
    See it in practiceGive roots enough roomShallow pockets work for compact herbs. Larger plants need deeper, stronger containers.

    Small wall pockets dry quickly and leave little room for roots, so keep them for compact plants. Troughs hold more growing mix and keep moisture steadier for many herbs and salad crops. Put climbing crops in a deep pot at floor level and give them a firm support above.

    • Shallow pockets: baby lettuce, other baby leaves, and compact seasonal flowers.
    • Medium-depth troughs: parsley, chives, thyme, compact basil, and strawberries when the light and local climate suit them.
    • Deep pots at floor level: container varieties of climbing beans, peas, cucumbers, and other vigorous vines.

    Read the plant label before buying. Check its full height and spread, whether it is safe around children and pets, the right season, and local growing advice. Some climbers will outgrow even a deep container.

    3. Plan how you will water every level

    Watering wand reaching the top of a vertical garden with a catch tray below
    See it in practiceMake every pot easy to reachYou should be able to water the top pot and catch runoff without climbing or stretching.

    Wind and heat often dry the top pots first. Runoff can leave the lower pots too wet. Feel the growing mix at each level before watering instead of treating the whole wall as one large pot. A narrow-spout watering can or simple drip line can help, but check often for dry pots, leaks, and blocked drainage.

    Leave enough space under the lowest pot to clean the floor. Keep the highest pot within comfortable reach from the ground. If you need a stool every time you water, lower the setup.

    4. Pick one simple layout

    Herbs near the kitchen

    Place two or three roomy troughs near the kitchen. Group herbs that need similar light and watering, and keep the ones you pick most at the easiest height. Grow mint in its own pot so its roots do not take over the others.

    Salad leaves on a freestanding tier

    Fill a freestanding tier with baby leaves and compact herbs. Place the tallest level where it will not shade the lower ones. Sow a little at a time so the leaves do not all become ready at once.

    One climber with flowers below

    Place one deep pot at floor level and secure a trellis above it. Add one low container of flowers beside the pot. You get height without covering the whole wall with small pockets.

    Trellis planter, wall herb troughs, and freestanding tiered salad planter shown side by side
    Three practical choices: a deep pot with a trellis, roomy wall troughs, and a stable freestanding tier.

    5. Check the garden from top to bottom each week

    Weekly check of plant ties, pot moisture, yellow leaves and drainage in a vertical garden
    See it in practiceCheck from top to bottomOnce a week, check the fixings, soil, leaves, ties, and drainage.
    • Feel the growing mix in every pot before you water.
    • Check hooks, screws, ties, shelves, and the base for any movement.
    • Guide long stems back toward the support before they block the path.
    • Lift out trapped leaves and make sure water can still drain.
    • Look for water marks, damp patches, or overflow on the wall and floor.

    Before you build

    Check the support, runoff, wind, and reach

    A trellis rising from a pot puts its weight on the ground. Wall planters put the full load on the wall or railing. Before fixing anything in place, check the product instructions, the surface, the wet weight, and any rules for your home or rental. Never guess which fixings or load limit are safe.

    What to checkWhy it mattersChange the plan when
    Support and fixingsCheck how it attaches and whether the wall or railing can carry the full wet load.The fixing is improvised, or you are unsure about the surface.
    Where water goesWatch where runoff lands and which pots dry first.Water could stain a surface, damage property, or fall on people below.
    WindSee whether the frame moves or the leaves and pots catch strong gusts.The frame shifts, rattles, or cannot be secured as instructed.
    Can you reach it?Make sure you can water, prune, inspect, and harvest from the ground.Routine care needs climbing or unsafe stretching.

    Start with the easiest safe option. A freestanding trellis works when you cannot fix supports to a wall. A stable shelf or plant stand is enough when the pots only need more height. Choose fixed wall pockets only after checking the support and drainage. Set up one section, water it fully, and watch it for a week before adding more.

  • Indoor-Outdoor Plant Decor Ideas That Feel Calm and Collected

    Indoor-Outdoor Plant Decor Ideas That Feel Calm and Collected

    ← All garden guides5 min read
    In this guide
    1. 1. Start with the main sightline
    2. 2. Create a readable height rhythm
    3. 3. Style the window without blocking the light
    4. 4. Let useful pieces carry the decor
    5. 5. Check plant and household safety
    6. A simple weekend decor plan
    7. Continue with the matching guide
    8. Separate the styling decision from the plant-care decision
    9. Sources and verification

    Before you act

    Connect the spaces without compromising plant care

    1. Compare both sides of the door: Check light, moisture, temperature changes, drainage, and access for children or pets.
    2. Link the look, not the growing conditions: Repeat pot colours or leaf shapes while keeping each plant in the place it needs.
    3. Check the arrangement after a week: Move anything that blocks a door, makes watering difficult, or leaves a plant struggling.

    The easiest way to make home and garden decor feel connected is to repeat a few decisions across the window or doorway. You do not need matching furniture or dozens of plants. One planter family, one foliage shape, and one warm accent can make an indoor room and outdoor corner feel like one calm composition.

    Visual bridge

    Repeat four details, not every object

    Move from the room to the garden with a quiet sequence the eye can follow.

    1. Start with the main sightline

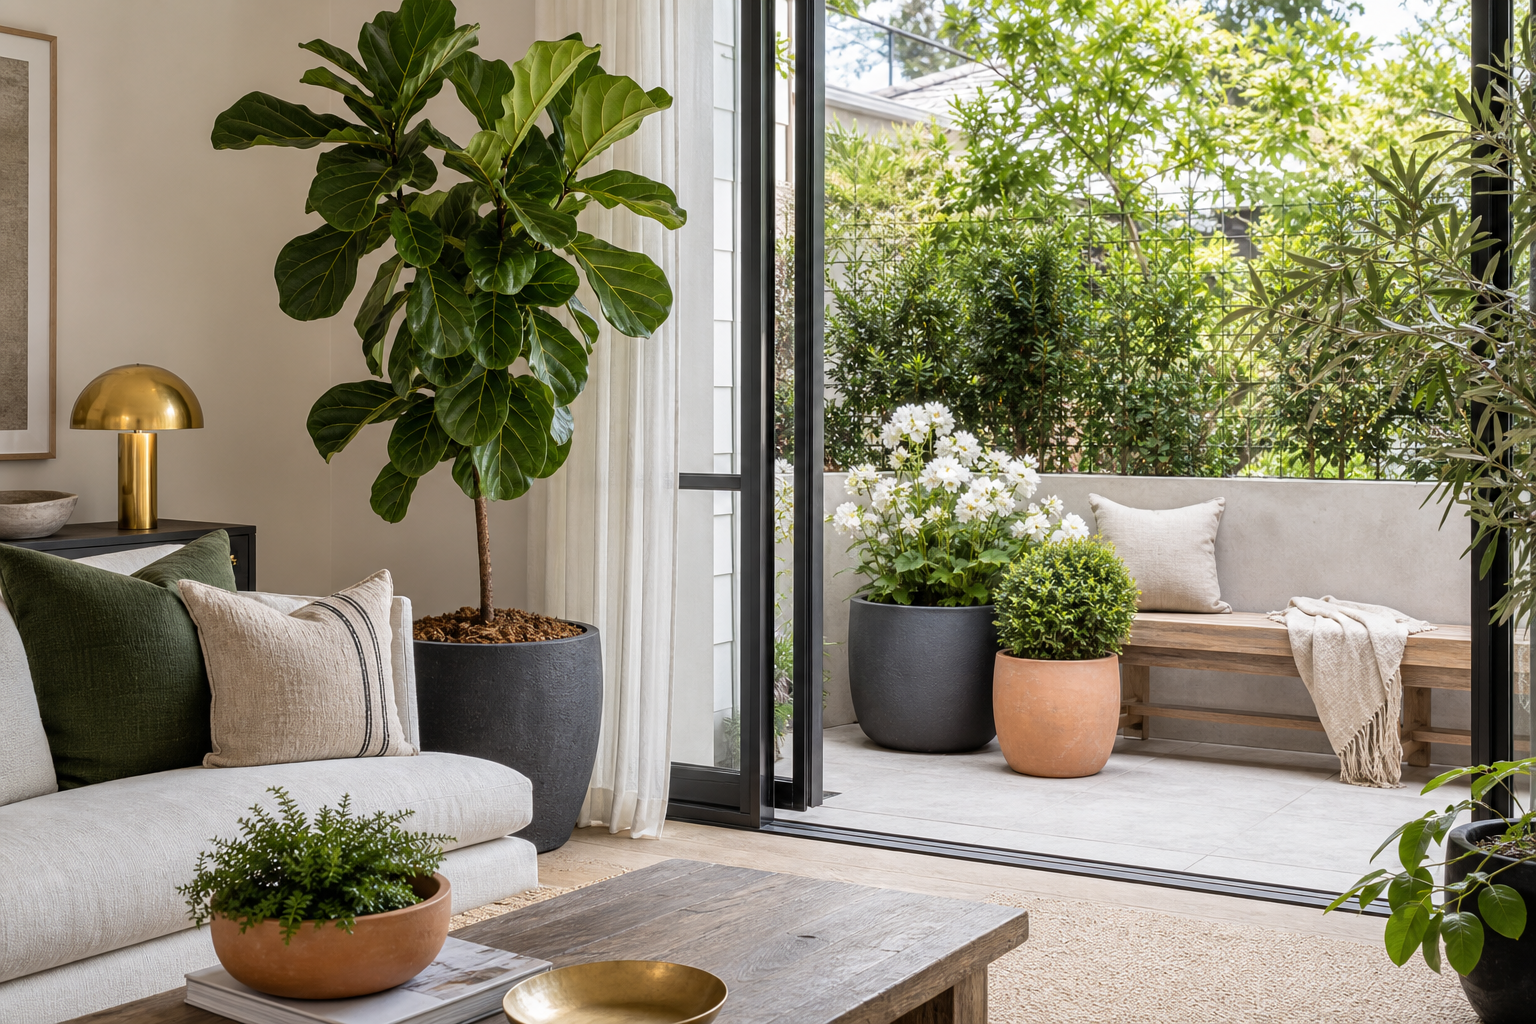
    Living-room view toward a patio framed by one tall plant with the doorway kept open
    See it in practiceFrame the viewPlace one strong plant where it leads the eye without narrowing the way through.

    Sit in the room you use most and look toward the garden, balcony, or window. The outdoor focal point should land inside that view. It might be a flowering container, a small tree, or a bench framed by plants. Move the focal point before adding smaller decor.

    If there is no direct outdoor view, use the same idea at the entrance: a strong plant group near the threshold makes the transition feel deliberate.

    2. Create a readable height rhythm

    Use one tall element, one medium mass, and one low edge. Indoors, that might be a floor plant, a plant on a console, and a low bowl. Outdoors, it could be a compact shrub, a medium planter, and a trailing edge plant. Avoid placing every pot on the floor at the same height.

    Keep visual height away from door swings, curtains, heaters, air vents, and narrow walking routes. Plants still need light and care access after the styling photograph is taken.

    Indoor and patio plants arranged in tall, medium, and low layers around an open doorway
    Reference: repeat planter materials and plant heights across the doorway while preserving the sightline and walking route.

    3. Style the window without blocking the light

    Two small plants at the sides of a bright window with daylight entering between them
    See it in practiceKeep the daylight openMove pots to the sides of the window so leaves get light without darkening the room.

    A crowded windowsill can reduce useful light and make watering awkward. Use fewer, wider-spaced plants and leave the latch, blind, and glass accessible. Outdoors, position the strongest plant group slightly off-center so it frames the view rather than covering it.

    4. Let useful pieces carry the decor

    Plant stand, woven basket, tray and watering can supporting a tidy group of healthy plants
    See it in practiceLet useful pieces do moreA tray, stand, basket and watering can can keep the area tidy and finished.

    A good planter, watering can, storage bench, plant shelf, or weather-safe light can be both useful and beautiful. Choose one finish and repeat it. Before buying, ask what job the object performs and where it will live in winter.

    For balconies and patios, confirm wet weight, wind exposure, railing safety, and runoff. For indoor plants, protect surfaces and floors while still allowing excess water to leave the root zone.

    5. Check plant and household safety

    Stable floor planter and hanging foliage arranged away from a walkway and a curious cat
    See it in practiceCheck everyday safetyKeep pots stable, floors dry and tempting leaves away from pets and children.
    • Check whether each plant is safe around the pets and children in your home.
    • Confirm that outdoor nursery plants match your growing zone and are not being treated as indoor plants.
    • Keep heavy pots on stable surfaces and away from railing edges.
    • Use weather-rated lighting and keep cords away from water routes.
    • Leave enough room to clean glass, sweep floors, and inspect leaves.

    A simple weekend decor plan

    A small indoor corner being measured, planted and reviewed from a few steps away
    See it in practiceBuild one corner at a timeMeasure the corner, place two or three plants, then step back and adjust the balance.
    1. Remove unrelated objects from the main sightline.
    2. Choose one planter material and one accent color already present in the room.
    3. Place one tall anchor, then one medium group, then one low detail.
    4. Live with the arrangement for two days and test watering and walking.
    5. Add only the missing useful piece; do not refill every empty corner.

    Transition workbook

    Separate the styling decision from the plant-care decision

    Indoor and outdoor areas can look connected without asking one plant to tolerate two incompatible environments. Repeat a planter color, leaf shape, material, or height rhythm first. Choose the actual plants only after comparing conditions on both sides of the door.

    ConditionIndoor checkOutdoor checkDecision
    LightNote direct sun on the leaves, not general room brightness.Record midday heat and reflected light from walls or glass.Use different plants if the exposures do not match.
    WaterProtect floors and confirm drainage can be emptied safely.Check rain exposure, runoff, and how quickly containers dry.Keep similar-looking pots but adjust the growing mix and care routine.
    TemperatureNotice heating, cooling, and drafts near the doorway.Consider wind and ordinary seasonal swings.Move plants gradually only when their requirements allow it.
    SafetyCheck pets, children, and unstable stands.Check railing edges, wind, and trip routes.Change placement before adding decorative layers.

    A calmer styling sequence: begin with one repeated material, add a single height echo, then use foliage as the final connector. Review the view from indoors and outdoors separately. If an object blocks watering, catches a door, or creates an unstable perch, it does not belong in the finished arrangement even when it matches the palette.

  • Small Garden Layout Ideas for Beginners: Plan One Useful Zone

    Small Garden Layout Ideas for Beginners: Plan One Useful Zone

    ← All garden guides5 min read
    In this guide
    1. 1. Mark what cannot move
    2. 2. Choose one main garden job
    3. 3. Build depth with three plant layers
    4. 4. Adapt one of these starter layouts
    5. 5. Test the plan before spending
    6. Continue with the matching guide
    7. Turn measurements into one testable plan
    8. Sources and verification

    Before you act

    Test the layout at full size

    1. Mark the layout on the ground: Use tape, cardboard, or empty pots to show paths, doors, chairs, and containers.
    2. Test it before buying: Walk the route, open every door, sit down, and pretend to water the farthest pot.
    3. Leave the outline in place for a week: Notice where daily use feels tight or awkward.

    A small garden feels larger when every area has one job. Before buying plants or furniture, decide where you will walk, where you will pause, and where the main planting will live. That simple order prevents the most common tiny-space problem: useful things competing for the same square meter.

    Layout map

    Give the floor three jobs

    The proportions can change, but the access route should never disappear.

    1. Mark what cannot move

    Small patio seen from above with a door swing, drain, water tap and fixed walls marked before movable pots are added
    See it in practiceMap the parts that stayStart with the door, drain, tap and walls. The open floor is the part you can plan.

    Stand at the entrance and note doors, drains, taps, steps, bins, air vents, utility boxes, and the route used to carry groceries or a watering can. Watch the space at morning, midday, and late afternoon. A bright wall is not proof that the floor receives enough direct sun for sun-loving vegetables.

    Measure the narrowest part of the walking route as well as the garden’s total width. Keep drains and doors easy to reach. In a rental or shared building, confirm what may be fixed to walls and where runoff must go.

    2. Choose one main garden job

    Small garden corner with one chair, three planters and a clear walking route
    See it in practiceGive the space one main jobOne chair and a few planters can work better than several competing uses.

    Pick the result that matters most for the next season: herbs near the kitchen, a calm sitting corner, flowers visible from indoors, or a small edible bed. A compact space can support several pleasures, but one priority should decide where the best light and easiest access go.

    • Food first: reserve the brightest reachable area for crops and keep water nearby.
    • Rest first: place the seat where it has shade or comfortable evening light, then frame it with plants.
    • View first: compose the strongest group where it can be seen from the main window.

    3. Build depth with three plant layers

    Narrow garden bed arranged with low, medium and tall plants in three visible layers
    See it in practiceBuild the view in layersKeep low plants at the path, medium forms behind them and the tallest shapes at the back.

    Use the back or boundary for height, the middle for the main plant mass, and the front edge for low plants that do not spill into the route. Height can come from a trellis, shrub, or tall container, but confirm mature spread so it does not swallow the small garden later.

    Repeat one container color or material two or three times. Repetition makes mixed plants feel intentional and is usually more effective than adding many decorative objects.

    4. Adapt one of these starter layouts

    Narrow patio

    Keep one long edge planted and the opposite edge mostly open. Put the tallest element at the far end so the eye travels through the space. Use a folding chair instead of permanent deep seating when the route is tight.

    Square tiny yard

    Use an L-shaped planting edge with a small open center. One corner can hold a compact bench or focal pot. Avoid placing unrelated pots around all four sides; the broken outline makes the garden feel busier.

    Doorstep or compact terrace

    Group two or three containers beside the door while keeping the door swing and landing completely clear. Choose plants with similar watering needs and use a tray or saucer only where it will not leave roots standing in water.

    Three small-garden layouts showing a narrow edge garden, an L-shaped square yard, and clear doorstep containers
    Reference: the planted edge changes with the shape of the space, but the walking and door route always stays clear.

    5. Test the plan before spending

    Cardboard outlines and empty pots testing furniture and container footprints on a patio
    See it in practiceTry the layout at full sizeMark the real footprints and walk the watering route before you buy.
    • Carry a full watering can through the planned route.
    • Open every door and gate without moving a pot or chair.
    • Reach the back planting area without stepping into soil.
    • Confirm filled container weight, drainage, and surface protection.
    • Leave enough room for each plant at mature size, not shop size.

    Layout workbook

    Turn measurements into one testable plan

    A useful layout records more than the outside dimensions. Sketch the door swing, the route from the water source, the area where sunlight actually reaches leaves, and the mature spread of the largest plant. Then mark furniture and containers at their real footprint. This exposes conflicts before anything becomes heavy or expensive.

    Layer to markQuestion to answerWhat changes if it fails?
    AccessCan you enter, turn, sit, and reach every plant?Remove or relocate the least useful object.
    Path for wateringCan water reach the farthest container without crossing seating?Regroup thirsty plants or simplify the route.
    Light patternWhich areas receive direct light, and for how long?Move the plant group rather than forcing an unsuitable plant list.
    Mature sizeWill leaves, stems, or supports block the path later?Use fewer plants or choose one that stays smaller.

    Test before buying: outline the largest pieces with tape, cardboard, or empty pots. Walk the route with a full watering can, open every door, and sit in the planned chair. Photograph the mock layout from the main viewing point. If the space still feels clear and every care task is reachable, the plan is ready for a small first purchase.

  • Balcony Garden Setup Guide: A Beginner Plan for Small Outdoor Spaces

    Balcony Garden Setup Guide: A Beginner Plan for Small Outdoor Spaces

    ← All garden guides5 min read
    In this guide
    1. Check the building rules first
    2. Watch the sun and wind
    3. Choose what the balcony should do
    4. Choose safe pots for the plants and balcony
    5. Add comfort after the plants have a place
    6. Related Beginner Garden Guides
    7. Next Step
    8. FAQ
    9. Sources and verification

    Before you act

    Balcony safety and access

    1. Check the space: Measure the usable floor, note the wind, and confirm the railing and weight rules.
    2. Plan one pot group: Keep it movable and leave a clear path to the door and water source.
    3. Watch it for a week: Check for tipping, difficult watering, and blocked walking space before adding more.
    Balcony garden with planters inside the railing, a wind screen, runoff trays, and a clear walking route
    Reference: place containers safely inside the railing, control runoff, and preserve a route for watering and everyday use.

    A balcony can become a lovely outdoor room, even when it is small. Begin with safety: check the building rules, the weight the balcony can hold, and where extra water will go.

    Next, notice the sunlight and wind and decide how you will carry water outside. These checks make it much easier to choose pots, plants, and a comfortable place to sit.

    Check the building rules first

    A clipboard with blank checklist lines beside a small empty lightweight planter on a balcony floor, railing visible behind.

    If you rent or share a building, ask what you may place or attach outside. Check before adding railing boxes, trellises, hanging pots, or large containers.

    Ask about weight limits and drainage too. Soil and pots become much heavier when wet, and water must not fall onto neighbours or damage the building.

    Put it into practice

    • Check weight restrictions.
    • Ask about railing planters.
    • Confirm drainage rules.
    • Avoid blocking exits or walkways.

    Watch the sun and wind

    A small balcony corner in daylight, a ribbon tied inside the railing indicating wind, and one small pot positioned away from the exposed edge.

    Watch the balcony in the morning, around midday, and later in the day. Notice where direct sun reaches, which corners become hot, and where the wind is strongest.

    Think about watering before adding plants. If you must carry water through the home, begin with only a few pots that are easy to reach.

    Put it into practice

    • Track direct sun hours.
    • Notice windy corners.
    • Plan where extra water goes.
    • Group plants with similar watering needs.

    Choose what the balcony should do

    A compact balcony devoted just to flowering containers: three modest matching pots of simple flowers on the floor, no furniture or vegetables.

    Choose one main purpose before shopping. You might grow cooking herbs, add flowers, harvest a few vegetables, or make a quiet place to sit.

    Starting with one purpose keeps the balcony clear and the cost under control. You can add more after you learn how the space behaves.

    Put it into practice

    • Herb garden for cooking.
    • Flower garden for color.
    • Vegetable containers for food.
    • Cozy patio-style balcony.
    • Vertical garden for limited floor space.

    Choose safe pots for the plants and balcony

    An empty lightweight planter tilted toward the viewer so its drainage openings are visible, beside a small bag of potting mix on a balcony floor.

    Choose steady pots with drainage holes and enough room for the plants at full size. Check how much each pot will weigh when filled, and make sure the wind cannot tip it over.

    A self-watering pot may help during hot weather, but you still need to check the soil and learn how much water each plant uses.

    Put it into practice

    • Start with fewer containers.
    • Avoid oversized heavy planters.
    • Use saucers only where allowed.
    • Choose stable containers for windy areas.

    Add comfort after the plants have a place

    A simple balcony with two established small planters and a folded chair, generous clear floor area; one restrained outdoor lantern well away from plants.

    Once the pots are safely placed, add one or two comforts, such as a small chair, an outdoor rug, or a weather-safe light.

    Repeat a few colors or materials instead of filling the balcony with unrelated objects. Keep the exit, walking space, and access to every plant clear.

    Put it into practice

    • Use one or two planter colors.
    • Keep floor space open.
    • Add lights only where safe.
    • Choose decor that can handle weather.

    Balcony Condition Check

    Check the balcony before choosing plants

    Balconies fail when the plant plan ignores real conditions. Open each check and match your setup to what the space actually gives you.

    Balcony readiness path
    1Watch one day
    2Group by exposure
    3Buy matching plants
    Sun check Balconies with strong afternoon light
    • Track when direct sun hits the floor.
    • Use heat-tolerant herbs or flowers for hot walls.
    • Keep shade-loving plants away from reflective glass.
    Wind check High floors, open railings, or exposed corners
    • Choose heavier pots before tall decor.
    • Keep delicate stems away from the railing edge.
    • Use grouped containers to reduce drying.
    Water check Balconies without an outdoor tap
    • Keep the watering route short.
    • Use saucers where runoff would bother neighbors.
    • Start with fewer pots if water must be carried.

    Quick rule: A balcony garden is easier when the plants match the harshest condition, not the prettiest corner.

    Related garden guides

    What to do next

    Choose another beginner guide, or use the free Garden Starter Planner to turn what you learned into a first-week plan.

    FAQ

    Can I start a balcony garden in an apartment?

    Yes. Check the building or rental rules first, especially for weight, drainage, railing planters, and anything attached to the building.

    What should I grow first on a balcony?

    Try herbs, compact flowers, or one or two vegetables that grow well in pots. Choose them only after checking the sunlight.

    How many containers should a beginner start with?

    Start with three to five pots that you can reach and water easily. Add more only when caring for them still feels manageable.

  • Beginner Herb Garden Setup: A Simple Plan for Fresh Herbs at Home

    Beginner Herb Garden Setup: A Simple Plan for Fresh Herbs at Home

    ← All garden guides5 min read
    In this guide
    1. Grow herbs you already enjoy
    2. Put the herbs where you will use them
    3. Choose pots or one small bed
    4. Check the herbs a few times each week
    5. Make the herb garden look tidy
    6. Related Beginner Garden Guides
    7. Next Step
    8. FAQ
    9. Sources and verification

    Before you act

    A herb garden you will actually use

    1. Start with your kitchen: List the herbs you use most, then find an easy-to-reach place with the right light.
    2. Keep the first group small: Choose three herbs that need similar light and watering.
    3. Learn from the first week: Notice how quickly the pots dry before you add more herbs.
    Basil, parsley, chives, thyme, and mint in separate containers beside a kitchen door
    Reference: keep frequently used herbs close to the kitchen, group similar care needs, and contain spreading mint separately.

    You can grow a useful herb garden in a few pots, a window box, or one corner of a raised bed. The best place is usually somewhere you pass often and can reach easily with water.

    Start with three to five herbs you already use. Check the sunlight, give each plant enough room, and keep mint in its own pot so its spreading roots do not take over.

    Grow herbs you already enjoy

    A kitchen cutting board with fresh basil and chives beside two separate pots of those herbs; a hand picks a basil leaf for a salad.

    Think about the herbs you buy or cook with most often. Those are the best ones to grow first.

    A small group is enough to learn how quickly the pots dry, how much sun the herbs receive, and how often you want to harvest.

    Put it into practice

    • Choose three to five herbs first.
    • Grow the herbs you cook with most.
    • Avoid buying every herb at once.
    • Check whether each herb fits your light conditions.

    Put the herbs where you will use them

    Two small herb pots beside an open kitchen patio door, with a watering can within easy reach and daylight falling on the leaves.

    A spot near the kitchen, patio door, or usual walking path makes herbs easier to water and pick. Avoid a far corner that you rarely see.

    Read each plant label and watch the sunlight during the day. Move pots if the space is too dark, too hot, or too windy.

    Put it into practice

    • Track sun exposure.
    • Keep herbs near water access.
    • Place frequently used herbs close to the kitchen.
    • Protect containers from extreme wind where possible.

    Choose pots or one small bed

    Basil, chives and mint growing in three separate terracotta pots.

    Pots are useful because you can move them and give herbs with different needs separate soil and water. A small raised bed works well when you have a yard and want the herbs to stay in one place.

    Every pot needs drainage holes and enough room for roots. Very small pots dry quickly and may need watering more than once on hot days.

    Put it into practice

    • Use drainage-friendly containers.
    • Group herbs with similar water needs.
    • Avoid overcrowding.
    • Use labels so you remember what is planted.

    Check the herbs a few times each week

    A close view of a hand checking the surface of potting mix in a potted thyme plant, with pruning snips and a small harvested sprig resting beside it.

    Push a finger into the soil before watering. Water when the plant needs it, pick small amounts often, and remove damaged leaves.

    Many herbs grow more leaves when harvested regularly, but do not remove most of a young plant at once. Follow the plant label when you are unsure.

    Put it into practice

    • Check soil moisture before watering.
    • Harvest small amounts regularly.
    • Rotate containers if one side gets more light.
    • Write down what grows well.

    Make the herb garden look tidy

    Three modest matching terracotta herb pots with matching blank wooden labels, aligned neatly on a plain shelf.

    Group the pots on a tray, shelf, or small table and repeat one or two pot colors. Add clear labels so you can identify every herb.

    Leave enough space to reach the soil and turn each pot. A few healthy herbs look better than a crowded group that is difficult to water.

    Put it into practice

    • Use matching labels.
    • Repeat one container style.
    • Group herbs near seating or cooking areas.
    • Keep tools and watering supplies nearby.

    Herb Choice Planner

    Choose herbs from how you cook

    Open the use case that fits your kitchen. This keeps the first herb garden small, useful, and easier to maintain.

    Herb choice path
    1Pick meals
    2Choose 3 herbs
    3Place near use
    Everyday cooking Pasta, salads, eggs, roasted vegetables
    • Start with herbs you already buy fresh.
    • Keep them near the kitchen door or window.
    • Harvest small amounts often to keep growth tidy.
    Tea and drinks Mint tea, lemonade, summer drinks
    • Grow mint in its own container.
    • Keep drink herbs easy to cut and rinse.
    • Choose a larger pot so leaves stay fresh longer.
    Garnish and scent A pretty patio that should still be useful
    • Use woody herbs for structure and scent.
    • Add labels so the setup looks intentional.
    • Group pots on one tray for a cleaner look.

    Quick rule: The best starter herbs are the ones you will harvest this week, not the longest wish list.

    Related garden guides

    What to do next

    Choose another beginner guide, or use the free Garden Starter Planner to turn what you learned into a first-week plan.

    FAQ

    What herbs should beginners grow first?

    Start with three to five herbs you already use and that suit your sunlight. Basil, parsley, chives, thyme, or mint may fit, depending on the conditions.

    Can I grow herbs on a balcony?

    Yes. Check the sunlight, balcony rules, pot weight, wind, and drainage before choosing the herbs.

    Do herbs need separate pots?

    Not always. Group herbs only when they like similar soil and watering. Keep mint in its own pot because its roots spread quickly.

  • Best Tools for Beginner Gardeners: What You Actually Need First

    Best Tools for Beginner Gardeners: What You Actually Need First

    ← All garden guides4 min read
    In this guide
    1. Match the tools to your garden
    2. Start with these six useful tools
    3. For pots and balcony gardens
    4. For one raised bed
    5. Wait before buying these
    6. Related Beginner Garden Guides
    7. Next Step
    8. FAQ
    9. Sources and verification

    Before you act

    The smallest useful tool kit

    1. List this month’s jobs: Include anything that is hard to grip, reach, lift, or store.
    2. Buy for work you already do: Skip tools meant for a garden you may never have.
    3. Try the tool on a normal week: Make sure it feels comfortable and has a place to be stored.
    Beginner garden kit with gloves, trowel, pruning snips, watering can, plant labels, and scoop
    Reference: this compact core kit handles most first-season container and small-bed jobs without specialist tools.

    You do not need a large tool set to start gardening. Buy only what helps you plant, water, trim, carry, and protect your hands. The rest can wait until a real job shows you what is missing.

    Use this list to choose a small starter kit for pots, a balcony, or one raised bed.

    Match the tools to your garden

    A compact hand trowel beside a small container on one side and a long-handled garden fork beside a small bed on the other.

    A few balcony pots need a watering can and hand tools. One raised bed may also need a watering wand and a bucket. Do not buy large-yard tools for a small container garden.

    Put it into practice

    • Container garden.
    • Balcony garden.
    • Raised bed garden.
    • Small flower garden.
    • Herb or vegetable starter garden.

    Start with these six useful tools

    A clear neatly spaced flat lay of three basic tools only: gardening gloves, a hand trowel and pruning snips.

    Most beginners need gloves, a hand trowel, pruning snips, a watering can or wand, plant labels, and a bucket or basket. Hold hand tools before buying when you can. They should feel comfortable and should not be heavier than the job requires.

    Put it into practice

    • Garden gloves.
    • Hand trowel.
    • Pruning snips.
    • Watering can or watering wand.
    • Plant labels.
    • Bucket, trug, or small basket.

    For pots and balcony gardens

    A small potting mat holding an empty pot, compact scoop and a little potting mix, with a small watering can beside the mat.

    A small trowel or scoop and a watering can with a narrow spout will handle most jobs. A potting mat can contain spills indoors. Put large pots in their final place before filling them; wet soil makes them much heavier.

    Put it into practice

    • Watering can suited to the space.
    • Small trowel or scoop.
    • Potting mat if working indoors.
    • Labels or marker.

    For one raised bed

    A watering wand reaching across a raised bed from the path, with the gardener standing outside the bed; no water spraying onto the viewer.

    A hand trowel is often enough for planting in a small bed. Use a watering wand for a gentle flow that does not wash soil away from seedlings. Keep labels and a simple notebook so you know what you planted and when.

    Put it into practice

    • Gloves.
    • Hand trowel.
    • Watering wand.
    • Pruning snips.
    • Labels and notebook.

    Wait before buying these

    A simple tool cupboard with one small set of used practical hand tools neatly hung, and plenty of unused hooks.

    Skip large bundles filled with tools you cannot name. You probably do not need specialist pruners, powered equipment, or decorative hand tools on day one. If the same garden job becomes awkward every week, then look for the tool that solves that specific problem.

    Watch out for

    • Large tool bundles with items you cannot name.
    • Specialty pruning tools before you know your plants.
    • Decorative tools that are uncomfortable.
    • Large-yard tools for tiny container setups.

    Beginner Tool Kit Selector

    Choose tools for the garden you actually have

    The useful beginner kit changes by garden type. Open your setup and skip tools that solve problems you do not have yet.

    Tool buying path
    1Choose setup
    2Buy core tools
    3Add only after friction
    Balcony or patio Containers, railing planters, small corners
    • Choose compact tools that store easily.
    • Use a small watering can if water is carried indoors.
    • Add a potting mat before messy repotting.
    Raised bed One bed with vegetables, herbs, or flowers
    • Choose tools that make reaching and watering comfortable.
    • Keep hand tools close to the bed.
    • Wait before buying large digging tools.
    Mixed beginner garden A few pots plus a small border
    • Start with gloves, trowel, snips, and watering.
    • Label plants until you learn their needs.
    • Buy upgrades only after a repeated task annoys you.

    Quick rule: A smaller kit is better when every tool has a real job this month.

    Related garden guides

    What to do next

    Choose another beginner guide, or use the free Garden Starter Planner to turn what you learned into a first-week plan.

    FAQ

    What tools does a beginner gardener really need?

    Start with gloves, a hand trowel, pruning snips, a watering can or wand, labels, and a bucket or basket.

    Should I buy a full garden tool set?

    Only if you will use every tool. Buying a few useful tools separately often gives you a better fit and less clutter.

    What tools do balcony gardeners need?

    A compact watering can, a small trowel or scoop, labels, and comfortable gloves will cover most early jobs.

  • Low-Maintenance Garden Ideas for Beginners Who Want Beauty Without Overwhelm

    Low-Maintenance Garden Ideas for Beginners Who Want Beauty Without Overwhelm

    ← All garden guides4 min read
    In this guide
    1. Start with one small area
    2. Choose plants that suit the spot
    3. Make watering quick
    4. Repeat a few plants and colours
    5. Follow a short weekly routine
    6. Related Beginner Garden Guides
    7. Next Step
    8. FAQ
    9. Sources and verification

    Before you act

    Design around an ordinary week

    1. Count your available time: Be honest about the minutes you can spend watering, weeding, pruning, and tidying in a busy week.
    2. Make the garden fit that time: Use fewer plant types and remove chores you cannot repeat each week.
    3. Try the routine for a week: Add more only if the work still feels easy to keep up.
    Mulched garden bed with visible drip line, repeated drought-tolerant plants, water connection, and open path
    Reference: fewer plant groups, covered soil, and a simple watering route reduce repeated weekly work.

    A low-maintenance garden still needs care, but the work should fit your life. Start with one small area, choose plants that suit it, and make watering easy.

    If you have only ten minutes on most days, plan for ten minutes. A small garden that stays healthy will bring you more joy than a large one that feels like a chore.

    Start with one small area

    A modest single planted border occupying one corner of an otherwise simple lawn and path.

    Choose one raised bed, one group of patio pots, or one herb corner. You can always add more after you know how much care the first area needs.

    Put it into practice

    • Choose one garden zone.
    • Use fewer containers.
    • Keep paths simple.
    • Expand only after the first area works.

    Choose plants that suit the spot

    A gardener holding a small potted plant beside a sunlit garden patch while consulting a blank plant label.

    A plant is easy to care for only when it suits the space. A sun-loving plant in shade will struggle. A thirsty plant in a hot pot will need constant watering.

    Watch the light before you shop. Check the plant’s mature size and ask a local nursery whether it suits your climate.

    Put it into practice

    • Track sunlight.
    • Consider water access.
    • Check mature size.
    • Avoid plants that need constant special care.

    Make watering quick

    A hose stored neatly on a reel next to a short row of separate plant containers, unobstructed access to each.

    Keep pots close to a tap or to the place where you fill your watering can. Put plants with similar water needs together, so you can water one group at a time.

    Mulch, self-watering pots, or a simple drip line can reduce the work, but check the soil yourself until you learn how quickly it dries.

    Put it into practice

    • Group similar plants.
    • Keep watering tools nearby.
    • Use mulch only where it suits the plants and soil.
    • Avoid too many tiny pots.

    Repeat a few plants and colours

    Three repeated clumps of the same ornamental grass beside a simple straight edging line.

    You do not need many different plants to make a garden look finished. Repeat one planter colour, two or three reliable plants, and a small colour palette. The result feels calm and is easier to shop for and maintain.

    Put it into practice

    • Repeat planter colors.
    • Use a limited plant palette.
    • Choose simple edging or containers.
    • Avoid too many decor themes.

    Follow a short weekly routine

    A hand removing one yellow fallen leaf from beside a potted plant, with a small tidy collection bowl nearby.

    Once a week, walk around the garden with a watering can and a small container for dead leaves. Check the soil, look under a few leaves, harvest anything ready, and note one job for later. Ten focused minutes can prevent a much bigger cleanup.

    Put it into practice

    • Check watering needs.
    • Remove dead leaves.
    • Harvest herbs or greens.
    • Write down what needs attention.

    Weekly Care Micro-Routine

    Build a 10-minute weekly garden reset

    A low-maintenance garden still needs rhythm. Use this tiny routine so care feels obvious instead of becoming a weekend project.

    Tiny routine path
    1Look
    2Water or trim
    3Reset one thing
    Look first Any low-maintenance garden
    • Walk the same route each week.
    • Check the plants at the edge of the path.
    • Notice one problem before it spreads.
    Water or trim Gardens with containers or fast growers
    • Water grouped pots together.
    • Cut one messy stem instead of pruning everything.
    • Top up mulch where soil is exposed.
    Reset the view Spaces meant to feel calm
    • Sweep the main path or seating area.
    • Turn one container toward the best side.
    • Remove one item that makes the space look crowded.

    Quick rule: The routine works because it is small enough to repeat before the garden feels messy.

    Related garden guides

    What to do next

    Choose another beginner guide, or use the free Garden Starter Planner to turn what you learned into a first-week plan.

    FAQ

    What makes a garden low-maintenance?

    A low-maintenance garden is small enough to manage, easy to water, and filled with plants that suit the light and climate.

    Can a beginner have a low-maintenance garden?

    Yes. Start with one small area, choose plants that suit it, and check the garden at the same time each week.

    Are container gardens low-maintenance?

    They can be. Choose larger pots with drainage holes and keep them near water. Very small pots dry out quickly and usually need more attention.