
In this guide
- Make these seven fall decisions
- 1. Check your local frost window
- 2. Sort plants into act, watch, or leave
- 3. Remove disease, not every stem and leaf
- 4. Leave healthy habitat where it is safe
- 5. Keep checking moisture around the roots
- 6. Test the soil before adding products
- 7. Plant only when your local timing works
- A simple two-hour fall garden reset
- Seven beginner mistakes to avoid
- Frequently asked questions
- Next step
- Sources
Start with your local forecast instead of a universal calendar. Note the expected first frost, tender plants, and unfinished crops. Remove clearly diseased material and leave healthy wildlife shelter where it is safe. Keep checking moisture, test the soil before adding products, and plant only when the timing suits your area and the plant.
Not every fall garden job is urgent. You do not need to clear every bed, buy fertilizer, or squeeze in one more planting. Focus on three things: protect vulnerable plants, remove material that can spread a known problem, and leave the garden easier to use next spring.
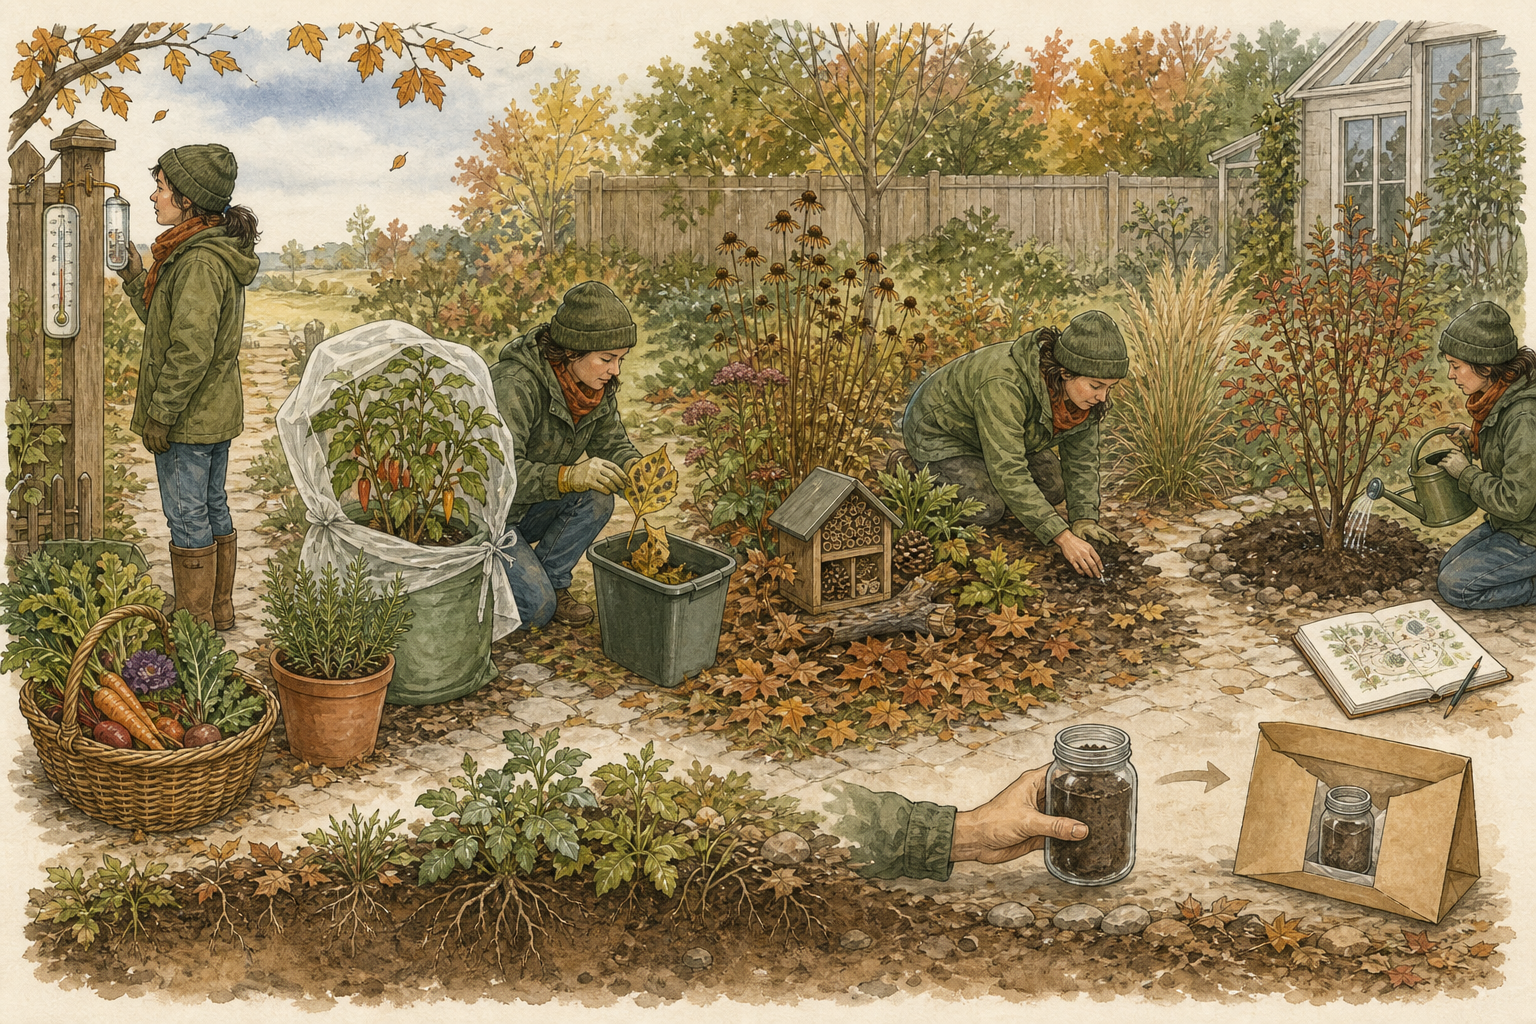
Make these seven fall decisions
Use the decisions in order. A task that does not solve a real problem can wait.
| Decision | Look for | Useful action | Do not assume |
|---|---|---|---|
| 1. Forecast | Local frost window and current weather | Record the likely window and recheck it | One national date fits everyone |
| 2. Sort | Tender plants, mature crops, unfinished crops | Harvest, protect, move, or let go deliberately | Every plant needs rescue |
| 3. Clean selectively | Confirmed disease or damaged material | Remove the problem material using local guidance | Every stem and leaf is waste |
| 4. Keep habitat | Healthy stems, leaves, bare soil, shelter | Retain useful habitat where safe and suitable | A bare garden is always healthier |
| 5. Check water | Root-zone moisture, rainfall, new planting | Water from observed need | Cooler air means watering stops |
| 6. Test soil | A real question about pH or nutrients | Use a reliable lab before adding soil products | More fertilizer is automatically better |
| 7. Plant locally | A plant that suits the area, workable soil, enough water, and time for roots to settle | Plant only when local guidance supports it | “Fall planting” is one universal window |
1. Check your local frost window

Penn State Extension recommends checking frost and freeze dates before planning fall work. Crop timing also depends on the number of days to harvest and whether you start with seed or a young plant.[1] A calendar from social media cannot give the right planting or harvest date for every garden.
Write down three things: the current ten-day forecast, the usual first-frost window for your area, and the most cold-sensitive plant still outside. Treat the long-range date as a planning range, not a guarantee. Recheck the short forecast before moving heavy pots, covering plants, or harvesting early.
Look at the actual garden too. A sheltered wall, exposed balcony, low frost pocket, or windy roof terrace can behave differently from a regional weather station. The forecast starts the decision; the site observation finishes it.
Done when: you can name the first vulnerable plant or crop and the weather event that would require action.
2. Sort plants into act, watch, or leave

Make three groups rather than one overwhelming list.
- Act now: mature produce, visibly declining annuals, tender plants that already have a
- Watch: crops still maturing, recently planted perennials, and containers that may
- Leave: hardy established plants that fit the site and do not have a diagnosed problem.
verified indoor or protected destination, and damaged containers that cannot drain.
need protection only if the forecast changes.
For vegetables, compare the time left in your season with the variety’s days to harvest. The count may start on the sowing date or the transplanting date, so check the packet or plant record.[1] If the crop will not have time to mature, harvest what you can. Compost healthy material if your local system allows it, and dispose of problem material according to local guidance.
Do not move every outdoor plant into the house. Indoor light, pests, pets, humidity, and space may make that a worse environment. Bring in only plants you can identify, inspect, and care for safely.
Done when: every vulnerable item is marked act, watch, or leave.
3. Remove disease, not every stem and leaf

Clean up where there is a clear reason. Illinois Extension explains that much fall tidying is only for appearance, but diseased material needs special care.[3] If a plant had a confirmed leaf disease or another diagnosed problem, remove the affected stems and leaves. Use the disposal method advised for that problem and your area.
Keep unknown or diseased material out of a cool home compost pile. Local collection systems differ, and some reach higher temperatures than home compost. If you do not know what is wrong with the plant, photograph it before removing it. Ask a local Extension service, plant clinic, or trusted garden adviser.
Healthy annual material can be handled according to the needs of the bed and your compost system. Healthy perennial stems do not all require cutting at ground level. Remove anything that blocks a route, creates a safety problem, or has a clear disease reason; avoid clearing the whole garden only to make it look finished.
Done when: the disease-risk material is separated from healthy habitat and ordinary garden residue.
4. Leave healthy habitat where it is safe

A tidy photograph is not the only measure of a functioning garden. University of Minnesota Extension recommends retaining features such as leaves, some bare ground, brush, and standing stems because different native bees use different nesting places.[2]
Apply that principle selectively. Keep healthy stems where they will not fall across a walkway. Let clean leaves rest in beds or designated habitat areas rather than sealing wet piles against doors, drains, or vulnerable structures. Preserve small areas of suitable bare ground instead of covering every surface automatically.
Habitat does not cancel disease management, fire-safety requirements, tenancy rules, or local invasive-species guidance. The useful design is intentional: a clear path, a clean problem area, and a few protected habitat zones that you understand.
Done when: you can point to what was removed for a reason and what was retained for a reason.
5. Keep checking moisture around the roots

Cool air does not mean the soil around every plant is wet. Oregon State University Extension advises watering new fall plantings until regular rain begins, with extra checks during long dry periods.[5] Pots, raised beds, sheltered areas, and new plants can all dry at different speeds.
Feel the soil below the surface, near the depth of the roots. Do not judge only by leaf colour or the dry-looking top layer. Think about recent rain, wind, pot size, drainage, and the plant’s growth stage. Water when the soil near the roots needs it, and make sure extra water can drain safely.
Avoid a fixed “once a week” promise. A schedule can remind you to inspect, but the soil and weather decide whether watering is needed. Empty hoses and watering equipment according to manufacturer and local freeze guidance before cold can damage them.
Done when: new plants and containers have a repeatable moisture-check routine and a safe watering route.
6. Test the soil before adding products

Fall can be a useful time to investigate a soil problem before the next growing season. Illinois Extension explains that a soil test can show pH and nutrient levels. The results help you add only what the soil needs and avoid fertilizer that could wash away.[4]
Start with a question: poor growth in one bed, a planned food-growing area, or uncertainty after repeated fertilizer use. Follow the sampling instructions of a reliable local or accredited laboratory. Keep beds with different histories separate when the lab recommends it, and label every sample clearly.
Do not buy lime, sulfur, or a general fertilizer before the result tells you what problem exists. A result still needs interpretation for the intended crop, soil type, and local recommendations. “Improve the soil” is not a measurement.
Done when: you have a clear reason to test the soil, or you have decided that it needs no added products this fall.
7. Plant only when your local timing works

Fall can be a good planting time in some climates. Oregon State University Extension explains that warm soil and fall rain can help roots grow, although new plants may still need water and careful mulching.[5] Use this as a general idea, not as a planting date for every region.
Before planting, check that the plant suits your area. The soil should be workable, not soaked or frozen. Make sure water is available and that mild weather should last long enough for roots to begin growing. Read the instructions for that exact bulb, seed, tree, shrub, or perennial.
Mulch should solve moisture and temperature problems without being piled against woody stems. Mark small perennials that disappear in winter and record plant positions; a simple map prevents accidental digging next spring.[5]
If the window is uncertain, prepare the site and wait. A plant purchased because a generic checklist said “plant in fall” is not automatically a good fit.
Done when: every new planting has a locally suitable reason, position, water plan, and record.
A simple two-hour fall garden reset

Use this sequence for one small zone, not the whole property.
- 15 minutes — observe: photograph the area, note the forecast, and identify the one
- 25 minutes — sort: label each plant or pot as act, watch, or leave.
- 30 minutes — remove problems: collect confirmed diseased or unsafe material and keep
- 20 minutes — protect function: clear the path, check drains, and retain one healthy
- 15 minutes — check water: feel the soil near the roots and water only the areas that need it.
- 10 minutes — record: sketch the bed, note what struggled, and save plant labels.
- 5 minutes — stop: do not invent extra work because time remains.
most vulnerable item.
it separate from ordinary residue.
habitat zone.
You are finished when the garden is safer, easier to understand, and ready for the next weather change. It does not need to be stripped bare.
Seven beginner mistakes to avoid

- Following a national frost date instead of a current local forecast.
- Harvesting or removing every plant because one tender crop is at risk.
- Putting confirmed diseased debris into an unsuitable home compost pile.
- Cutting every healthy perennial stem for visual neatness.
- Stopping moisture checks as soon as daytime temperatures cool.
- Buying fertilizer, lime, or sulfur before identifying a soil need.
- Planting a bargain shrub without enough mild weather for roots to settle or easy access to water.
Frequently asked questions
Should I cut every perennial down in fall?
No. Remove material for a clear disease, access, safety, or species-specific reason. Healthy stems can provide winter structure and habitat, while some plants have their own local care requirements.[2][3]
Do I stop watering the garden in autumn?
Not automatically. Check actual rainfall and root-zone moisture, especially for containers and new plantings. Adjust watering rather than following a rigid calendar.[5]
Is fall always the best time to test soil?
It can be a practical time when you have a real pH or nutrient question and can use a reliable lab. Follow the laboratory’s sampling and interpretation guidance.[4]
Can I plant vegetables after summer?
Possibly. Check your local frost dates and the variety’s number of days to harvest. Read the packet to see whether that count starts when you sow the seed or set out the young plant.[1]
What is the most important fall garden task?
Identify the first real risk in your own space. That may be a tender container, diseased material, a dry new planting, a blocked drain, or a crop close to maturity. Solve that one before adding optional chores.
Next step
Use the free GardenEleganceHub Starter Planner to define one manageable garden zone, or continue with the low-maintenance and container-gardening guides. This article contains no affiliate links, prices, or paid-product claims.
Sources
[1] https://extension.psu.edu/season-extenders-and-growing-fall-vegetables — Season Extenders and Growing Fall Vegetables [2] https://extension.umn.edu/garden-and-home/yard-and-garden/lawns-and-landscapes-in-minnesota/pollinator-nests — Nests for pollinators [3] https://extension.illinois.edu/news-releases/should-you-make-your-garden-tidy-fall-or-spring — Should you make your garden tidy in the fall or spring? [4] https://extension.illinois.edu/blogs/good-growing/2018-09-19-give-your-soil-check-fall — Give Your Soil a Check-up This Fall [5] https://extension.oregonstate.edu/news/fall-planting-offers-long-term-benefits-trees-shrubs-perennials — Fall planting offers long-term benefits
Leave a Reply